Have you noticed the Match Hue button in the Color Corrector
3-way window and wondered what it did?
Well, it's a surprisingly powerful tool
that can help you color balance between two, or more, scenes.
If you have only one scene to color, you would not use Match
Hue. But, if you are trying to match the same color between multiple
scenes, Match Hue can be a big help.
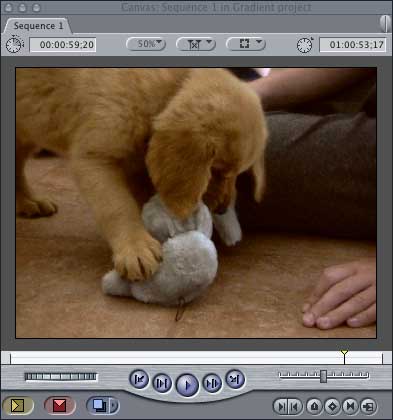
Recently, I shot a scene called, "New
Puppy Comes Home." And, like all "great" photographers,
I shot it without lights and without any good white or black
references in the shot. In fact, the entire room is beige. And,
since I didn't use any lights except daylight, all the colors
looked a bit desaturated and rolling towards blue.
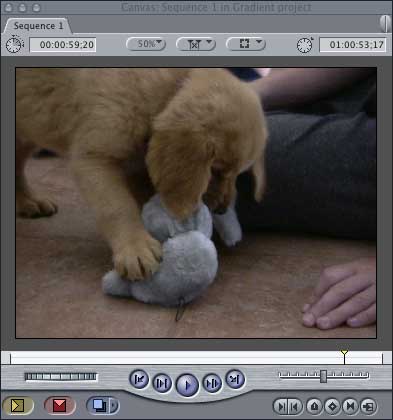
Since this is a "golden" retriever,
I want to put some of the gold color back in her fur. So, now,
I want to "fix it in post."
Here's how to use Match Hue to get this
done.
1) Select your shot
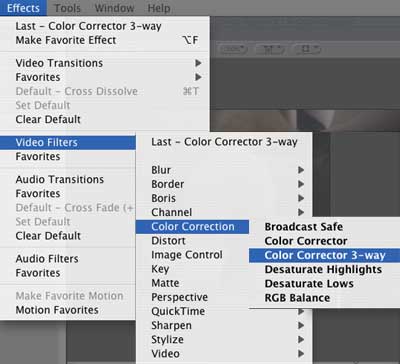
2) Apply the "Color Corrector 3-way"
filter
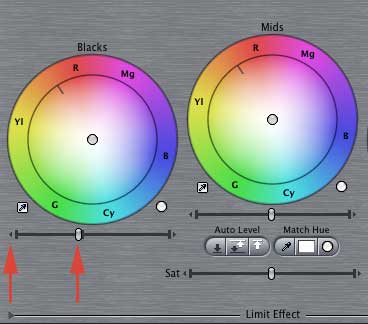
3) Set your black levels by clicking
the small arrows at the end of the black level slider of the
color corrector window...
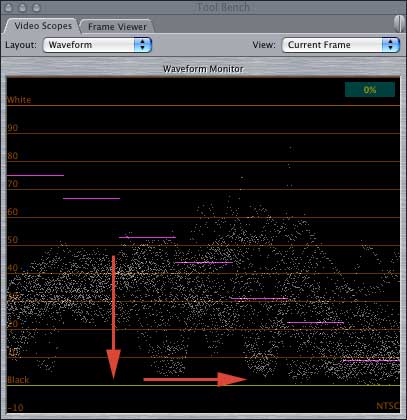
... so that your adjusted black levels
sit right on the black line of the Waveform scope
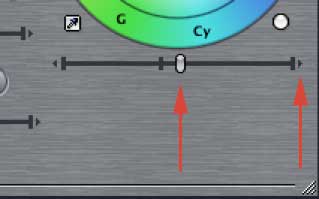
4) Now, set your white levels by clicking
the small arrows at the end of the white level slider of the
color corrector window.
There aren't any real whites in this
shot, so I raised the levels a bit to give the picture more "snap,"
but didn't take them all the way to the limit.
With this first shot, as there wasn't
a white reference, so, instead, I did a color balance on the
mid-gray toy using the eye dropper tool (#1), then color balanced
on the black tube top of the girl at the center top of the picture
using the black eye dropper tool (#2).
Then, looking at my NTSC monitor, I increased
the saturation (#3) until the puppy's fur started glowing.
This is the shot I ended with.
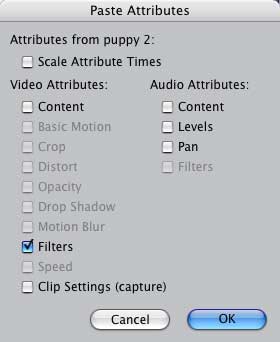
Now, one option to color balance the
next shot is to simply copy the settings from this filter into
my next shot, using Edit->Paste Attributes. And, I tested
it and it works. You end up with a perfectly fine result.
However, to illustrate how Match Hue
works, let's do something different.
1) Select the second clip in the sequence
and apply the Color Corrector 3-way filter
2) Double click the clip to load it into
the Viewer
3) Click on the Color Corrector 3-way
tab in the Viewer
4) Important - position your Timeline
playhead in the earlier, color balanced clip
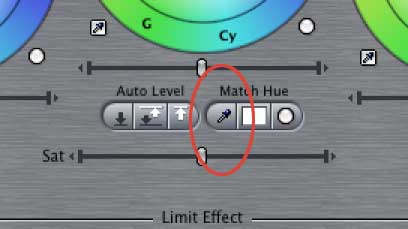
5) Click the Match Hue eyedropper to
select it
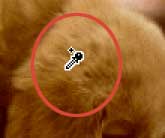
6) Click on a section of the puppy's
fur in the color corrected shot that is in both shots. In this
case, I clicked at the top of the ear.
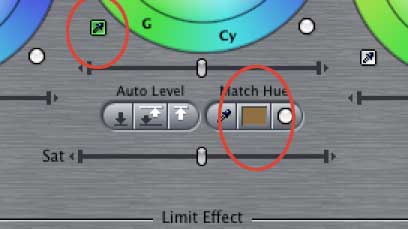
Notice that the color chip in the Match
Hue selector has turned brown. Notice, also, that the mid-gray
color selector has turned green.
This means that, instead of looking for
a mid-gray, the color selector will CONVERT the color you click
it on INTO the color in the Match Hue color selector.
7) Move the Playhead in the Timeline
to your second shot to display your second shot in the Canvas.
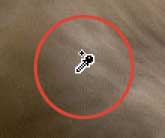
8) Select the green mid-gray color selector
and click in the Canvas at the top of the puppy's ear. Notice
that the color has instantly changed so that the color of the
fur in the new shot matches the color of the fur in the first
shot.
This technique is especially useful when
matching colors in product shots or where reference colors are
missing.
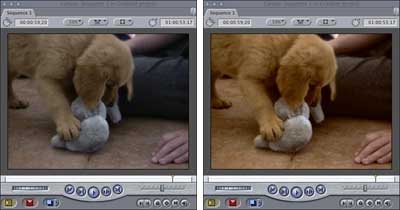
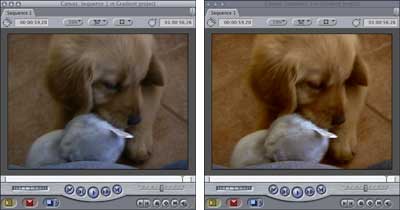
Just for comparison, here are the before
and after versions of the two puppy shots.
Ta-DAH! We got the "golden"
back.
This article is from the
April issue of "Larry's FCP Newsletter," a very cool,
FREE, monthly Final Cut Pro newsletter -- subscribe by
sending an email to larry@larryjordan.biz
or visit Larry's web site: www.larryjordan.biz.
Larry Jordan
is a post-production consultant and an Apple-Certified Trainer
in Digital Media with over 25 years experience as producer, director
and editor with network, local and corporate credits. Based in
Los Angeles, he's a member of both the Directors Guild and Producers
Guild.
Text copyright 2004 by Larry
Jordan. All rights reserved