It was Tips/Tricks
night for this March meeting of the lafcpug and a grand bunch
of tip/tricks there were.
As usual Stump the Gurus were
up first with Ken
Stone, Andrew
Balis, and special guest Guru Scott
Barbour. No one stumped the gurus again this month so next
month we roll over the raffle tickets to 70 for the "winner."
Some of the FCP Questions asked and answered were:
Q.) I shot some footage on a GL1 in LP mode and it looks terrible
in places on the source. Anything I can do to make it look better
in FCP?
A.) Not really. You can try fooling with a bunch of filters but
if it's on the source it's a re-shoot.
Q.) With FCP 3 and OS 9.2.2 if I log a clip and put in more than
25 characters FCP wont warn me and will truncate the name and
call it something different making me have to re-link all those
captured files.
A.) Not sure here but keep your names under 25 characters. (Someone
else in the audience pointed out that he received a warning when
putting in more than 25 characters so perhaps something is off.)
Another said indeed FCP does not warn you with 3.0 and OSX. So..best
to count your letters.
Q.) FCP is telling me I dont have the latest version of QT. I
have 5.0.2
A.) Actually you need 5.0.4 which is on your FCP 3.0 CD. Install
that.
Q.) My partner and I are editing together and he lives across
country. What's the best way we can share this project together?
A.) As long as you both have the same media with the same names
on your respective computers just email project files back and
forth.
Q.) I want to be able to crop my analog footage before I capture
into FCP. Can I do that?
A.) No. We are un aware of any Hardware cards that will do this
prior to capture
Q.) My Canvas turns orange for some reason when I play the timeline.
A. This seems to be a bug with certain video cards in Dual Macs
with FCP 3.0 and Apple is aware of the problem. Some cures seem
to be changing your monitor resolution to thousands from millions
and back again to millions. Others just re-start and it goes
away. Others dump the RT enablers from the FCP Plug ins folder.
Course you lose RT that way.
Q.) So I brought in my media and my audio, instead of 48khz reads
as 47.99 something.
A.) thats an issue with the Adjust sync movies box. Just do a
Mixdown audio from the Sequence menu providing your sequence
settings are 48khz.
Ripple
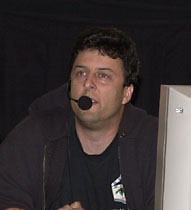
Training's Steve Martin was up next with this month's Tip/Trick of
the Month.
Now lets say you have four clips and you've applied the color
correction filter to them and you want a fast and dirty way of
comparing the clips to each other quickly with out dragging the
playhead to each individual clip. Well, all you need to do is
hold down the control key and hit the up arrow and the playhead
will jump back to the previous clip and you can toggle back and
forth from the clip you have your playhead on tot eh previous
clip just by hitting the up arrow. Playhead doesn't move, it
just jumps and comes back. Wanna go back 2 clips? Well hold down
the shift key and hit UP arrow. Very cool.
 Next trick Steve
opened Boris Title 3D right in front of our eyes and in front
of Tim Wilson who was sitting in the front row. He then typed
in the word RACING. Now this is kind of goofy and not very intuitive
but in order apply a color to the text and actually SEE it when
you apply it you must first click in ANY field after highlighting
the text. THEN open up the color wheel and pick your color. Now
you will be able to see the color you picked for your text. Wanna
KERN your title? Put the curser anywhere in the title and hold
down the option key and hit the left and right arrow . If you
want to KERN the WHOLE Title just put the curser at end of title
and hit SHIFT > OPTION > RIGHT ARROW and it will KERN the
whole thing. Steve also showed us the gazillion FREE text styles
Boris gives you for download as owner of FCP 3.0 Title 3D and
Crawl. One last trick Steve showed us was if you want to apply
a drop shadow to your Boris Title DON'T use the drop shadow in
Boris. Use FCP's drop shadow and it will render MUCH faster.
Next up was our good friend Tim Wilson
from Boris FX who flew
in from his home in Florida to show us the VERY cool Calligraphy
(Title 3D and Crawl) AND the just shipped Graffiti
2 and a little bit of RED.
All in 25 minutes. And what a 25 minutes it was.
Tim began where Steve left off and opened up Title Crawl. Now
instead of typing all the names and credits in the window like
you would normally THINK you must, you can just import any word
processing file from any word processor and Boris will import
it WITH all information intact including size and font. VERY
Cool. So Tim imported a simple text file with a bunch of words
which seemed to be about mixed drinks vs cocktails. From what
I saw. Mixed drinks won hands down.
Tim let us know that Boris supports Type 1 fonts as long as you
have ATM on your system. Tim recommends when working with DV
ALWAYS stick with Sans Serif fonts such as Arial.
Anyway, back to Crawl. Tim changed the font to Arial Black and
dropped the file into FCP and set the in and out to 5 seconds,
selected ROLL from crawl menu and boom, instant crawl, no key
frames needed. You can even cut out half the crawl and it will
automatically compensate for the cut out and retain the original
length/speed.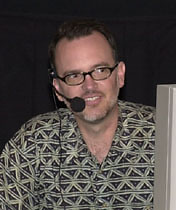
Tim then opened Graffiti 2 (OSX supported) Static from the Title
generator and insisted that Graffiti 2 is MUCH MUCH faster in
rendering. Now with Static you can create 3D titles and they
will play back in RT if your Mac supports that. One of the tricks
you can do with Graffiti is, if you're going to apply a tile
as a filter, than apply it to a slug, NOT video. It will render
so much faster.
Tim imported the same text he showed us with Title Crawl and
dumped it into Graffti's 3D container. Now THIS was cool. With
one click of the mouse Tim turned that list of words into a Star
Wars type title crawl. Again, no key frames and no 8 video tutorial
like in After Effects. You can work at quarter, half or full
res in Graffiti. All text is pristine. Why? Because it supports
vectors. Graffiti comes with it's own custom interface because
of its animation capabilities.
Tim went on and showed us how easy it was to create animated
titles in Graffiti and yes, it IS easy. So many of the animations
are already done for you with the included "styles"
that all one has to do is change the text.
It was getting late and Tim had only a brief time to show RED.
Its a flat out impressive package and one wonders what more they
can possibly put into considering RED is only version 2.1. Look
out After Effects I'm telling ya.
For more information on Graffiti, Calligraphy and RED, go to
the Boris web site. And be sure to stop in and hang around Tim's corner. There
is a wealth of good tutorials and tips in there.
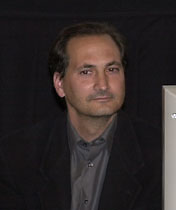 James Darfus was up next
with the first Show and Tell of the evening and it was
a lot of fun,especially if you are into beer. Beer? Yeah. You
see James showed us a segment of his web series titled Brewshow,
which is a travelogue of Breweries throughout the world.
This particular brewery James took us too was in Belgium and
called Chimay and we learned everything you want to know about
this place including it's history, which was fascinating if you're
into this sort of thing.
James also acted as the host of this segment and a quite affable
one at that.
You can view Brewshow here.
And I strongly suggest you do. It's a lot of fun.
Next up was co-founder of lafcpug, original
FCP Team member, and former producer of 2-pop.com, Ralph Fairweather
who came down from his home in Oakland to discuss another way
of capturing and logging your tapes. Huh? Well lets explain.
For the purposes of this demo Ralph showed an interview video
Begin with capturing your whole tape using no device control
and yes, you an use DV Stop/Start. Drop the long "clip"
in the timeline.
Turn ON audio waveforms so you can see them in the timeline.
See the breaks in the audio waveforms? Well that means a break
in the action quite possibly.
Now scrub through the entire "clip" finding those sections
of the tape you wish to actually log and use. The audio waveform
comes into play here. When you find a section you want to log,
get out the razor blade and cut. Wanna color label that "subclip"
you just made? Go to the MODIFY window and select LABEL and then
the color. Do the same thing with all your "subclips"
if you want. 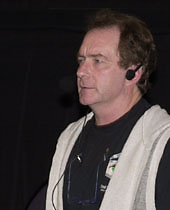
So how do you LOG these clips while in the timeline? Here's the
secret. Put the playhead over the clip and hit Command+9 and
up comes Item Properties. In the NAME field, put whatever name.
Click on the Logging tab. Put all info in there INCLUDING comments
which you cant do logging offline..However, unless you have actually
selected the clip that you are logging you will notice that Audio
information will not be present. Want that? Select the clip before
opening Item properties. Very cool trick Ralph showed us while
selecting his various subclips was. if you want to extend your
out point for whatever reason, all you have to do is select the
edit point and put the playhead where you wish the edit point
to go to and hit the E key for EXTEND EDIT.
So now you've logged and selected all your clips, so how do you
make independent clips out of the whole thing in case you ever
need to re capture or in this case want to make them offline
RT? Well it's Media Manager time. And this is where it gets a
bit un intuitive.
Select the sequence Media Manager and select Recompress/offline
RT. Now since FCP doesn't quite go along with this method of
L and C you MUST put a check in the little box that says "Create
Media Bin in New Project. Click OK and create a folder for the
new clips and boom it recompresses all clips to offline RT, all
independent of that big long clip you captured.
After all is said and done you will notice that your clips in
the timeline all have numbers attached to them on the sequence
clips. They do NOT have those numbers in the browser or on the
Hard Drive.
Food for thought only but as shown by Ralph this method can,
with a little help from Apple, make logging and capturing less
of a tedious process. VERY COOL.
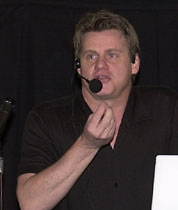 DV Companion
author Phil Hodgetts was up next to take us on a tour
deep into the bowels of FCP 3's nifty Color Corrector.
And a deep exploration it was.
Phil began by bringing up the three way color corrector to fix
a problem with a particular underexposed clip with sharp contrasts.
He played with the white balance, mid tones etc. Used the histogram
to show hot spots He fixed blacks and whites. Simple fix for
blacks is just use the broadcast safe filter. Of course while
correcting you want to use a Video Monitor rather than your computer
monitor so after each correction you should toggle out to your
video monitor to check. BTW, the new DV Companion has about an
hour's worth of movies on the color corrector alone.
On a particularly difficult clip Phil used the invert mask to
pick out the most contrasting elements of the image to adjust.
Using the softening filter buried deep at the bottom of the manual
controls Philip was able to "soften" the blown out
whites while not adjusting the rest of the image.
Phil went on to bring up other problematic clips and showed us
how easy it was to "fix" those problems with the three
way color corrector.
Wanna get creative? Well with the color corrector you can change
colors of the sky or objects with very little trouble. Using
masks, we saw Phil change a bright red truck to another color
NOT so problematic as Red.
The color corrector is a VERY powerful addition to FCP and the
only problem with it other than requiring a Hardware card for
RT out to a Video Monitor is that you will NEVER be satisfied
with the look of your video because now you have so much control
over it.
Time for a break so we all went out to
the Lobby and hung with the boys from Promax and the fellow from
Canon USA.
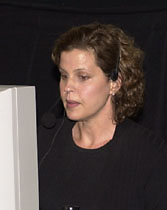 Elaine
Wilkes was up first after the
break to show us the very cool CD authoring program called MovieWorks. What is Movieworks?
Well it's very cool, thats what. What it does is make "Director"
EASY and CHEAP. By using this app you can make cross platform
interactive CDs and you can make your video stop start, re wind,
throw in a splash screen, make a bunch of cool buttons, make
it auto start on any computer and do it for the cost of $119.00.
It's basically a suite of 5 applications. Video, Sound, Animation,
Paint, and Movieworks.
So Elaine gave us a demo on how to use this thing and it's all
drag and drop and seemingly moron proof. I say that because if
I can understand how to use an app just from a demo than ANYONE
can.
Buttons are VERY easy to make and make in anyway you and your
imagination can come up with. You can create links using buttons
or pages or scenes. You can do sideshows as easy as drag and
drop.
Elaine showed us some work being done in Hollywood by pros using
the app and it's quite amazing what they are doing with this
app.
Check Movieworks out if you have no desire to spend 6 months
with Director to achieve almost the same results.
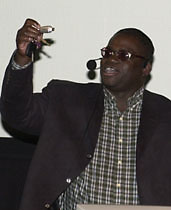 Cawan
Starks from ProMax
Systems was up next with a little diddy about backing up
your project files in a very easy and efficient manner using
what is called a PIN Drive.
Now a PIN drive is this tiny little USB HD no bigger than the
size of a key chain. In fact most people actually attach it to
their key chain. By plugging into your keyboard USB port it will
automatically mount on your desktop. No drivers required. Sizes
range from 32 MBs to 1 Gig. So what can you use this thing for?
Well Cawan uses it with FCP 3's auto save files. Now if you know
FCP 3 you know you can set your Auto save files to save every
so often and FCP creates a brand new project file at the time
you tell it too. Well save those files to the PIN drive and if
for some reason aliens destroy your computer you have a back
up attached to your key chain. It's available at many web sites
including Dr Bott..
Another cool item Cawan showed us was this FW docking station
that plugs into your ATA drive turning into a low cost strange
solutions. It's only 3 inches wide and comes with all cables
and includes the 911 bridge chip set. It's from Weibetech and
you can look at it here.
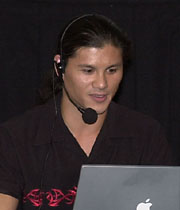 Next
up was Guy Cochran from DV
Creators who showed us a nifty trick involving Photoshop
and FCP. Now lets say you have a video clip with this very cool
sky and you want to use that sky to replace the sky over this
very pretty cityscape image. Well using PS open your image and
with Quick mask and a down and dirty work with the wand, paintbrush,
and other tools, get rid of the sky in the pic and save results
as a PS file and bring into FCP.
He then opened up the video clip of the sky and drop the now
cityscape pic on V2 and boom, you've got this nifty still with
a moving sky in the back ground
Now to make things more interesting Guy wanted to show us the
power of the new FCP's RT capabilities started adding layers
to the effect until the ol' red line appeared. So he added a
duck and animated it to fly across the screen Then he added text
to Still green. So he had a total of 5 video layers before he
added the one that created the Red line. Plus he did it on a
PowerBook 400. How did he do it?
Well, as he was leaving the stage he
mumbled something about the Dane hack.
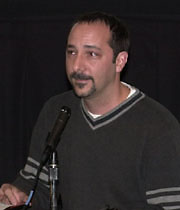 Next
show and tell of the evening was a very fine piece by filmmaker
Anthony Delasandro who showed
us a piece he did for group101
which is this very cool group here in LA whose members by virtue
of joining are forced to make a film a month on a particular
theme. The theme that Anthony was given for this piece was "A
Damsel in distress." Titled "Collette's Last Bath" it is a moody piece with a great twist at the end you
NEVER see coming. With a score by Portishead and some fine camera
work and editing by Anthony this was a dandy little short.
Finally World Famous raffle rounded
out the evening and the following were given out to those lucky
enough to grab the right ticket.
Many thanks to all you generous people who donated and continue
to donate prizes.
Prizes included
5 $20 Gift Certificates - Poquito
Mas Restaurants
(Hey, we gotta eat)
1 T-shirt - kenstone.net
Automatic Duck
- Wes Plate and Automatic
Duck
Boris Graffiti - Boris
CD and DVD labels - Meritline
1 PowerStart Guide 2/3 - DV
Creators
Speed Truck Challenge
Video and DVDs - Darren
Purcell
Promax T-shirts
- Promax
Vivistar DVD-R discs - 5 FCP Keyboard KeyGuides - Neotron
Design
2 DV Companion
for FCP 3 - Intelligent
Assistance
6 pack of adult
contemporary Music CDs - Sound
Adventures
1 copy of MovieWorks
- MovieWorks
Special thanks must go to Chris
Rogers, for taking tickets. Ken stone for taking pics. Mark Havener for doing
the lights, Ross Jones for being teh AV guy, Dan Brockett for taping the show, and of course Promax for footing the bill.
Michael Horton,
"HeadCutter"