Tonight we showed you cool tips,
tricks and how2s using Final Cuts myriad of effects tools. Plus
"The Truth, the Whole Truth, and nothing but the Truth"
about the Panasonic
DVX100 24p mini
DV Camcorder. And another round of Stump the Gurus, show and
tells, and of course World Famous Raffle.
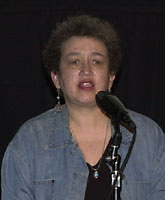
First up was Stump The Gurus with Ken Stone,
Andrew
Balis, and special guests Lisa Brenneis and Sharon
Franklin from the sfcutters.
Some of the questions asked and answered were:
Q.- When I rotate my image in the Canvas
and render I get a loss of resolution. I see this on the NTSC
monitor.
A.- Anything that is rotated has the possibility of softening
simply because you moved the image and you Ned to render your
already compressed DV footage. Also and in this particular case
you can and should always find a better position for the rotated
object. Hold down the option key and use the up and down arrows
until you find the best location.
Q.- I keep loosing my render files. How
come?
A..- One reason most people loose it and it happens only randomly,
is because of the energy saver kicking in or screen saver kicking
in. Also avoid calling your drives similar names.
Q.- If I'm capturing between two different
projects can I get the capture scratch drive to go back to the
same one I use in the first place?
A.- No. Unless you manually set it each time. Also in OSX you
might want to try logging in as different users for your different
projects. keep preferences the same for all projects.
Q.- How do I make a good freeze frame?
It wobbles.
A. Try the flicker filter or de-interlace filter. BUT move your
image one frame at a time until you get less shaking then apply
the filter.
Q.- I'm getting Unexpected Quits when
using Jaguar and the Text Tool. It especially happens with changing
fonts, and rendering.
A. Just might be a font problem. Make sure you upgrade to 3.0.2
by going from 3.0 to 3.0.1 then 3.0.2
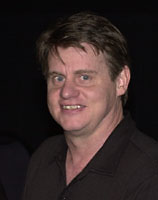 DV Companion
author Philip Hodgetts was up next to show us the World
premiere of his latest offering to all of us who need help with
FCP, The Troubleshooter for Final Cut Pro.
Now the Troubleshooter differs from the
DV Companion is a BIG way. Where the DV Companion solves your
problem and keeps you working in a productive non stop manner,
the Troubleshooter allows you to ask a series of questions to
solve your problem based on you and YOUR Final Cut system. You
do not have to know anything about troubleshooting nor even ask
the right questions. The questions are there for you to click
on. Keep clicking Continue and you'll find the question to start
with. Ask a question, it will give you a series of possible answers.
If the answer isn't there, click on one of the possible answers
and it will give you more content to find your answer.
The great thing is that it is always
up to date. When you first purchase Troubleshooter you are directed
to go to the Intelligent Assistance web site to download the
content. So right there you are up to date no matter when you
buy. The TroubleShooter will prompt you when more content is
available and it's free to registered user.
Philip took a couple problems from the
audience and it works flawlessly.
It's only $75.00 and $50.00 for DV Companion
owners and it's available at the lafcpug
Store.
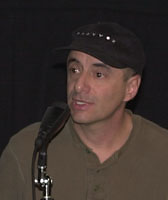 Next
up was our first Show and Tell of the evening and it was
a dandy by our long time friend and filmmaker Mitchell
Rose.
Titled "Case Studies from the
Groat Center for Sleep Disorders" it tells the story
of founder, Dr Peabody Groat and his work with people with sleep
problems.
Shot "progressive" using dancers
from the Portland Dance Company and using stop motion techniques,
and the program ImageDV this is a VERY funny take on the peculiar
habits of a group of people who have peculiar sleep disorders.
It brought down the house down.
"Case Studies from the Groat Center
for Sleep Disorders" is now on the festival circuit and
has already won awards for Mitchell. See it if you can before
Mitchell becomes too big for lafcpug.
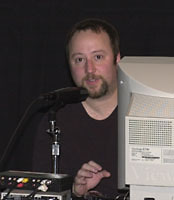 Since
it was Compositing and Effects Night it was time to do some Compositing
and Effects so who better to show us some tips and techniques
but DV Creators, Josh Mellicker
Josh began by booting up FCP and showing
us by going into the Keyboard Control Panel and selecting to
make the repeat rats "short" and keys "faster"
thus by holding down the left or right arrow keys you get a sort
of shuttle control, one frame at a time.
Josh imported a Cloud layer and put it
on V1. Then he next dropped a clip of Steve Martin driving a
car onto V2. Now we know the track on V2 hides the clip on V1.
Now you can resize (make smaller) the top layer to appear, which
Josh did, or make the top clip transparent which Josh also did.
But Josh went into Composite mode cause thats what we wanted
to see.
To composite the two clips, simply hold
the Control key down and click on one of the clips and up comes
choices for composites. Now's the time to experiment with the
many modes. Do them all.
Josh showed us how to use the "Color
Key" to bring the clouds into the background of the flying
car. One click will do it. Josh likes to experiment. Experiment
is key to all this. It's really the only way you can understand
what compositing is all about. That, or buy Secrets of Final
Cut Pro CD.
Not satisfied with 2 layers to composite Josh moved V2 to V3
and dropped a flying Chicken man into V2 around the point he
wanted the Chicken man to appear.
Since Josh added filters to the flying
car similar to what he was going to do with Chicken Man he simply
"pasted attributes from the flying Car clip.
Make a long story short, we got to see
Steve Martin driving a car threw the clouds shocked by a flying
Chicken Man flying along.
Josh ended his preso by showing us how
to do "jittery text," by typing your text, drop the
text in the timeline, put text in Wireframe mode in Canvas and
now start moving text one frame using the arrow keys while adding
keyframes. The results after render is very cool jittery text.
Josh then added a couple more words to the effect and indeed
it's very cool and very easy to do.
Many of the effects Josh did tonight
can be found in Secrets of Final Cut Pro available in the lafcpug
store.
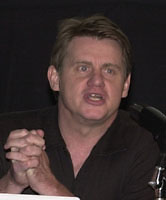 One
the most frequently posted problems has to be "my Titles
look like crap after I render." So...we brought in Philip
Hodgetts who LOVES the title generator in FCP to teach us
how to get the best looking titles one can possibly get.....
using Final Cut Pro's Title generator. A tough task for anyone.
Which is why we recommend you use Boris Calligraphy and NOT the
title generator but for purposes of demonstration Phil stuck
with the Title Generator. So there!
Start by using BOLD fonts such as Impact,
Arial Bold, Helvetica,and avoid sans serif font. Then choose
a nice big size. To small and your hosed, to big and you can
fit your title on the screen. Make sure you look at your title
on a NTSC or PAL monitor NOT your computer monitor.
Don't attempt to put default white color
fonts over a Black Background. The whites in FCP are WAY to HOT
and will flicker. Bring your whites down to almost grey on your
computer monitor.
Titles over Video still require you bring
your whites down as well as any bright color such as Red or Yellow
Fool with adjusting opacity when placing
titles on top of a clip.
Phil brought up the Vectorscope to show
us how to bring down the colors to a Legal limit making your
titles look MUCH better and keeping them legal.e . Bottom Line
you MUST have a NTSC or PAL monitor to see what your titles will
really look like. Do NOT depend on your computer monitor.
Time was running out and we had to stop
Phil's excellent demo but we are lucky to have text and pictures
and a how2 that Phil so graciously sent to us. You can print
it out here.
 Next
Show and Tell before the break was from our good friend and veteran
editor, Lillian Bensonwho showed us clips from "Smothered,
the Story of the Smothers Brothers Comedy Hour, a 2 hour
documentary soon to air on the Bravo network.
Lillian has done many small projects
using FCP but this was the first "big" one. She told
us that she captured the hours of footage using the offline RT
codec which she found to be very problematic when it came time
to up res. She went on to say that FCP was chosen for this project
because the producers could not afford an Avid rental for 16
weeks and if FCP was not around this documentary would of never
been made.
The doc was shot on Beta SP, and later,
via an EDL, brought into a traditional online house. No errors
were experienced in the EDL.
The doc is slated to air December 4 of
2002. It's a great piece of history and American culture.
Time for a break, so we took one.
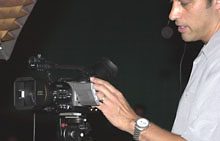 The
Panasonic
DVX100 24p/60i Camcorder just shipped in Oct of 2002 and
by all accounts is the most talked about digital camcorder since
the XL1 And the most confusing it seems. So we thought it be
a good idea to show it off and talk about how to actually use
it.
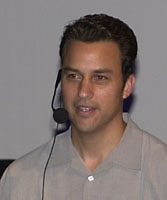
We brought in Frank Rohmer from
Promax who had spent a good
deal of time with this camera, and probably knew it as well as
anyone.
Frank began by showing some video he
shot at 60i, 24p and 24p advanced although we had no other camera
to do a side by side comparison, I'd think most in the audience
found the image(s) to be on par or superior to "other"
mini DV camcorders. 24p advanced (2:3:3:2 pulldown) seemed to
give a subtle cinema style quality to the image as well as boosts
the colors big time which the telecine will correct if you plan
to go to film according to Frank.
 The
DVX has a cool feature called "Skin Detail" which when
turned on gives a softening quality to the skin. Great for getting
rid of wrinkles.
The camera has VERY nice wide angle with
little vignetting I could see, and dual XLRs. Colors in 60i looked
very real and warm. More like a Sony than Canon to my eye.
There are SO many features in this camera
and there was not enough time to show them all but Frank tried.
Dual XLR audio sounds great according
to Frank as well as on board microphone.
Leica lens is very nice even though hampered by only a 10:1 optical
zoom.
Frank thinks this camera competes nicely
with the PD150 and XL1 right out of the box.
LCD flip out display is larger than most
as is the view finder which most find very comfortable.
The menu has 7 categories and Frank doesn't
quite like the "joy stick" mechanism approach to navigating
through them especially if you have to make adjustments on the
fly.
Settings are to numerous to go into here
but Frank recommends (actually insists) that you read the manual.This
is particularly important with this camera.
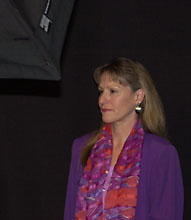 Frank
then brought up our beautiful model for the night, Chriss Horgan
and showed off some of the nifty features.
Now it's probably not fair to judge the
image projected onto a theatre screen as what appears on the
LCD screen is not what appears after going through the S video
cable to a projector, but if you have 300 people in a theatre
you can't do a demo like this with a 19 inch monitor.
First impressions from this writer was
that Panasonic has done a great job and certainly found a worthy
competitor to Sony and Canon. 24p mode brings out a slight blurring
in motion and horizontal lines seem to mosquito ( to my eye at
least.) No true 16:9. Century is coming out with an anamorphic
lens by the end of the year though.
In 24p advanced, does it look like film?
Well, no not really. But it sure doesn't look like video. All
in all it's an impressive camera.
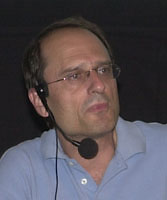 Dan
Fort got up next to tell us how
to edit with this thing and by using Cinema Tools, convert the
video to TRUE 24fps if you are planning to go to film. VERY fast
too.
We had a problem with Dans PowerBook
hooking to the projector so we pointed the DVX100 to the PB's
screen and that was projected onto the Theater screen. Hey it
worked.
Dan began by giving us a lesson on what
pulldown is, (2:3 and 2:3:3:2) what 24P means and used a chart
to explain it all and I missed this part so I need to buy the
DVD to learn. Sheesh.
Anyway using Cinema Tools you can convert
your video to TRUE 24fps doing the 2:3:2:3 pulldown and as Dan
demonstrated do it VERY fast.
Again I need the DVD to explain it all
but the process is fairly simple it seems and boy is it fast.
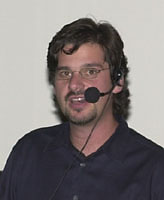 Last Show and
Tell was from Gregg Spotts - aptly named "How
miniDV and FCP helped the Los Angeles Galaxy Major League Soccer
Team take their Game cast to the Next Level" And win
the championship I might add.
Multimedia Producer and lafcpug member
Greg showed us a pair of two-minute sports television segments:
one shot on Beta and edited with Avid, and the other shot on
miniDV and edited on a Ti-book with FCP. Greg explained how the
combination of miniDV and FCP made possible a half-hour "Galaxy
Countdown" pre-game show broadcast on KCAL 9 throughout
the 2002 season. Greg contends that MiniDV and FCP can produce
effective television segments for major-market broadcast at less
than 1/3rd the cost of traditional broadcast tools- and from
the results we saw, he's right. This was good stuff.
World famous raffle was up next and we
thank those who so generously donated these great prizes.
2 FCP Keyboard Keycharts
- Neotron
Design
2 Royalty Free
Stock Footage CDs - ThinkStock
4 Apple Clip
Boards - Tony
Edwards and Frys Electronics
Free FCP 101 class - Digital
FilmTree
1 copy "Final
Cut Pro for Avid Editors" Diana Weynand
5 $20.00 Gift Certificates - Poquito Mas Restaurants (Hey, we gotta eat)
DV Companion for FCP 3 - Intelligent
Assistance
TroubleShooter
fo Final Cut Pro - Intelligent
Assistance
Secrets of Final
Cut Pro - DV
Creators
2 copies of FCP
3 Visual QuickPro Guide - Lisa
Brenneis
1 copy of VideoClix - VideoClix
2 Royalty Free
Stock Footage Cds - RocketClips
DriveTime - Josh
Paul
DVD Companion
Pro Pack - Recipe
4 DVD
1 copy Creating
Motion Graphics Vol 1, 2nd Edition
- CMP
Books
1 copy Audio
Postproduction for Digital Video - CMP
Books
1 T-shirt - kenstone.net
2 copies of lafcpug DVDs - lafcpug
Special thanks must go to Chris
Rogers, and Doug Lindeman for taking tickets. Ken
stone for taking pics. Mark
Havener for doing the lights. Dan Brockett for taping the show, and of course Promax for footing the bill.
Michael Horton,
"HeadCutter"