Lots of tips and
tricks in tonights meeting so we are calling it "more tips
and tricks night" which sounds better than "FCPtips/tricks/Plugins/Effects/Film
Look Night"
As usual Stump the Gurus was up
first with regulars Ken
Stone, Andrew Balis,
and special guest Gurus, Steve Martin of Ripple
Training , and FCP Guru, Larry Jordan. Some of the
questions asked and answered were:
Q.) I have motion effect with lots of
keyframes and I want to shift everything a frame or so. Is there
a way I can move all the keyframes at once?
A.) Yes. Make sure motion and filter bar is turned on in your
timeline and just click on the BLUE bar in between Video and
Audio tracks and move left or right. By control clicking on one
of the keyframes you can turn off certain effects for more control.
Q.) The manual says you can drag markers
off and they will disappear from Timeline. That true?
A.) Not that I know of. Park on the marker, hit the M key and
delete.
Q) How do you do a speed ramp in FCP?
A.) Not very well. Get one of the many plug ins available for
that. Boris Continuum, Joes Filters, CGM all have these plug
ins.
Q.) I have this EQ audio filter I apply
and no red render line comes up nor does the filter seem to work.
A.) Well not all audio filters require rendering if you have
enough real time audio tracks specified in your preferences.
As for the EQ filter if you left it alone on it's default settings
and did not change any of the parameters the filter will do nothing.
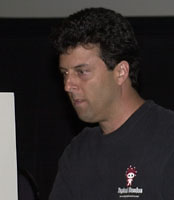 Steve
Martin of Ripple
Training was up next and Steve was here to show us how to
make motion menus in FCP and import them into iDVD 3.
Steve started out reminding us that with
iDVD3 you can import chapter markers just like you can with DVD
Studio Pro. How do you make a chapter marker? Simple. Add a marker
as you normally do in the FCP timeline by hitting the M key and
then control Click on the marker and select ADD CHAPTER MARKER
in the window. Do this for all chapter markers you wish to import
into iDVD3. Trick here to make this all work is this:
Go to FILE menu and select EXPORT >
FCP Movie.
Uncheck Make Movie Self Contained. (It's a ref movie now folks)
Select ALL MARKERS next to the Markers button. NOT Chapter Markers
or DVD Studio Pro Markers or Compression Markers. Those wont
work.
Now export
 To
create a custom menu is very simple. Do all your work in FCP
and get your composite or whathaveyou like you wish and export
as above and then launch iDVD 3 and click on the customize button
on the iDVD3 window and choose whatever theme you like and just
drag your file right into the window of that template. Done.
But wait. You want your OWN custom menu. That one you created
in FCP? OK. Click on the Settings button above all those themes
you are playing with. Now just drag the cool motion menu you
made into the IMAGE window and...Done. Sort of. Remember iDVD3
works with other iApps such as iTunes. Want to change background
music? Click the Audio Button, and up comes your iTunes library.
Choose your music.
You can add slide shows, more buttons
if you wish and go crazy without going back to FCP and tweaking.
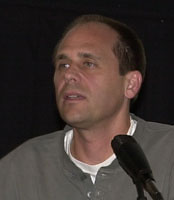 Marco
Paloni from Digital
FilmTools showed us the latest and greatest plug ins from
their 55mm collection. Plus gave us a quick look at Zmatte and
Composite Suite.
Marco started off showing us a demo reel
with some of the plug ins in action. Movies such as Great Expectations,
Anna and the King, How Stella got her Groove Back, What Dreams
May Come and FireStorm all used DFTs plug ins.
55mm is a package
of 20 plug ins that work inside FCP and include useful effects
such as Mist, Fog, Faux Film, Skin Smoother, Bleach Bypass and
more. "The filters are designed to keep you from fumbling
around with glass filters when shooting. You can now precisely
treat your images in a controlled digital environment with high
quality, 16 bit processing." The plugins are not only useful
but quite easy to tweak and the default settings of each are
good enough in most cases to just leave alone. The faux film
filter is among the best I have ever seen for a "Film Look"
This plugin alone is worth the price of the package. 55mm works
with After Effects or FCP in 16bits however FCPs render engine
works only in 8 bits so there is a bit of a hit in quality if
you wish to stay and render in FCP. Render times are fast for
the most part.
Zmatte which
Marco had only a little time to show is quite amazing and VERY
easy to use for us Key challenged folks. Seems there are little
elves in the program that allow you to create excellent blue
and green screen composites even if your shot was really badly
done. It has very cool De-artifact controls, matte manipulators
and spill suppression controls, easily manipulated with sliders.
You can treat multiple bad blue and green screen shots with Blur,
Shrink and Wrap functions. Very Powerful.
Composite Suite
which just shipped for FCP is also quite amazing and a HUGE time
saver for those who dont wish to do their own composites assuming
the effects you wish to do are in the Composite Suite. Well I
be most of them are.
"Light" is simply killer. It
gives you the ability to add light where none existed before.
In as many shapes and patters as your head can imagine. What
sunlight streaming through a shutter window? LIGHT does that.
How about light through a crack in the door? Light does that
too. Other plugins in this 28 effects package include Color Correct,
Grain, TBC, Matte Repair, and optical dissolve which is as lovely
a dissolve in default mode as you can find.
Go to their web
site and take a look all three packages. Chances are you
need something in there and chances are it will save you a heck
of a lot of work in the future.
First Show and Tell of the evening
was more of a "New Concept" Show and Tell then clips
from a movie.
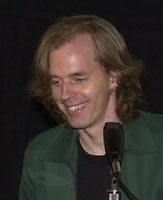 Brian
Fleming directed and wrote the
critically acclaimed and award winning "mock documentary
"Nothing so Strange" which attempts to solve the mystery
of Bill Gates assassination. Brian showed off his new DVD of
same but this DVD has a bit of a twist. The DVD is not "Nothing
So Strange" itself but rather a compilation of video and
audio "evidence" related to the Gates assassination.
And here's the kicker--you buy the DVD, you get the copyright.
You can use any footage on it, including the Zapruder-like shot
of the assassination, in any project you wish, without seeking
permission. Inspired by the open-source software movement, Brian
considers this an experiment in grass-roots marketing and distribution,
and says, "I make no claim that I know exactly what I'm
doing here." Film site: http://www.nothingsostrange.com/
Take a look at the site and and get your
head wrapped around this new "Open Source" style filmmaking.
I believe Brian has something here which deserves not only further
study but participation.It's an interesting idea.
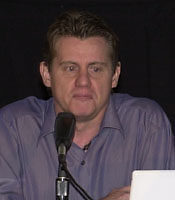 DV Companion
author Philip Hodgetts was up next to show us how to do
some cool effects using only what's inside FCP and NOT using
any plug ins. The idea behind buying plug ins is that someone
has done most of the work for you and you dont have to waste
time doing it your self. BUT the reality is some dont have the
money and are forced to do it them selves. AND you can do most
of the effects you see in plug in packages with out having to
buy them. Downside? It takes a lot of effort and a lot of work.
Intelligent Assistance just released
a very fine CD Tutorial named "Great
Visual Effects In Final Cut Pro Vol 1" which shows you
how to do many cool visual effects working along side the include
training movies. No reading required.
Phil showed us how, for instance to do
an animated glow around a moving object, (skier going down a
hill). This involves Mattes, keyframes, luminance values and
the kitchen sink. The result? Very cool glowing skier gliding
like an Angel down the slopes.
Another effect was 3D titles whereby
all you need to do is duplicate your title onto the upper track,
shift the top track a couple of frames to the right or left,
select Composite > Multiply and BOOM, instant 3D. Course you
can use Title 3Ds 3D text but what fun is that?
You can do dozens of effects in FCP without
buying plug ins and Great Visual Effects will show you not only
how, but make you understand the principles behind what you are
doing so you can create just about whatever your imagination
can come up with.
Time for a break and we all went
into the lobby and raced across the street for 99cent Tacos from
Jack in the Box
 Perhaps
the most requested presentation lafcpug receives is how to
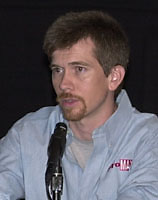
achieve a film look in FCP. Well Promax's
JD Wilcox has 5 favorite methods and talked about them
all.
JD began with his most favorite EXPENSIVE
method which is the plug in Magic Bullet. Magic Bullet is a very
powerful suite of "Film look" After Effect plug ins
that work inside FCP but it sells for $999.00
Next came Cinelook from Digi
Effects which has been around the longest, is OSX ready and
costs $695.00. Film Damage is perhaps what Cinelook is
most notable for.
Cinemotion,
also from Digi
Effects is the same as Cinelook but doesn't include Film
Damage and Stock Match. it sells for $295 or on sale for $195.
This plug in along with the above plug ins take a LONG time to
render. Figure about 20:1 ratio.
DV Film has a nice "film Look" plugin called
DV Filmmaker and it's a stand alone app which sells for
$99.00. Much like Cinemotion it sells for much less money.
All these plug ins will achieve a very
nice "film look" but they all cost money. What doesn't
cost anything and arguably does a better job then these plug
ins is to simply use the de-interlace filter included in your
copy of FCP. Yep, thats right, the de-interlace filter. The look
is similar to shooting in frame movie mode with a Canon XL1,
only much better.
Understand the de-interlace filter works
only with FCP 3 as the filter in prior versions was not so good,
throwing out much of the resolution.
There are other techniques one can do
that are free and can be found here.
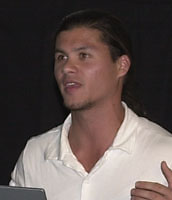
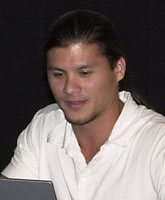 Dv Creators Guy Cochran returned to lafcpug this
time to show us how to create a motion favorite to apply to a
range of clips for quick, smooth automated moves. This is a HUGE
time saver folks.
Let's say you have a bunch of stills
in your timeline and you want the stills to dissolve to the beat
of this groovy music track you laid under the stills. Using the
M key (Marker) park you playhead at beginning of sequence and
play, hitting the M key everytime you hear the beat of the music.
Result? A whole bunch of markers on the time line. Now select
your ROLL tool and roll each picture to the marker so each picture
will begin and end on a mark.
Create a Motion favorite. How? Easy.
Park your playhead where you want your custom dissolve to go.
Apply dissolve. Double-click on dissolve to open in viewer. Change
duration to whatever you want and what your still clips can handle
and look for that little transition icon in upper right hand
corner of viewer window and drag it to your favorites folder
in the browser. Call it something like "Dissolve 2 seconds."
Now control click on this new favorite and select Default from
the Pop up window.
 Now
for the time saver. Select all your clips by dragging your mouse
around all of them and drag the entire timeline into the overlay
window of the Canvas and drop into OVERWRITE with TRANSITION.
Bingo. All your stills now have dissolves of 2 seconds each between
every picture. Wait, thats not enough. How about adding a Ken
Burns effect to each still to so the pics move into each other
while dissolving. Easy.
Park your playhead on one of the stills
and double click to open in Viewer and Canvas. Put Canvas in
Wireframe mode. Apply keyframes to scale motion of still until
satisfied then go up to MODIFY MENU > MAKE MOTION FAVORITE
and that favorite will now be in your favorites folder. Select
all the stills in timeline until all are highlighted and just
drop the new favorite onto any of them. All stills will now have
that favorite applied. Render and your done.
 Next
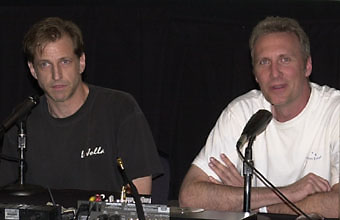
show and tell was "Derelect" from Bill Lippincott
& Paul Kelleher who said; "We did this video for
the Band 'Macho Pinto'. I am friends with them and for
the past year they had been telling me "you are going to
be our DERELICT ...if we ever make the video". Somewhere
around Dec 7th or 8th I saw the LAFCPUG call for entries and
I asked/told them I should make the video. They said yes, I asked
Paul to help. then write, shoot, edit, boom drove it to your
house on the 29th. So the user group inspired me to get us to
complete our first '100% ours' project."
Derelict was shot on DV, expertly edited
and fun to watch. The tune from Macho Pinto is very catchy but
what this video shows is all of us need a bit of a push to get
off our butts and make a movie. In this case Bill and Paul used
the deadline of a DVD. The results are they completed their project.
It's always a good thing to put a deadline on your self and meet
it.
World Famous raffle was up next and we thank the generous folks who
donated these raffle prizes.
2 FCP Keyboard Keycharts
- Neotron
Design
2 Royalty Free Stock Footage
CDs - ThinkStock
Copy of 55mm
Plug ins for FCP - Digital
FilmTools
Free FCP 101 class - Digital
FilmTree
3 Color Correction
for FCP DVD -
Digital FilmTree
PowerStart Guide - Dv Creators
Tickets to MacGathering -Deborah Shadovitz
Secrets of Final Cut Pro - Dv
Creators
Free FCP or DVD Studio Pro
or After Effects class at Promax Hollywood or Irvine - Promax
5 $20.00 Gift Certificates - Poquito Mas Restaurants (Hey, we gotta eat)
DV Companion for FCP 3 - Intelligent
Assistance
Great visual
Effects for Final Cut Pro - Intelligent
Assistance
DVD Companion Pro Pack -
Recipe
4 DVD
Various books - CMP
Books
Free Tickets
to MacGathering Expo - MacGathering
Final Draft - Final
Draft
1 T-shirt - kenstone.net
2 copies of lafcpug DVDs - lafcpug
Special thanks must go to Chris Horgan, for taking
tickets. Ken stone for
taking pics. Dan Brockett
and Matthew Lawton
for taping the show for the DVD, Mark
Havener for doing the lights and of course Promax for footing the bill.
Michael Horton,
"HeadCutter"