It was rock and roll night so we cranked up the
volume on a bunch of music videos and documentaries, solved a
few folks problems with FCP, showed a few camera filters and
what they can do to aid your "look", learned how to
"Say Cheese," educated us all on how to log and capture
the proper and cool way, got a how2 on using the Vectorscope
and Waveform, and got fed for free. Can't beat that for the less
than the price of a matinee.
 Stump
the Gurus was up first, (as usual)
with Ken Stone and guest Guru Steve Martin stepping
in for Andrew Balis, and wouldn't you know it they were
stumped. Seems one of the folks had a problem with crackling
and popping audio and it seems he did and tried everything short
of a religious ceremony to cure the problem and nothing the gurus
said were anything he had not tried so we gave up and he won
5 raffle tickets. Course he still has the problem.
Stump
the Gurus was up first, (as usual)
with Ken Stone and guest Guru Steve Martin stepping
in for Andrew Balis, and wouldn't you know it they were
stumped. Seems one of the folks had a problem with crackling
and popping audio and it seems he did and tried everything short
of a religious ceremony to cure the problem and nothing the gurus
said were anything he had not tried so we gave up and he won
5 raffle tickets. Course he still has the problem.
Other questions asked:
Q) I'm having sync problems in the timeline when I capture
via Firewire from my Sony camcorder.
A) Try this as it 'might" work. If you know you have
done everything correct and your audio sample rate matches your
capture sample rate and you are not using a Canon camera and
you have speakers hooked up to your DV device and are not monitoring
sound from your Mac and have speakers in your preferences turned
to "OFF while capturing," then delete the clip and
turn ON the autosync compensator in the General Preferences and
bring the clip back in.
Q) How come some of my clips are captured at 3.6 mgbs
per second data rate and some are 3.5 mgbs per second?
A) Well.....it's uh...just because. 3.6 is not science
and it might vary a little but if everything is looking and sounding
good then it doesn't matter.
Q) When I drop my clip into the timeline it doesn't butt
up against the other clip.There is a tiny gap.
A) Turn
on "SNAPPING."
Q) I have a DSR-20 and I outputted to DVCam and gave it
to a guy with a GL1 and he couldn't see it. What's up?
A) Output it to DV instead of DVCam. Hook up a DV player
and then give THAT to your friend.
Q) I want to scroll the thumbnail in the timeline and choose
my poster image but I can't seem to do that.
A) Thats cause you can't do it. It works only in the browser.
Using the hand tool you can scrub but you can't grab that poster
image.
Q) How can I apply a transitions between nested sequences.
A) add handles and make sure you have in and out points
set in each sequence before you apply transition.
Q)I have some MP3s I convert in QT then bring them in
to FCP and they sound like crap.
A) Thats cause there MP3s. They just sound lousy. You
CAN bring them into Bias DV and tweak them in there with all
the cool filters that come with it or revert back to 1.2.5 and
QT 4.1.2 which did a pretty good job with MP3s.
Q)What's the best way to export long form project, (over
60 minutes) to DV since DV tapes are only 60 minutes long?
A) Use full size DVCam. You can put 183 minutes on those
things.
Q)When I quit FCP and then relaunch I loose my window settings
and favorites.
A) You need to open FCP from your PROJECT file icon not
the FCP icon.
Steve Payne
of Group
101 films was up first with his Music Video Show and
Tell called My Vacation and it was as dandy a video you
are likely to see this side of MTV2.
Shot in one afternoon and featuring the music of JenBeast, it emphasized the use of extreme
close-ups and a "over exposed" image using a TRV-20
with NO special filters.
The resulting images are a perfect fit
with the poetry of the (excellent) song and evokes a strong sense
of an idea fully realized.
Edited with FCP in a couple days, the
entire video was simple cuts and fades and then the sequence
was copied into another sequence and duplicated onto itself.
He then made it 85% transparent and put a blur on it so you have
a sharp image and a transparent blurred image in composite mode
then dragged THAT sequence into another sequence and cropped
it in letter box style over a white background. The result was
a stunning realization of what you can do with an idea, an afternoon,
a cheap DV camera, and a damn fine song.
DVCreators
Steve Martin was up next with his now "west coast
famous" (soon to be world famous) "Tip/Trick of the
Month" and this month it was "Say Cheese," which
is an effect where you freeze a section of your video and create
a "snapshot" of it as though someone was taking a picture
through a 35mm camera.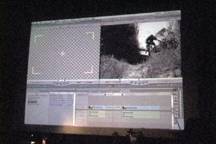
But prior to the demo Steve showed off
his CD, "Secrets of
Final Cut Pro", the nifty training tool featuring 20
tutorials of creative ideas you too can do in FCP while the CD
runs in the background. (available here at the lafcpug
store and also reviewed by Ken Stone)
Anyway, here is how to do the say cheese trick:
1. Put your playhead on a point in your
sequence you wish to "freeze"
2.. Go up to the MODIFY menu and and select MAKE STILL FRAME
3. By default the still frame image is 10 seconds long. Apply
the Desaturate filter onto the still image (Effects>Video
Filters>Image control>Desaturate)
4. Create a :viewfinder look" with alpha channel in Photoshop,
(you know, that cross hair in the middle with partial borders
in all four corners) and bring it in and superimpose that onto
the Desaturate still image.
5.Put a 4 frame dip to color transition at the "shutter
click" point using white or black.
6. Put a sound effect to simulate shutter click at the transition
point.
7. Adjust 10 second still image to suit taste.
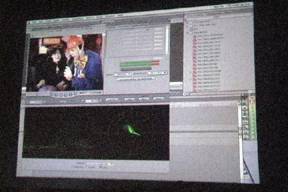
Chris
Dupont of Monkey Wrench Studios was up next with
show and tell of the Metal band "Dream Theatre" A limited
budget DVD this project was top heavy on visual effects utilized
entirely in FCP.
Shot with 6 Digi-Beta cameras, this was
the first FCP project Chris cut coming from a Media 100 background.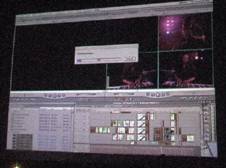
Chris started out showing us the final
DVD output using the DVD player on the Mac. The resulting project
was a cacophony of concert footage interlaced with multiple split
screen effects, heavy use of animated graphics, flop filters,
and dazzling quick cuts and wipes.
But what was cool about this show and
tell was that Chris was not only able to tell us how he did this
multiple camera DVD project, but showed us the timeline as well
so we could actually SEE exactly HOW he did it.
At a couple points in the video he utilized
8 tracks of video which of course offered ample time for TV viewing
as things rendered.
Chris took us through the motion controls
and filters controls and gave us a quick how2 on his workflow
which he developed over several attempts to find it. As well,
he gave us a tour on how the concert was shot.
Great to have the timeline as a visual
on how things are put together to archive the end result.
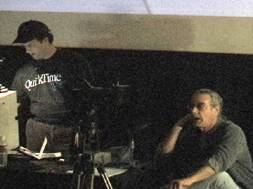
 DP Barry
Braverman brought a whole bunch of DV Cameras (courtesy
of Promax)
and a box of Tiffen
Filters, sat model Lori Schwartz in a chair and gave
us all demo on what filters can do for your particular DV camera
and yes, all cameras are different and require different filters
to achieve your desired result.
DP Barry
Braverman brought a whole bunch of DV Cameras (courtesy
of Promax)
and a box of Tiffen
Filters, sat model Lori Schwartz in a chair and gave
us all demo on what filters can do for your particular DV camera
and yes, all cameras are different and require different filters
to achieve your desired result.
For example a 1/2 black pro mist filter
on a PD100 will give you a nice warm image but flare out any
hard light that might in the composition. A possible solution?
A silk stocking? No. A black diffusion FX filter will give you
very nice diffusion without loss of resolution. So he showed
us the difference between the two and the flare all but disappeared
and the image was warm and quite pleasing. Barry says that this
particular filter should be used only in interior situations
and you should shoot with the lens wide open. In fact using any
filter you want to shoot with the lens wide open as it tends
to show the image elements of the filter if you stop the camera
down.
If it's not practical to shoot wide open
then try a Soft FX filter which loses a bit of resolution but
produces a nice image without flare.
Although time did not allow us to show
all the cameras Barry did touch on the differences in the images
between them siting the more hard colors of the XL1 vs those
of the Sony cameras. Each would require its own type of filtration
to produce your desired result.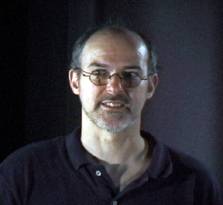
Barry brought out a nifty and rugged
Matte box to hold up. Barry recommends spending the money on
a good matte box as he feels most folks change cameras but you
only need one matte box
Judging from the mass of people who scampered
onto the stage during the break to pepper Barry with questions
and touch the cameras, this subject deserves much more discussion.
Speaking of the break we all took a time
out for 20 minutes to eat vegetables and drink sodas courtesy
of the good folks over at Runway.
Gregory
Lemkin from Tribe Digital Ent. was up first after
the break to show and tell about the aimee Mann video, "Ghost
World" he edited which was first shown at MacWorld in
SF in January. Directed by John Fortenbarry and shot with 2 XL1s
and a ZL1 with extensive use of SteadyCam Jrs and guerrilla approaches
such as wheelchair dollys and minimal lighting to achieve a "home
movie" type effect.
Shot over 2 days at Hollywood High Gregory
gave us a few of war stories on the post production which included
about 70 gigs of material he digitized as likes to have every
piece of footage in his Mac available regardless of the usability.
Gregory said it was difficult to match
cameras as one of them was not balanced or matched to the same
color as the others. He suggests if you are doing a multiple
camera shoot that you, at the very least, hook up all cameras
to a single monitor and adjust for color balance.
Gregory also showed us his award winning"commercial"
that he wrote and directed for DigiDance which featured extensive use
of Green Screen effects and told the story of a young man pitching
a movie idea to various tiers of people in the studio system
and getting literally kicked around in the process.
A dandy short worthy of the acclaim it
received and showing that maybe it's best to do it yourself rather
than incorporating a corporation to help you tell your story.
DV Companion, (available here
at the store) author Phil
Hodgetts gave us an interesting How2 on one of the more problematic
areas of FCP, the Log and Capture. Here is how to do it the proper
way according to Phil.
 First thing is to get your settings right. With
2.0 it's pretty easy and self explanatory and with 2.0s many
pre sets it's just a matter of selecting the right one. Then
set your viewer and canvas windows to 50% or smaller so your
Log and Capture will open at half size for smoother playback.
First thing is to get your settings right. With
2.0 it's pretty easy and self explanatory and with 2.0s many
pre sets it's just a matter of selecting the right one. Then
set your viewer and canvas windows to 50% or smaller so your
Log and Capture will open at half size for smoother playback.
Phil doesn't like using Capture Now despite
it's cool "stop start detection" ability. He prefers
logging so he can exactly find what he needs to find by searching
his log notes, also using Capture Now does not allocate to any
particular project. You must navigate to the captured clip and
SAVE it manually and then place it where you want it. Also there
is a delay in the capture despite 2.0s ability to specify length
of capture Clunky, Phil calls it.
You must put in a reel name in the log
and capture window prior to capturing. Set your in and out points
as you would normally and after logging clips, use batch capture.
Phil recommends turning off the drop frame warning as 2.0 seems
to look very carefully at the first frame of capture and sine
the first frame is often abnormally long FCP thinks it is a dropped
frame and will tell you so. You can use Analyze Movie to check
your captured clip. If it says dropped frames all over the place
then you got a problem. If it says you dropped the frame on the
first or second frame then ignore it. BTW, Phil likes logging
using markers instead of using in and out points.
Phil also showed us what we thought of
as impossible. Using the Vectorscope and Waveform to monitor
your video and audio in the timeline. For this (impossible) technique,
click HERE
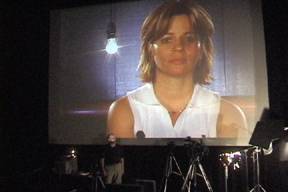
 Anthony Scarpa was up next with a documentary he directed on
the band "Betty Blowtorch" an all female metal/punk
group. Shot with a vx2000 and a GL1 in "run and gun"
style, edited on FCP with Cinelook and featuring interviews with
the band and many celebrity admirers, it tells the story of this
"sexy and bad" group of girls through a mixture of
intimate interviews, concert footage, and Vanilla Ice rapping
about his manhood.
Anthony Scarpa was up next with a documentary he directed on
the band "Betty Blowtorch" an all female metal/punk
group. Shot with a vx2000 and a GL1 in "run and gun"
style, edited on FCP with Cinelook and featuring interviews with
the band and many celebrity admirers, it tells the story of this
"sexy and bad" group of girls through a mixture of
intimate interviews, concert footage, and Vanilla Ice rapping
about his manhood.
What is remarkable about any DV documentary,
and certainly this one is no exception, is the intimacy one can
achieve using mini DV cameras as opposed to bulky 16mm or beta
SP. Performance becomes reality when the camera disappears. Betty
Blowtorch might be performance art but Anthony gave us the "who
they are" which is often more fascinating then the music,
even if you are a fan. This is good stuff on a band is going
to grab a great deal of attention when it's album comes out June
15th. Click HERE to view it on iFilm
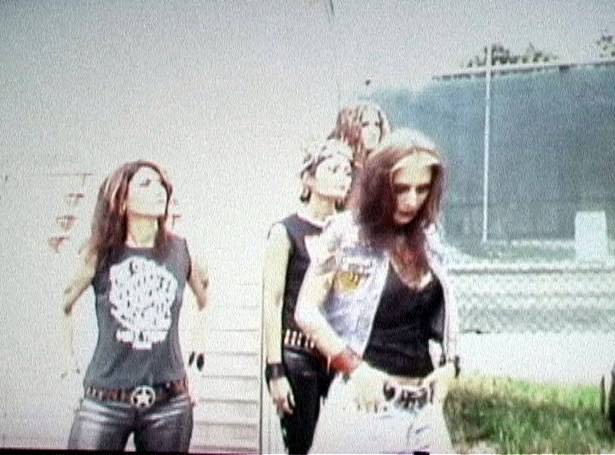
Vicki Blue
was up next with her film about arguably the most influential
all female band in Rock and Roll history, The Runaways.
Unfortunately Vicki had to leave before she was able to show
and tell so I showed it and told a little about it.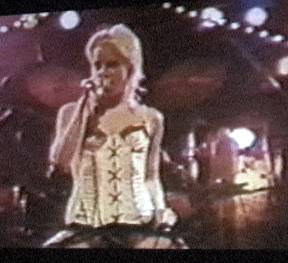
Titled "EDGEPLAY" and shot on a XL1 with
use of archival footage it tells the "untold" story
of this group of 16 and 17 year old girls and their life in the
band with a manager that was somewhat less than a gentleman.
This is an expertly edited and remarkable
film that is still unfinished due to lack of funds and we can
only hope that Vicki finds the money to finish it as it is a
story that needs to be told simply for it's historical value.
Just wish Vicki could of staid to tell war stories. They are
as remarkable as this film.
World famous raffle was up next and we thank the generous folks
who gave us the following.
$250.00 gift certificate
-Tiffen Filters
Final Cut Pro keyboard - Post-Op Video
Stealth Serial port - Geethree.com
Slick transitions and Plugins for iMovie - geethree.com
ShuttlePro jog shuttle device - Runway
Promax FCP Keyboard - Promax
Calculators - promax
Secrets of Final Cut Pro 2.0 CD - DV Creators
Final Draft and Final Draft AV- Final Draft
T-shirts- Promax
t-shirts - Creative Cow
A loud and late night and a really good
time. Thanks to Promax
for footing the bill, Runway
for feeding us, Chris Coe and Doug Lindeman and
Ken Stone for handling tickets and Dan Brockett for Taping the event.
See ya next month on June 27 where we
try to get it right once again.