|
   
| Tutorial: The Basics - Flying
Type in Final Cut Pro |
June, 2001
The Basics - Flying
Type in Final Cut Pro
By Ken
Stone
Setting Type
We are going to set some basic
type with a black background and fly it across the screen. Starting
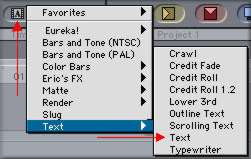
with nothing on the TimeLine and the playhead at the start, from
the Viewer window "A" drop down menu, select
Text. This will open the text window in the Viewer, it will read
'sample text'. Click in the center of the Viewer window and drag
into the Canvas window and drop on the 'overwrite' box. This
will drop the text generator onto the TL. From the TL, 'control'
click on the clip and select duration, set duration.

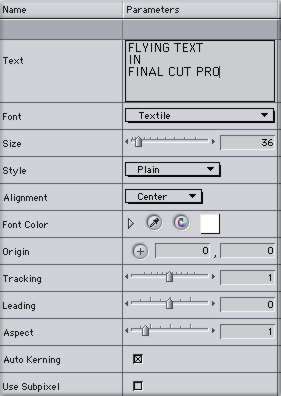
In the Viewer window click on the Controls tab to open the text
controls box shown below. If the Text generator does not appear
in the Controls tab double click on the clip in the TL to load
it into the Viewer. I have set some text to work with, I chose
Textile as my font, 36 point. All other settings are still at
default. After entering your text hit the 'enter' key on your
keyboard. This will load the text into your Canvas window and
onto your NTSC monitor. Any time that you change a setting hit
'enter' to load the change into the Canvas window and NTSC monitor.
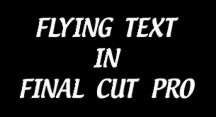
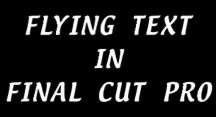
In the sample (below left) you can see the text as it appears
in the Canvas window at the default settings. The letters of
the text are too close together, also there is not enough space
between the lines of text. To space the letters out I have entered
3 in the Tracking box which moves the letters apart, I entered
10 into the Leading box to put a little more space between the
lines of text. See below right.
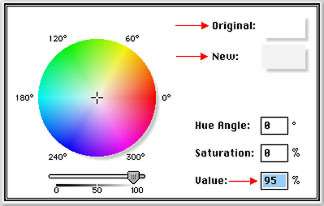
We have our Tracking and Leading done, next is Font color. In
Font color you can drop down the color menu. You can set a numerical
color, you can click on the eye dropper to sample a color, or
you can open the color wheel by clicking in the white color box.
If you have worked with white text in FCP before you might have
noticed that white text 'blooms' (flares) when it first comes
on screen. To prevent this and to give your text a smoother look
do not use pure white. In the Color wheel box below you can see
that I have set my 'value' for white at 95%. Look in the upper
right hand corner of the box and you will see an original swatch
of white and below that my new swatch of white. The new white
is not as bright as the original white. This will help prevent
blooming and yet it will still appear as white on your NTSC monitor.

There are a few more settings in the Control window. Style which
offers; Plain, Bold, Italic, and Bold/Italic. Alignment; Left,
Center, and Right. Origin; which allows you to enter a numeric
value for the placement of your text, both vertical and horizontal,
or you can click on the "+" button and then click in
the Canvas window for text placement. Auto Kerning should be
on so that your Tracking and Leadings settings will work. 'Use
Subpixel' should be off. Aspect changes the shape of your text.
Flying Type
The type is set and is ready to be put into motion. In the TL
move your playhead to the beginning of the clip (up arrow on
the keyboard). In the Canvas Window, set window size to 50%,
turn on 'image + wireframe', and Title Safe from the two drop
down menus, top center of the Canvas window.
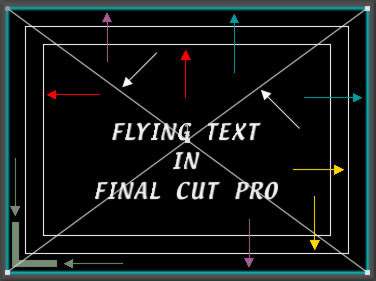
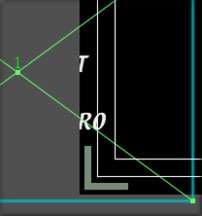
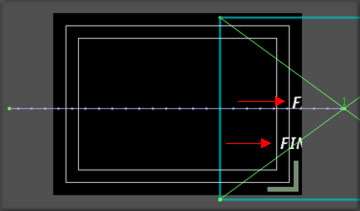
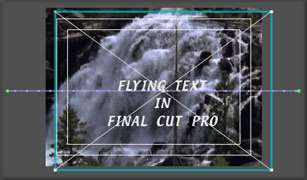
In the Canvas window below. The Turquoise
arrows point to the Bounding box. Placing your cursor into the
Bounding box turns it into a move tool. You can click on any
one of the four corners of the Bounding box and drag in or out
to change the size of the image. Placing the cursor on the borders
of the Bounding box, purple arrows, turns it into a Rotate tool.
The Red arrows point to 'Title Safe' area. This is the cut off
point for what can be viewed on most TVs. The White arrows to
the 'wire frame', Green arrows to the 'beginning of clip marker'
and the Yellow arrows point to the 'action safe' border. I am
not really sure of the point of the action safe area as it is
outside the title safe area and therefore out of view. We are
talking about TV here. QT movies and digital projection use the
entire image. from edge to edge.
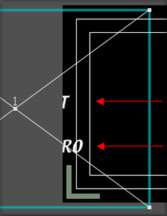
To set the starting position for your type drag the Bounding
box to the left until all the letters are outside the Title Safe
area. Hold down the 'shift' key while you drag to constrain up
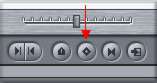
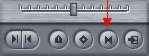
and down movement of the text (below left). When you have your
text in position set a keyframe by clicking on the key frame
button at the bottom of the Canvas window (below center). You
will know that you have set a key frame when the wire frame turns
green (below right). The number '1' just above the X of the wire
frame denotes video track one.
Now move your playhead to the end of the clip, down arrow on
the key board. This is a very important point. Sometimes when
you move to the end of the clip you wind up on the edit point
and not on the last frame of the clip. You must be on the last
frame of the clip. You will know that you are on the edit point
as there will be a purple border on the right hand side of the
frame (below left). You will know that you are on the last frame
of the clip when you have the green last frame border (below
right). This is the correct position for your playhead. If you
have the purple border then use the left arrow key to move back
one frame. You should see the purple border change to the green
end of clip border.


Click inside the Bounding box, hold down the shift key and drag
to the right until the text is just outside of the Title Safe
area. Set a keyframe.
To review your type motion, turn off snapping from the menu bar
> View > Snapping. While holding down the option key drag
your playehad through the clip. You can use 'option + p' from
the key board and FCP will step through the clip for you. Slowly.
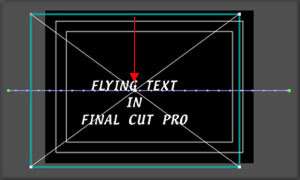
Looking at the three samples below you
will see the horizontal, purple 'motion' path that has been created.
At each end of the motion path are small green boxes which represent
the two key frames that have been set. The X that is formed by
the wireframe will be positioned on the motion path showing the
current position of the playhead.


Moving Text on Video
We are going to place moving text over
moving video. Place your video clip on V 1, Place the playhead
any where on the clip and select the clip. From the bottom of
the Canvas window click on the 'mark clip' button (below left).
This will set 'in and out' points for the length of your clip
(below center, blue arrows).
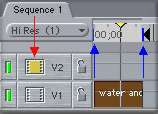
On the TL make V-2 active by clicking on the yellow box at the
left hand side of the TL (above center). From the Viewer window
"A" drop down, select Text (above right). This
will open the text window in the Viewer, it will read 'sample
text'. Click in the center of the Viewer window and drag into
the Canvas window and drop on the 'overwrite' box. This will
place the text generator above the video clip on V 1 and it will
have the same length (duration) as the clip on V 1. Double click
on the text generator in the TL to load it into the Viewer. Click
on the Controls tab and.........well, you know........start setting
your text.
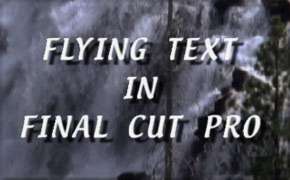
Okay, so I opened the Motions tab in the Viewer and added some
drop shadow. Had to do something, all out of arrows.
Enjoy,
--ken
copyright © Ken Stone 2001
This article first appeared on www.kenstone.net and is reprinted here
with permission.
All screen captures and
textual references are the property and trademark of their creators/owners/publishers.
|