|
   
| Tutorial: - Using the Roto Brush Tool in Adobe After Effects CS5 |
Sept. 2010

Using the Roto Brush Tool
in Adobe After Effects CS5
by Steve Douglas
You must have a great deal of patience to be an editor. There is not a one of us who has not said to their companions," I'm just finishing this up, will be there in 15 minutes tops.", only to find themselves still at work in the editing bay 4 hours later. Heck, once you're in the zone you just can't leave. Even more so, you must have the patience of a bona vide saint to be a Rotoscoper. In the past, when rotoscoping any moving object out of its background environment, it took several hours, days or even weeks to mask the subject frame by moving frame just to get a small clip, and then there was even more time spent refining that matte.
Prior to the release to the public of Adobe's CS5 suites, I was able to view and review many of the exciting new features now available in most of the Adobe applications, but none excited me more than to see the After Effects Roto Brush in action and to see just how easy and relatively quick it worked. Of course, much of the speed can be accredited to Adobe's 64bit Mercury engine, the NVIDIA graphics card and as much RAM as you have available for as many cores as your computer contains, however, the process of rotoscoping your foreground and background subjects is no longer a lifetime endeavor.
Very similar to Photoshop's Quick Selection tool, the Roto Brush in After Effects CS5 will save you an enormous amount of time in post production.
Let's get started and see how this tool will work its magic.
Initially you create a new composition as you would for any After Effects project. I try to make it a habit to make sure that my comp settings are the same as the footage I am importing.

For this tutorial, these are the composition settings I will be using.
Once I am done importing the clips I can then bring them into the After Effects timeline.

The whole process is fairly straight forward. Double clicking on the layer in the timeline will open up its layer panel. I can now click on the Roto Brush tool and by holding the command key down can adjust the size of the brush you will be using by simply dragging the mouse either up or down.
Different brush strokes for different brush folks.
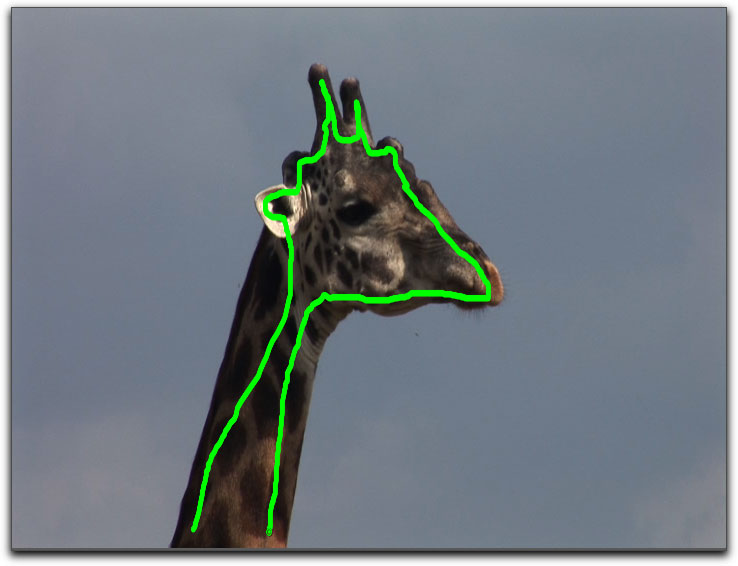
My first order of business is to use the Roto Brush tool to mark inside the subject.

Frame from the original clip. No color correction or effects of any kind.
The Roto Brush tool does a very good job of recognizing both shape and color information within the subject and motion tracking its movements throughout the clip's duration.
The giraffe, shot in HDV, appears to be distorted. This is because HDV is an anamorphic format, i.e. its original pixel size is not square. The Rotoscope tool analyzes frame by frame and AE displays the clip in its square pixel equivalent. That's why the clip seems distorted during the process. After analyzing the clip it is presented in its original (non-square) aspect ratio again. To avoid this, click on the 'correct for aspect ratio' button. The Roto Brush will be able to track any movements the subject might make. What you are really doing is teaching the Roto Brush what portions of the image should also be considered as foreground. Once done, your subject will show a magenta outline, shown below.
Now, while holding down the option key, I drag the Roto Brush tool marking the dull background sky that I want to remove from the frame.
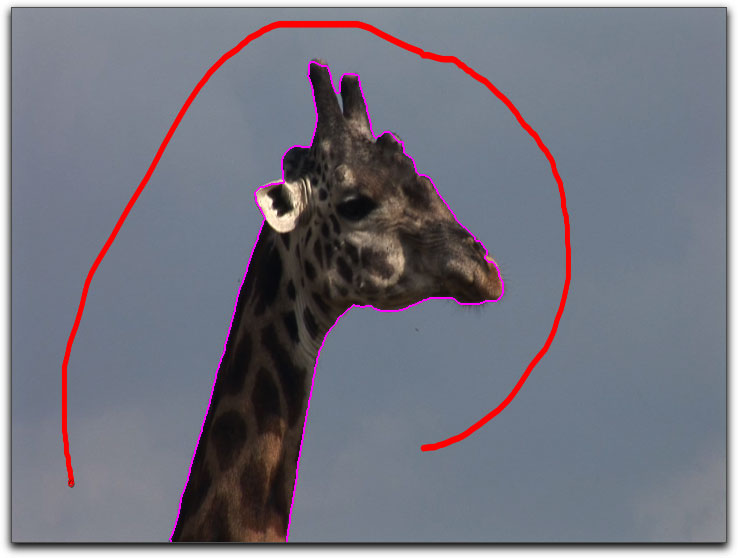
The Adobe CS5 Roto Brush tool has been applied to my foreground subject, now I am using it to identify the dull sky in the background.
By making the brush smaller, I can touch up any of the details of the subject that I may wish to include or exclude for the final frames.
One thing I had to be careful to remember was that while in the layer panel, I did have to remember to stretch out the Roto Brush Mapping Span Indicator extension which shows the range and direction of Roto Brush's auto matting function. If you forget to do this, then the entire duration of the clip will not be completely Rotoscoped.

AE Roto Brush Span Indicator
Once done, the Adobe After Effects CS5 Roto Brush tool analyzes the entire clip and mattes out your subject.
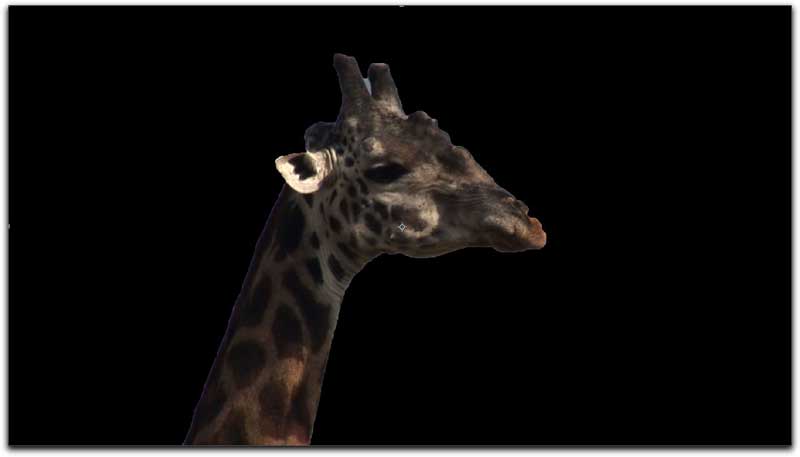
Back now in Composition view, the giraffe has been completely rotoscoped out of the original image. Now to do some light touching up.
The Roto Brush tool has several parameters that were very easy to use and made a difference. The most formidable and helpful is the Refine Matte parameter which adds some blending to the image via three steps.
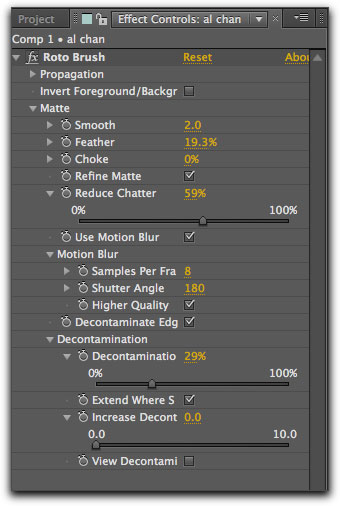
Roto Brush's Refine Matte parameters.
By looking at the motion of the subject it reduces chatter
by looking at any edge where there might be more motion than in another part of the image. Secondly, the Refine Matte parameter also functions by looking for a part of the image where there might be some blurred pixels and adds a feathered edge to that portion of the matte. The last of these is the Decontamination parameter which looks for areas where background pixels have been picked up within the matte itself. By turning on the View Decontamination check box, you can see the areas where this is put to use.

The thicker the area around the subject, the more decontamination is needed.
Once completed, you can add any background you wish. No green or blue screen needed. Additionally, even if you do not need to use the Roto Brush tool, Adobe has included the Refine Matte as a separate effect within After Effects CS5 as it would be useful for any matte composition or when working with a chroma key project.

Completed with a more colorful sky background. Notice that the folds on the underside of the neck have not been obscured or softened out.
All the detail of the original image remains. If the shot looks as if it has been layered in and faked, keep in mind that this is just a screen grab.
When the video is playing, both the foreground and background appear real and natural.
Even without having used the Refine Matte, Adobes' Roto Brush tool did a great job on my good friend Al Chan talking aboard a ship in Costa Rica.
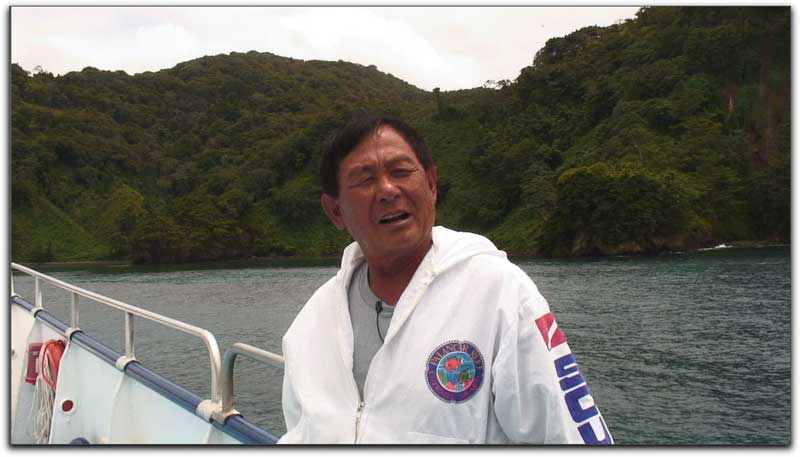
Original frame.
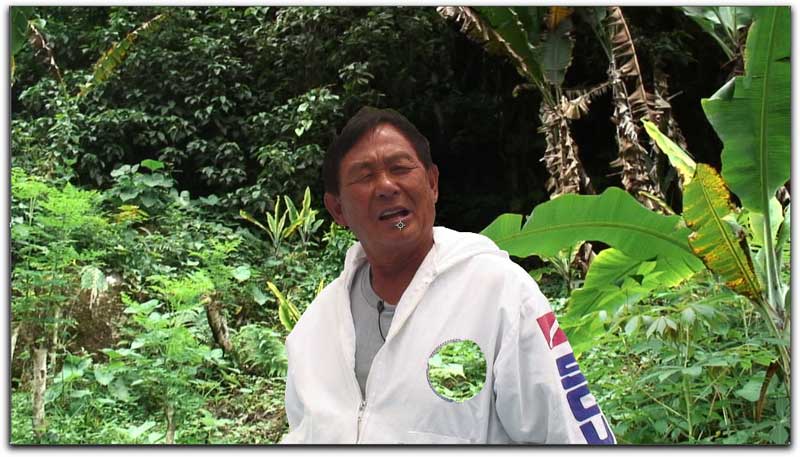
At first, I made an error by not using the tool on his jacket patch as well. Maybe this is what H.G. Wells envisioned with his 'Invisible Man' but not me.
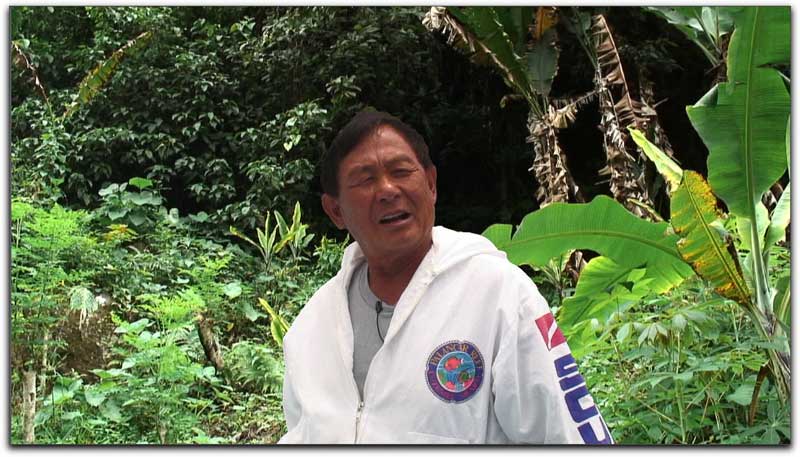
Error corrected and Al is now jungle bound.
Initially, I had some doubts as to how well the Roto Brush tool would work with low contrast clips. As an underwater shooter, contrast is not so easy to get in many instances, so I had several great examples from the cutting room floor to try and trick the Roto Brush tool with.
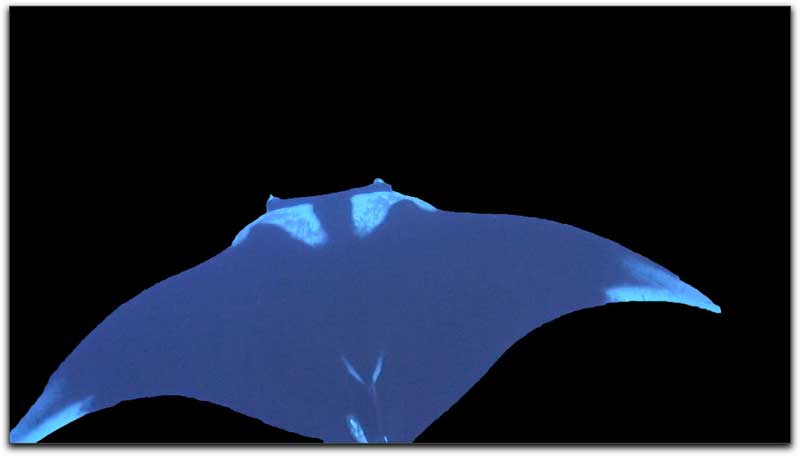
Here is the original clip of a large Manta Ray in the Socorro Islands. I did not expect the Roto Brush to be successful working with this clip. This is a terrible shot, poorly white balanced leaving almost no contrast at all.
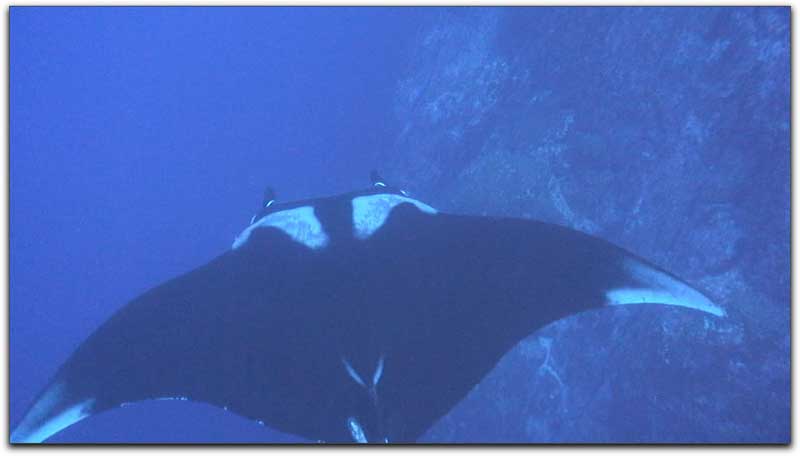
Embarrassingly original frame.
No Refine Matte usage yet but the Roto Brush did a surprisingly commendable job of matting the manta ray out of its background environment.
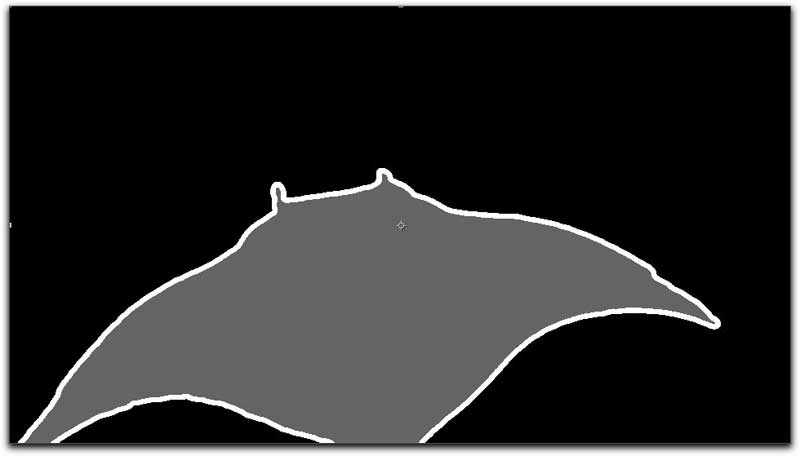
There was a lot for the Decontamination tool to work on.
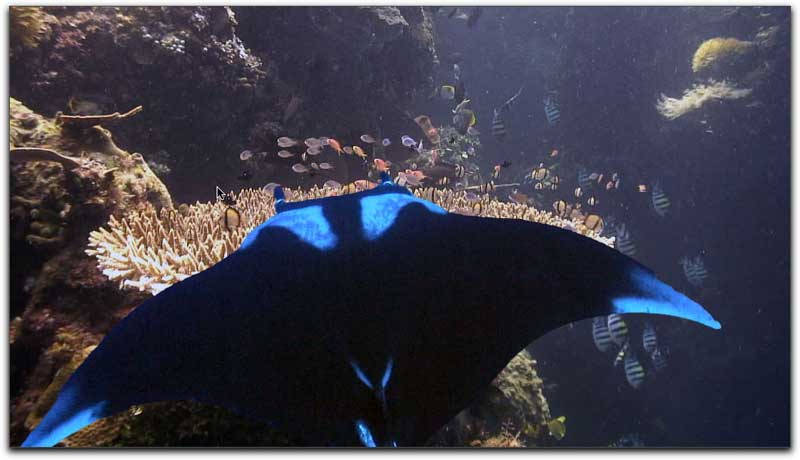
Is the Manta Ray properly positioned? Nope but with a little use of the Auto Color filter (the first time I've used this filter at its' default setting) and a decent background, Viola!
As I said earlier, there was not one feature that excited me more than did the After Effects CS5 Roto Brush tool. I am not disappointed in the least. Wow, is this going to save me time and encourage me to do many more creative things in After Effects that I might have avoided. The Roto Brush does a great job and does it fairly fast at that.
There is no question in my mind that along with the many other features and improvements made within the entire Adobe CS5 suites, that what we have here is a genuine retooling. This is a version that Adobe can really crow about.
 Steve Douglas is a certified Apple Pro for Final Cut Pro 7 and underwater videographer. A winner of the 1999 Pacific Coast Underwater Film Competition, 2003 IVIE competition, 2004 Los Angeles Underwater Photographic competition, and the prestigious 2005 International Beneath the Sea Film Competition, where he also won the Stan Waterman Award for Excellence in Underwater Videography and 'Diver of the Year', Steve was a safety diver on the feature film "The Deep Blue Sea", contributed footage to the Seaworld Park's Atlantis production, and productions for National Geographic and the History channels. Steve was a feature writer for Asian Diver Magazine and is one of the founding organizers of the San Diego UnderSea Film Exhibition. He is available for both private and group seminars for Final Cut Pro and leads underwater filming expeditions and African safaris with upcoming excursions to the Cocos Islands, Costa Rica, Lembeh Straits, Indonesia, and Wakatobi. Feel free to contact him if you are interested in joining Steve on any of these exciting trips. www.worldfilmsandtravel.com Steve Douglas is a certified Apple Pro for Final Cut Pro 7 and underwater videographer. A winner of the 1999 Pacific Coast Underwater Film Competition, 2003 IVIE competition, 2004 Los Angeles Underwater Photographic competition, and the prestigious 2005 International Beneath the Sea Film Competition, where he also won the Stan Waterman Award for Excellence in Underwater Videography and 'Diver of the Year', Steve was a safety diver on the feature film "The Deep Blue Sea", contributed footage to the Seaworld Park's Atlantis production, and productions for National Geographic and the History channels. Steve was a feature writer for Asian Diver Magazine and is one of the founding organizers of the San Diego UnderSea Film Exhibition. He is available for both private and group seminars for Final Cut Pro and leads underwater filming expeditions and African safaris with upcoming excursions to the Cocos Islands, Costa Rica, Lembeh Straits, Indonesia, and Wakatobi. Feel free to contact him if you are interested in joining Steve on any of these exciting trips. www.worldfilmsandtravel.com
copyright © Steve Douglas 2010
This article first appeared on www.kenstone.net and is reprinted here with permission.
All screen captures and textual references are the property and trademark of their creators/owners/publishers.
|