3 Band Equalizer
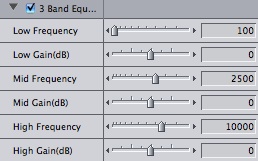
This allows you to take three separate
bands (low, med and high) and adjust the gain up and down individually.
I personally prefer AUFilter (in the Apple folder) because it
gives you a bit more control and allows you to adjust 5 bands.
This is useful when you need to boost
the bass of a voice or improve a flat-sounding voice.
Band Pass Filter
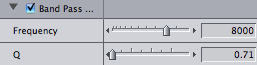
This will allow a range of frequencies
on either side of the center frequency to pass through and reduce
(attenuate) frequencies outside this range.
This is identical to the AUBandpass filter
(in the Apple folder) except that instead of the bandwidth parameter,
it has a mysterious one called Q. Q stands for Quality Factor
and is a different way of representing the bandwidth. There are
numerous articles about it on the internet that get quite technical
but all you need to know is that it's the relationship between
the center frequency and the bandwidth (f/b) so Q is inversely
proportional to the bandwidth (i.e. when the bandwidth goes up,
Q goes down by a proportional amount). It is worth noting that
Q is not the bandwidth itself but it is related to it. If you
want to find out the bandwidth, just divide the center frequency
by Q.
If you don't understand the above explanation
just play it by ear or use the AUBandpass filter.
Compressor/Limiter
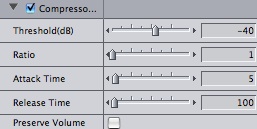
The Compressor / Limiter reduces the
volume of sounds above the threshold amplitude. This is a useful
way of minimizing the difference between two subjects talking
at different volumes or making sure that the audio fits within
the limits of the playback device.
Obviously this reduces the volume of
the overall audio so Preserve Volume rectifies this (although
I find it is often then too loud). Attack time refers to the
time it takes for the filter to decrease the volume once it has
detected a frequency with an amplitude above its threshold. Release
time refers to the time taken for the filter to increase the
volume again once the high amplitude frequency has finished playing.
Higher values allow for a smoother and less noticeable response
but set them too high and the compressor won't respond quickly
enough. This is something inherited from live audio mixing where
you don't know what's coming next. Setting the threshold to just
under your preferred limit allows time for the compressor to
lower the volume in anticipation for a louder sound once the
threshold is reached.
Ratio tells the compressor by how much
it should reduce the volume when a sound exceeds the threshold.
If the ratio is set to 2 (2:1), then a 10 dB increase in volume
above the threshold will be halved to a 5 dB increase. It is
worth noting that the compressor lowers the volume of sounds
above the threshold but does not necessarily reduce them to a
value at or below the threshold. Be aware that very loud sounds
could still theoretically peak.
Finally, it is also worth mentioning
that the compressor reduces the volume difference between the
subject and any background noise, so background noise will be
more noticeable upon boosting the audio after applying the compressor.
DC Notch

Sometimes you may experience a DC current
leakage through the mic, causing noise in the recorded audio.
A DC Notch filter will remove the DC offset component which you
probably need a degree in audio engineering to fully understand.
It has no parameters.
This is one of the lesser-used filters
FCP provides.
Echo

This one obviously adds an echo. Effect
Mix allows you to mix the echoing audio with the original in
order to better blend it in. Effect Level controls the volume
level of the echoes (but not the original audio). Brightness
controls the degree that the echoes will overlap. Feedback controls
how long each echo will last and delay controls the spacing between
each repeat.
It is worth noting that the echoes will
be abruptly cut off unless you lengthen the audio clip or fade
it out.
Expander / Noise Gate
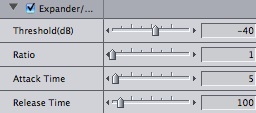
The opposite of a compressor. A compressor
takes high amplitude sounds and lowers them whereas an expander
takes low amplitude sounds (sounds below the threshold) and lowers
them. I know it probably seems strange to lower sounds that are
already quieter than the rest of the audio but this is designed
to increase the dynamic range of the clip.
Threshold is the amplitude below which
the expander will kick in. Ratio controls the proportion of expansion
- for example with a ratio of 2 (2:1), a 3 dB fall below the
threshold will be adjusted to a 6 dB fall. Attack time is the
time for the volume change to be applied once it falls below
the threshold. Release time is the time for the volume to return
to normal once the signal goes above the threshold again.
A noise gate is a more extreme expander
that will completely eliminate frequencies below the amplitude
threshold. This can be achieved with high ratios (e.g. 10).
Gain

This is a simple filter that raises or
lowers the volume of the audio. It is added automatically to
clips when you use the Modify > Audio > Apply Normalization
Gain command.
High Pass Filter
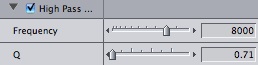
This will attenuate (reduce) low frequencies
below the threshold. This is the same as a Low Shelf Filter.
Use the Q slider to modify the bandwidth (width of the frequency
range).
Useful for cutting out low frequency
noise such as the rumbling of traffic or very low notes in a
deep voice.
High Shelf Filter
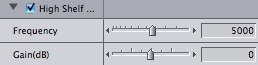
This will attenuate (reduce) high frequencies
above the threshold. This is the same as a Low Pass Filter. Gain
allows you to adjust the volume of audio that passes through
the filter.
Useful for filtering out high frequency
noise such as buzzing on the soundtrack.
Hum Remover
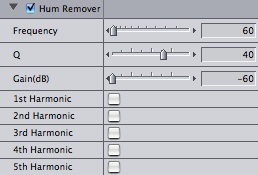
This is similar to the Shelf / Pass filters
but it has several extra parameters. Frequency, Q and Gain have
been explained many times above. In order to explain what the
harmonic check boxes mean, we need to delve into a little audio
theory.
The fundamental frequency is the lowest
frequency in a harmonic series (the Frequency value in this case).
Harmonics are integer multiples of the fundamental frequency
- e.g. if f=60, 2f=120, 3f=180, etc. These play at the same time
as the fundamental frequency and contribute to the tone of a
sound. The Hum Remover is more powerful than a Shelf / Pass filter
because it allows you to remove these specific frequencies without
removing any frequencies in between these. For example, if f=60
and you wanted all harmonics up to 5f removed, a Low Shelf or
High Pass filter would remove ALL frequencies up to 300 Hz, potentially
affecting the quality of your sound. The Hum Remover would not
do this.
Despite being called Hum Remover, the
use of harmonics makes it useful for other purposes such as enhancing
or reducing a musical instrument on a soundtrack.
Low Pass Filter
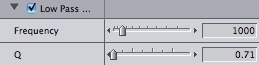
The Low Pass Filter has the same effect
as the High Shelf Filter - it will attenuate (reduce) frequencies
higher than the specified frequency range, keeping lower ones
intact.
Frequency refers to the center frequency
and Q is a way of representing the bandwidth (the width of the
frequency range).
Useful for reducing high frequency noise
such as buzzing.
Low Shelf Filter

The Low Shelf Filter has the same effect
as the High Pass Filter - it will attenuate (reduce) frequencies
lower than the specified frequency range, keeping higher ones
intact.
Useful for reducing low frequency noise
such as air conditioner hums.
Notch Filter
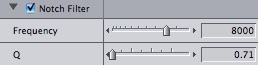
The opposite of a Band Pass filter. Instead
of only allowing frequencies within a certain range, this cuts
out frequencies within a certain range.
Frequency refers to the center frequency
and Q is a way of representing the bandwidth (the width of the
frequency range).
Useful if you have noise of a constant
frequency on your soundtrack (such as a buzzing sound).
Parametric Equalizer
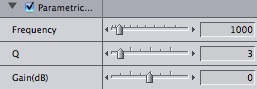
This is a combination of Band Pass, Notch
and Shelf filters combined into in a single filter. Frequency
is the center frequency, Q is related to the bandwidth (see the
explanation above) and gain allows you to boost or cut the frequencies
passing through the filter.
Reverberation
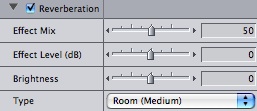
This is similar to the Echo filter but
considerably more sophisticated. Rather than simply repeating
sounds with a delay, it allows you to mimic the characteristics
of echoes within various locations. This is incredibly useful
when performing ADR (Automated Dialogue Replacement) because
it is highly likely that the sound booth you record the ADR in
will sound nothing like the original location. This allows you
to mimic the effect of sound waves bouncing off walls, with some
canceling each other out and some increasing in intensity. It
can also be used sparingly to improve a flat-sounding voice.
Subtlety is often the key with this filter
and Effect Mix allows you to mix the reverb with the original
sound to help blend it in. Effect Level controls the intensity,
Brightness controls the degree that the echoes overlap and Type
allows you to specify various preset locations.
It is worth mentioning that the reverberation
will end abruptly unless you extend your audio clip or fade it
out at the end.
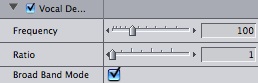
Vocal DeEsser
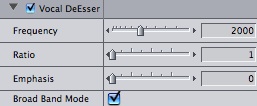
This helps to reduce the intensity of
"s" sounds, most noticeable if the actor has a lisp.
The controls are similar to a compressor but it is optimized
for reducing sibilant ("s") sounds. Ratio controls
the amount of reduction - e.g. if the "s" sound is
6 dB and the ratio is 2, it will be reduced to 2 dB.
Emphasis controls the sensitivity of
the filter and Broad Band Mode widens the bandwidth so that more
frequencies around the center frequency are affected.
Vocal DePopper
Sometimes if a microphone is directly
in front of an actor's mouth they will accidentally breathe into
it while speaking, causing a wind-type noise to be generated.
This filter aims to minimize these.
The parameters are similar to a compressor
- ratio controls the ratio of reduction proportional to the intensity
of the sound. Broad Band Mode widens the bandwidth so that more
frequencies around the center frequency are affected.
One Final Note
These filters do a decent job of repairing
troublesome audio but they are not miracle cures. Sometimes (and
this is never popular with producers) it just isn't cheaper to
fix it in post. Even big Hollywood movies with access to multi-million
dollar sound studios re-record a lot of their audio. It is important
to always think realistically.
However, I hope this two-part guide has
been useful in showing you just what can be improved. I noticed
a significant improvement in the sound quality of my projects
once I understood more about the audio filters available to me,
and I hope you'll be able to say the same.
Part 1 can be found here
Copyright 2008 Digital Rebellion,
LLC.
This article was first published
on Digital Rebellion
and is reprinted here with permission from the author.
Jon Chappell is an editor,
VFX artist and software developer originally from the UK. He
is the owner of Digital
Rebellion LLC and is a regular contributor to the Final Cut
Pro community. He is well known for developing the popular troubleshooting
applications FCS
Remover and Preference
Manager. His film credits include Perfect Sport.