by Jake Russell
How to have a Play All Button and Individual Play Buttons is something that comes up all the time. Typically on corporate type jobs and training material but also on TV Series Projects, Music DVDs or Extra Features of a Feature Film.
There are various ways of tackling this kind of project. This method is a great option if all the video on the disc is the same aspect ratio and does not require any scripts!
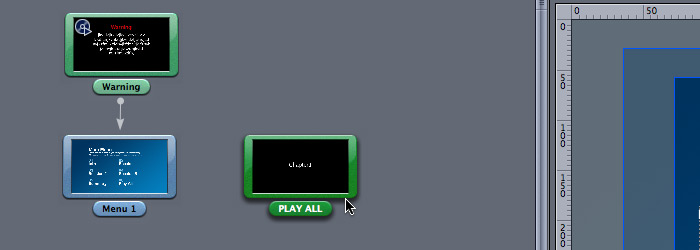
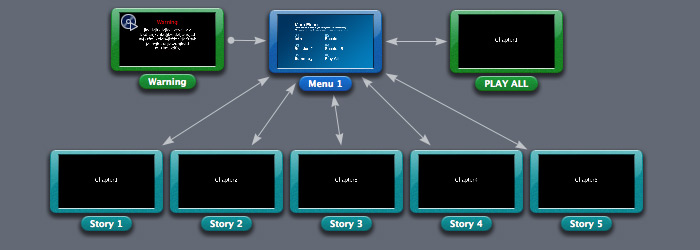
The project has already been started, named and saved. A Warning Track Added (Track2) and named Warning. All User Operations (UOPs) Disabled for the Warning Track and its End Jump Set to Menu1 Button 6 (Play All). The First Play of the Project is the Warning (as you can see by the little icon in the top left of the asset in Graphical View). Track 1 has been named PLAY ALL.
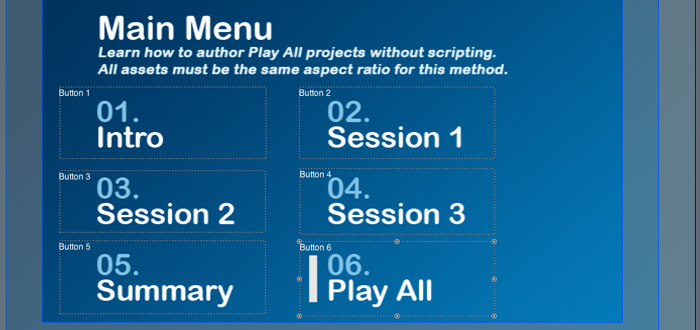
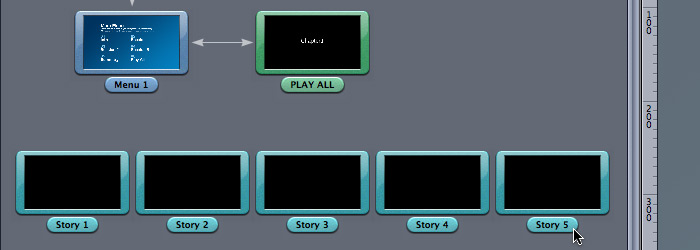
Menu 1 has 6 Buttons. Buttons 1-5 will be for playing the individual options and Button 6 is for the Play All.
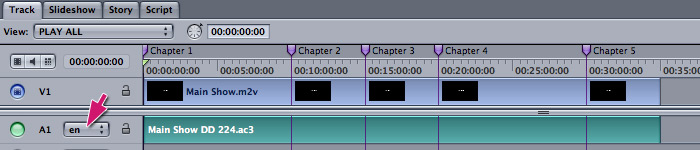
The PLAY ALL Track has 5 Chapters and the A1 (Audio Stream 1) Language Stream Flag is set to en for English. This can be set manually or automatically via the Preferences.
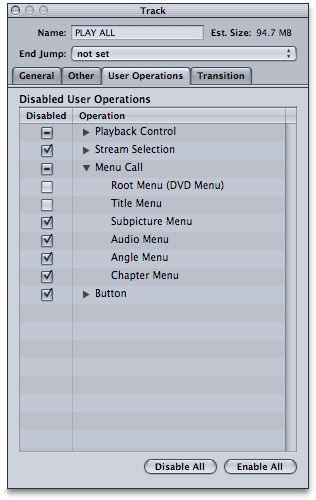
The PLAY ALL Track has also had its UOPs set.
Now to start adding the functionality to the project. First take care of the Play All option. The PLAY ALL Track (which was Track 1) will be used for the Play All so that is what I ll target for the Play All Button on the Menu.
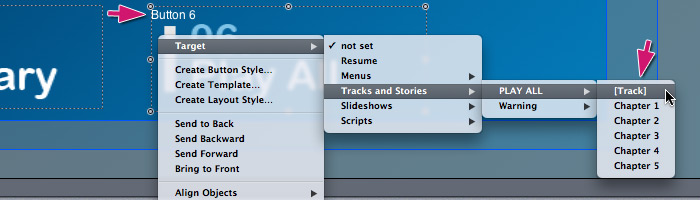
Button 6 is my Play All button. Right Click on the button and choose Target > Tracks and Stories > PLAY ALL > [Track] from the fly out Menu. That s it! Now when the Play All Button is activated the Track will play.
Next we need to take care of the Track End Jump and Menu Call options. Select the PLAY ALL Track in the Graphical View or Outline Tab.
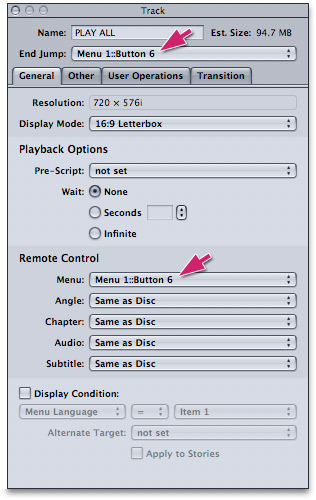
In the Tracks Property Inspector you can see the Track Name, then set the End Jump and the Remote Control Menu settings to the Button you want highlighted when these events happen. I want to take the user back to the Play All Button on my Menu so select Button 6 on Menu 1.
Now if the User is watching the Track and presses Menu they ll go back to the Menu with Play All highlighted likewise if the Track plays right through and Jumps back to the Menu.
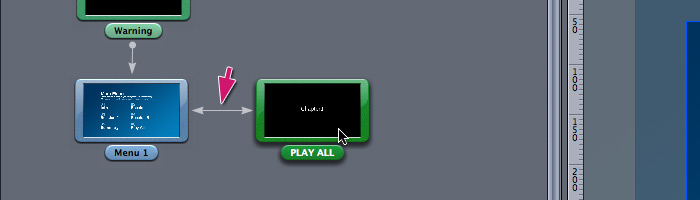
The Graphical View will have now updated to show this with its connection arrows. You can Simulate the Project if you want to check things are working as expected so far.
Next its time to take care of the individual playback options. When Buttons 1-5 are selected we want the single Chapter to play and then return to the Menu. For this I ll use Stories. A Story allows you to reuse the Chapters in the Track its associated to without increasing the Project size (much). You can duplicate or use parts of a Track without doubling the Project size as you would by duplicating the Track Item for example.
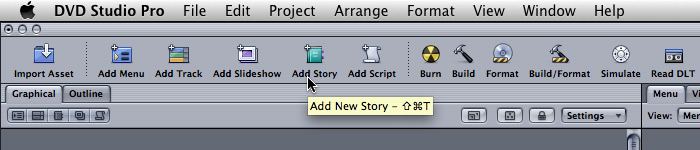
Select the Track (PLAY ALL) and then click Add Story in the Tool Bar. A Story Item will be added to the Project. I prefer to Right Click on the Track and choose Add > Story but lots of people use this option too.
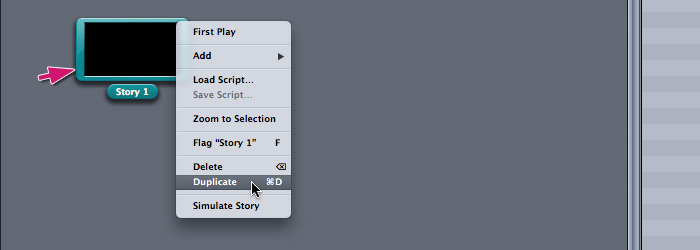
To speed up UOP setting, it s always a good idea to set them on the Empty Story (over in the Property Inspector with Story 1 selected). Then Duplicate Story 1 (Right Click the Story and select Duplicate) so you have the amount of Stories you need. In this case I need 5 Stories total for my 5 Chapters.
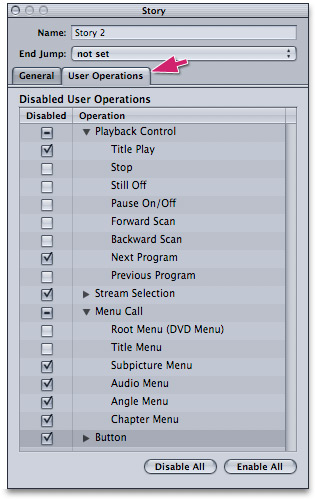
The UOPs (User Operations) from Story 1 are inherited and your time saved!
Now re-name the Stories something appropriate, I m using Story 1-5 so hopefully things won t get too confusing but could use Intro, Session 1-3 and Summary.
Double Click Story 1 to open the Story Editor.
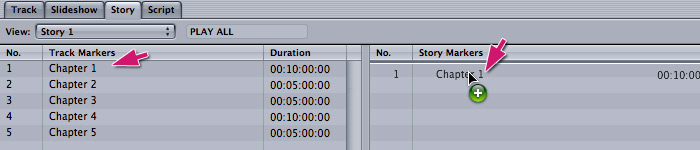
The Source List on the Left shows all the Chapters in the Track. Drag Chapter 1 from the Left to the Entry List on the Right and let go. Now add the required Chapter to each of the other Stories.
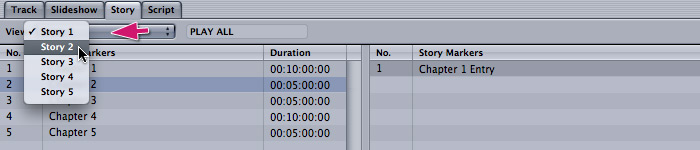
Using the View Menu (in the Top Left of the Story Editor Tab) you can select from the Stories associated to the Track. I select Story 2 and add Chapter 2 to it s Entry List. Then I do the same for Story 3, 4 and 5.
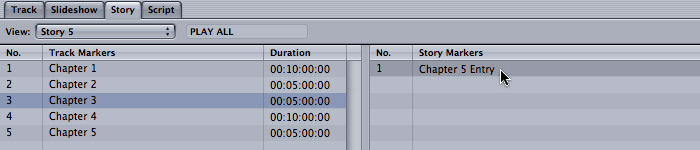
Once I have added Chapter 5 to Story 5 I need to set the End Jump and Menu Call settings for all the Stories as we did for the PLAY ALL Track.
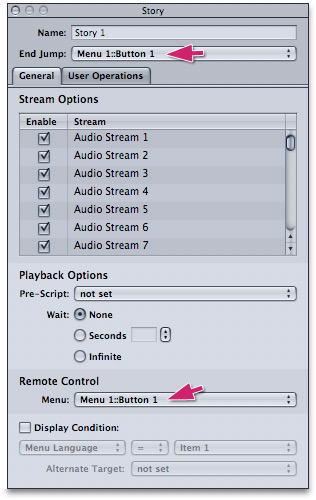
Select Story 1 then in the Property Inspector set the End Jump and Remote Control options to the appropriate Menu Button. Using this method is fine but using the Connections Tab is a lot faster! Connections Tab is your friend.
Click the background of Graphical View or the Disc in the Outline Tab and then Open the Connections Tab. Basic level of detail and All connections are fine for the moment (in the Top Left of the Tab).
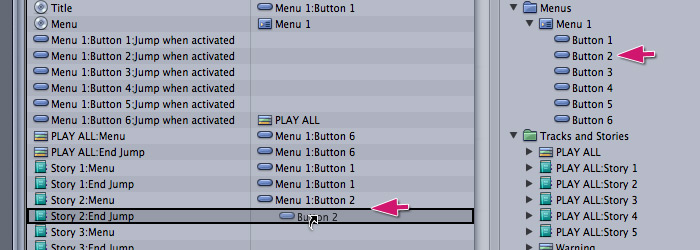
You can often build up a nice rhythm and see patterns in the Connections Tab. Simply drag from the Targets list on the Far Right to the Connections List on the Left. To quickly set the Story 2 Menu Call setting I drag Menu 1 Button 2 from the Right to Story 2: Menu on the Left. Then for the End Jump I do the same but drag to the Story 2:End Jump Source.
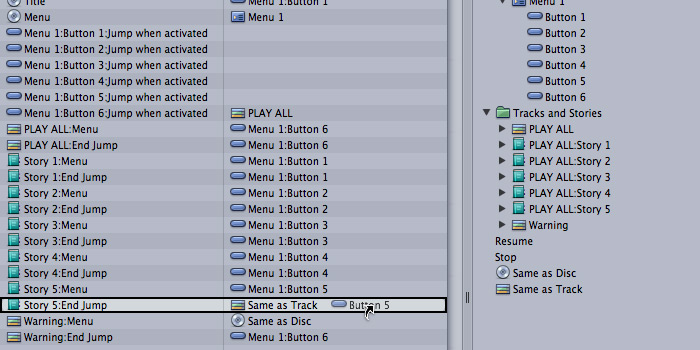
You then drag Button 3 twice, once for Story 3 Menu and once for Story 3 End Jump and so on. You ll quickly see how fast and easy it is! and you can always select a Story and click the Property Inspector to check while you get used to things.
By setting the Story End Jump and Menu Call settings to the Menu Button the User will be taken back to their selection on the Menu. Sometimes you may want End Jump to take the User to the next Button so after Story 3 finished Story 4 Button is highlighted ready for the user to select. You simply set the End Jump to that Button instead but I ll cover that in another article...
Once finished all the End jump and Menu Call settings have been set. Button 6 is the Play All button which we have already taken care of earlier.
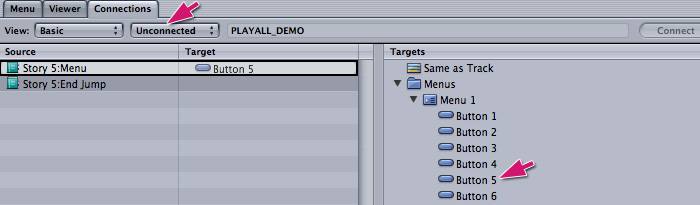
If you are already comfortable using the Connections Tab you might like to change the Connections Status from All to Unconnected.
Doing this means that when you set the connection it disappears from the list, as its no longer unconnected. This can come in very handy when setting a lot of connections but you need to stay perky and have lots of coffee in the blood stream if it s late. Because getting out of sequence while you think your rhythm is sweet can lead to lots of mess to sort out! Apple+Z Apple+Z Apple+Z...
Nearly finished, time to set the other Button Targets.
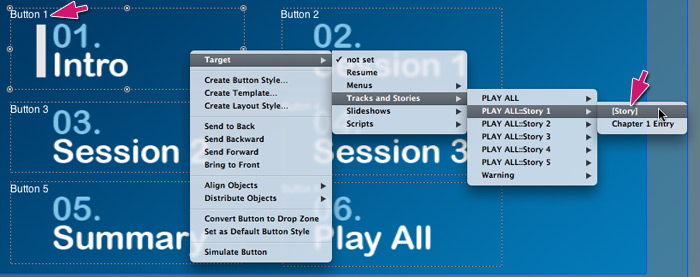
Right Click on Button 1 (Intro) and Target Story 1 > [Story] which you can see is associated to PLAY ALL Track. Warning has no Stories so there are no available Stories to select associated to it.
Button 1 will now play Story 1 when it is activated.
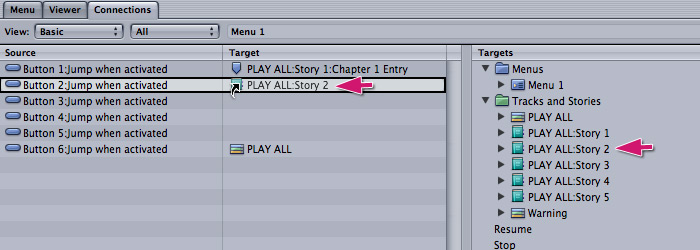
Again, Button Targets can be set much faster in the Connections Tab rather than Right Clicking Buttons or using the Property Inspector. Select Menu 1 then oven the Connections Tab. Drag the Target Story from the Right and Drop it in the Connections Area for the Source. To Set Button 2 Drag PLAY ALL:Story 2 from the Right to the Target Area for Button 2. Then Drag Story 3 to Button 3 and so on.
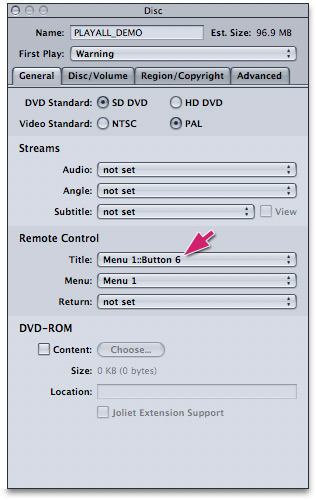
One last thing is to decide where the Title/Top Menu Button takes the User. Select the Disc in the Outline Tab or Click the background in Graphical View and set the Title Option in the Remote Control Area of the Discs Property Inspector. Button 1 (Intro) or Button 6 (Play All) are the best options for this project.
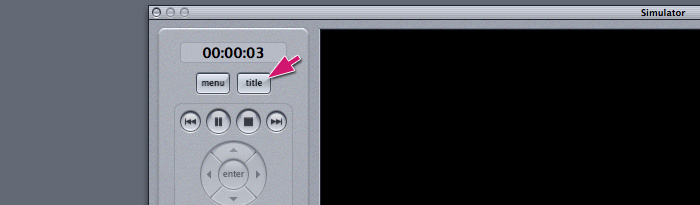
To this point we have been Programing the Menu Button option but DVD Remote Controls have a Title/Top Menu option also. Typically I d set this to Button 1 on the Top Most Menu which Means that if a User is watching a Feature Films Special Features Video, if they pressed Title on the Remote they would be taken to Button 1 (Play usually) on the Main Menu. They can use Menu to get back to the Special Features Menu.
In this case though I have chosen to have Title take the User to the Play All button, Menu 1 Button 6.

That is it. It is a lot faster and easier to author than it is explain in writing but hopefully you can see that. The Project plays the Warning (Track 2) and goes to the Menu. The Play All button plays all the Chapters in the Track and returns to the Menu. The other buttons play a Story (one Chapter Entry) and return to the Menu. All the correct Buttons highlighted, Menu Calls taken care of and UOPs set.