|
|
   
| Tutorial: Across the Lines: Editing in the Different NLEs |
December, 2012
Across the Lines: Editing in the Different NLEs

by Gerard Tay
In this day and age, many of us editors are starting to work on different NLEs quite frequently, so in this article, I am hoping to cross the great divide, and bridge the differences between the different NLEs, in terms of the edit keys and functions. Despite all the passionate debate surrounding the death of FCP7, using an NLE really isn't the same as supporting a soccer club. They are just tools. Tools we use to tell a story. In this article, I will give examples from Final Cut Pro 7, Avid Media Composer 6, and Adobe Premiere Pro CS6.
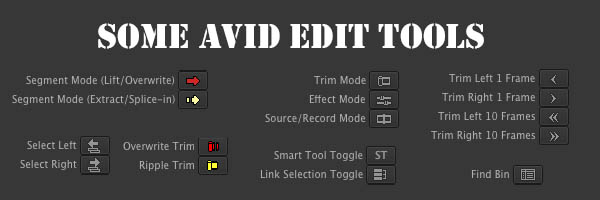
Here are some of the commonly used edit tools in Avid MC 6:
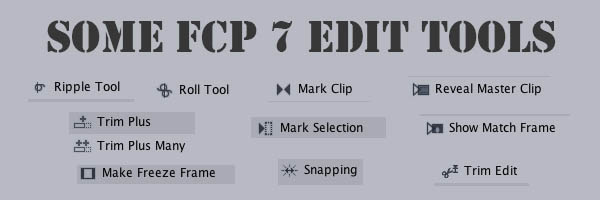
And here are some of them in FCP 7:
Then, here are some of them in PPro CS6:

The Avid Angle
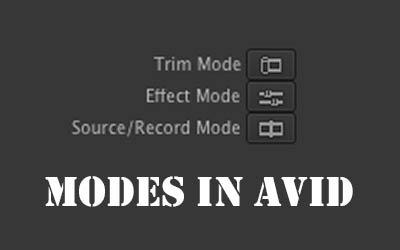
Avid, being one of the older digital editing machines, was designed to work in "modes"- source/record mode, segment mode, trim mode, and effects mode.
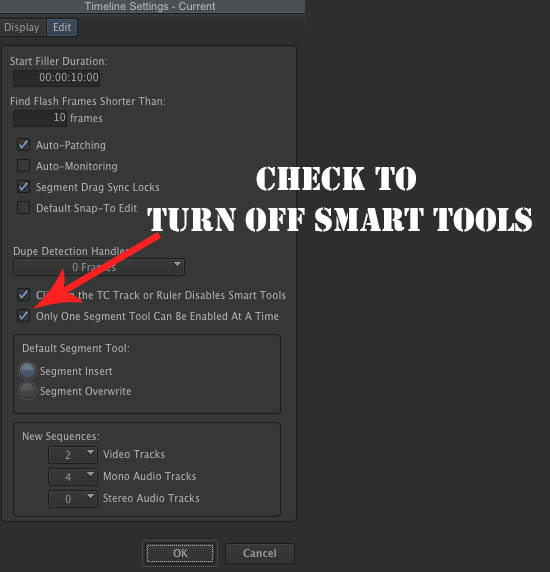
Source/record mode is where you insert clips from the source monitor into the timeline, and where you scrub through the timeline. Segment mode is where you select clips in the timeline, so you can shift them around, and trim mode is where you do trimming. There are two types of operations, namely, what Avid calls, overwrite and insert/splice-in modes. Insert/splice-in mode (aka the yellow tool) ripples or shifts the rest of the clips in the timeline, and overwrite (aka the red tool) doesn't. In MC 5, Avid came up with what is known as the "Smart Tool", which basically makes it a little more FCP-like, in that you don't have to get into a "mode" to trim or select clips, and you can do so by hovering your mouse cursor over different parts of the clips in the timeline. Many of the older Avid editors, being keyboard driven, didn't like that so much, so the smartest thing Avid did, was to allow users to turn off the smart tool, which is what I prefer, being keyboard driven myself.
Traditionally, Avid required users to create Avid media on import, so when dragging a clip into Avid, clips are automatically transcoded or "fast imported" based on the settings in "Media Creation", and the newly imported media is created in the media drive in the "Avid MediaFiles" folder on your media drive, and a media database file is updated. Handling of media is done within Avid Media Composer. This allows Avid to have a robust media management system.

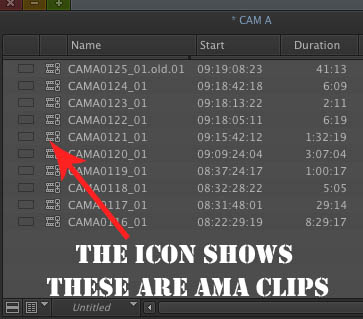
In MC4, Avid came up with the Avid Media Access feature (AMA), which lets users link to native camera files and edit without creating Avid Media (Avid's MXF format). Users can create Avid Media if they choose to. In reality, many of us choose to, but AMA is a pretty good option to have.
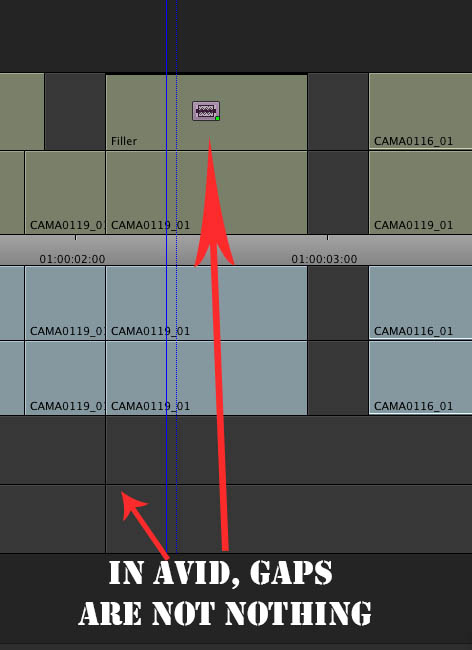
One other difference in Avid, is that the gaps in between the clips isn't nothingness. It isn't black either. It is filler, and you can blade it. Because in traditional film editing, you needed something in between two clips, not nothing. This "something" is filler. In MC5, Avid added the ability to apply effects on the filler above the clips. The effect will then be applied to the clips beneath it. After Effects users will understand this concept as an "adjustment layer", so take that, traditional film editing!
Rise of FCP 7
Final Cut Pro 7, has been EOL'd for about a year and a half now, however, many of us still use it. One of the biggest original features in FCP, was the ability to capture and cut DV on a computer without additional hardware peripherals. That was a big thing in its time. Then a few versions later, it gained traction in the broadcast market, because the hardware abstraction layer in the software allowed users to buy 3rd party IO cards and connect it to broadcast monitors and tape decks like the Digital Betacam, Betacam SP, and HDCAM decks.
Cometh Adobe Premiere Pro CS6
Premiere Pro has been around for quite a while, in fact, it was developed before Final Cut Pro came into existence, and it started gaining popularity with the demise of FCP7. In PPro CS6, Adobe added dynamic trimming (aka 'on-the-fly' trimming), and support for more native formats, as well as more real time effects. One of the main advantages of Premiere Pro is the native workflow, where footage does not have to be transcoded for editing. After Effects is already very widely used for motion graphics and many of us see it as the tool that made mo'graph what it is today. In the CS6 upgrade, Adobe has improved the integration of After Effects into Premiere Pro, and this is another reason many users are seeing PPro CS6 as the replacement for FCP7. Premiere Pro largely works the way we are used to in FCP7, from the trim tools, to media management.
Importing media into Premiere Pro is quite similar to FCP. The media basically resides wherever they were when you imported the media, so if you imported media into Premiere Pro from your client's thumbdrive, your media will be offline when the client takes the thumbdrive home at the end of the day.
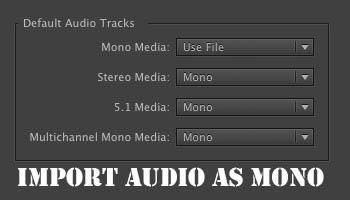
One of the things I do in Premiere, is set it to import audio as "mono". This lets me manipulate each channel on the file as a separate object, just like I do in FCP7 and Avid.
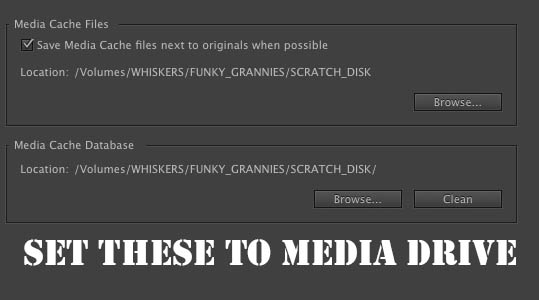
One of the other things I do in Premiere, is set the cache to somewhere else, other than in a hidden library folder, because the default setting is really not very intelligent.
The Edit Keys
Overwrite or Splice-In Segment Mode

In FCP/Premiere, you are always in segment overwrite mode, so to select a clip, all you have to do is to click on it. In Premiere, to do a "swap edit" or shift clips in Segment Mode (extract/splice-in), hold command and option while dragging. In Avid, hit the segment overwrite or segment extract/splice-in key, or hold option and marquee select the clip(s), just make sure you drag from left to right.
Cut, Copy, Paste

In Avid, a cut or paste operation respects the overwrite/insert mode you are in, so a paste when you are in insert segment mode, will become what FCP/PPro users call a "paste insert".
Lift/Extract

If you mark an in and an out point in the timeline, the lift command will lift that segment, creating a hole in the timeline. Extract will ripple the timeline. While FCP7 has "Lift" that does not copy to clipboard, these same operations can be performed by Cut, Copy, Paste and Paste Insert.
Snap
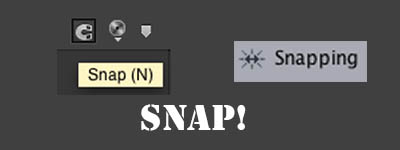
In Avid, to snap, hold command while doing the operation, or hold command and option to snap at tail frames. In FCP, hitting "N" toggles snap on/off. In Premiere Pro, there is the snap icon, but to snap the playhead to the edit points on the clips in the timeline during scrubbing, hold shift. I personally prefer PPro's implementation of snapping, because most of the time, I like snapping off when I am scrubbing through the timeline, and snapping on when I am shifting clips around in the timeline.
Trim Tools
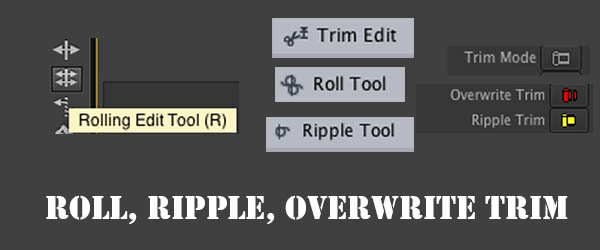
In FCP7, the closest to Trim mode is to call up the Trim Edit window (by default, cmd 7). Trimming in Adobe Premiere comes in trim tools like in FCP7. Except that you can marquee select a bunch of trim points, just like in Avid (Avid: hold option and marquee select right to left).

Selecting Edit Points

Avid has this concept called selecting "A/B sides". This means that if you want to do a ripple edit, you can hit a short cut to select the out going point of a trim (A side) or the incoming point of the trim (B side). In Premiere Pro, you can "select nearest edit point as ripple out", or "select nearest point as trim in", which is essentially A/B sides in overwrite or ripple trim modes. To select both sides, "select nearest edit point as roll".
Extend Edit

In FCP7, select an edit point, and hit the "E" key. In Premiere Pro, you can do the same thing. Also, in PPro, you can choose to extend the out point of the clip to playhead, or in point of the clip to playhead. In Avid, to extend the edit point of the incoming clip (the next clip), you can mark an in point and hit the extend edit button. Marking an out point, will extend the edit point of the outgoing clip (previous clip).
TOPS/TAILS/RIPPLE TRIM TO PLAYHEAD

In Avid, hitting the "top" key will trim the head of the clip to the playhead, and "tail" will trim the tail end of the clip to playhead. In Premiere Pro, the same function exists with "ripple trim next/previous edit to playhead".
Marking Clips

In Avid, to mark an in and out point on a clip in the timeline, make sure the track is selected and hit "mark clip". Or you can select a bunch of clips and hit mark clip. In FCP 7 and Premiere, there is "mark clip" or "mark selection", and "Mark Clip" will mark an in and out point on the clip where the playhead is, and "Mark Selection" will mark the selected clips in the timeline.
One Frames, Many Frames
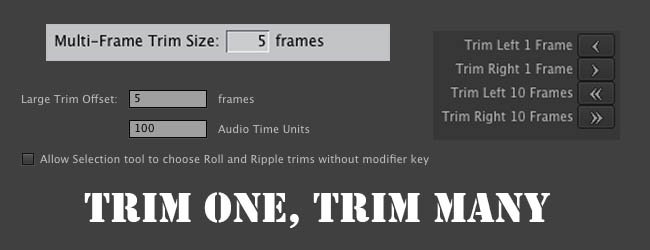
In Avid, you can trim one frame or trim 10 frames. Similarly, in Premiere Pro and FCP7, you can trim one frame or trim many frames. However, in Premiere Pro and FCP7, you can set how much "many" is.
So there you have it! A basic run down of the similarities and differences. Hope you enjoyed the article.

Gerard is a freelance broadcast editor and fellow geek who works in the small but congested urban jungles of Singapore. When he is not too busy swinging between editing suites and solving the intricacies of the L-cut, he keeps a blog and posts on the LACPUG (like everyone else should).
|