|
|
   
| Tutorial: Final Cut Pro X: Track Based Editing. |
July 2012
Final Cut Pro X: Track Based Editing.
by Richard Taylor
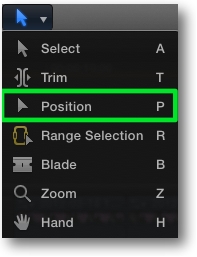
I really like the Magnetic Timeline in Final Cut Pro X. I find it a refreshing modern way of editing video. But if you prefer, it is very easy to override its magnetic features by using the Position tool instead of the main Select tool. This method allows you to freely move clips in the Timeline and leave gaps in their place.
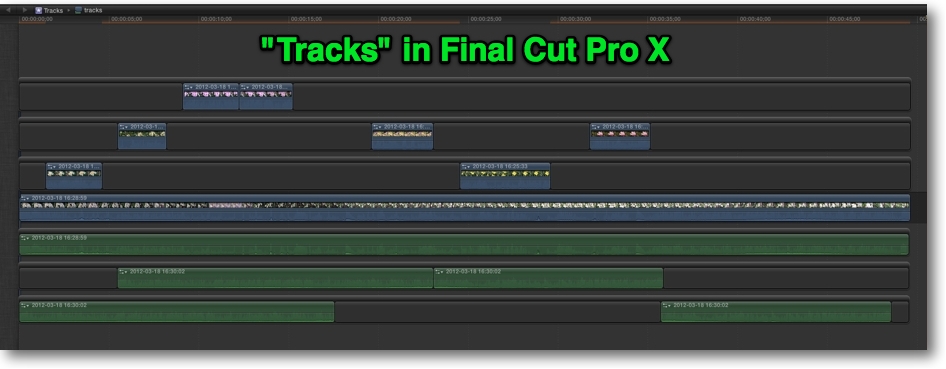
If want to use Final Cut Pro X and you'd like to edit the traditional track based way without the Magnetic Timeline like in Final Cut Pro 7, for the most part you can with Storylines. I am using the term track instead of Storyline in this tutorial for simplicity's sake because Final Cut Pro X doesn't actually have tracks. Tracks = Storylines = containers. This technique is for organizing multiple clips in a single track. If you are just dealing with a few single clips, you can attach them to the Primary Storyline. You also can use tracks in FCPX in combination with its Magnetic Timeline.
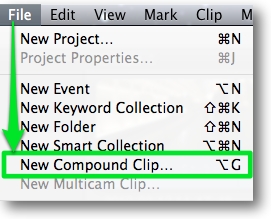
Let's get started with track based editing. In Final Cut Pro X, make an Event and import into it the media that you'd like to edit track-based. Click inside of your Event Browser and then go to the File menu and choose "New Compound Clip" or use the keyboard shortcut Option - G. This will create a new Compound Clip in your Event Browser. I'm using a Compound Clip to simplicity this tutorial but this would also work in a Project Timeline.
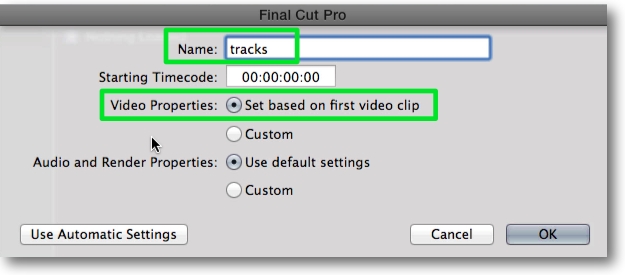
Here I've named my Compound Clip "tracks" and left the Video Properties to "Set based on first video clip".
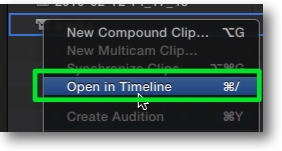
Right click on your new Compound clip and choose "Open In Timeline" or just double click it.
This will open a new empty Compound Clip in the Timeline.

In the Event Browser, select any clip and add it to the Compound Clip Timeline.
This clip is a placeholder and can be replaced or edited later.
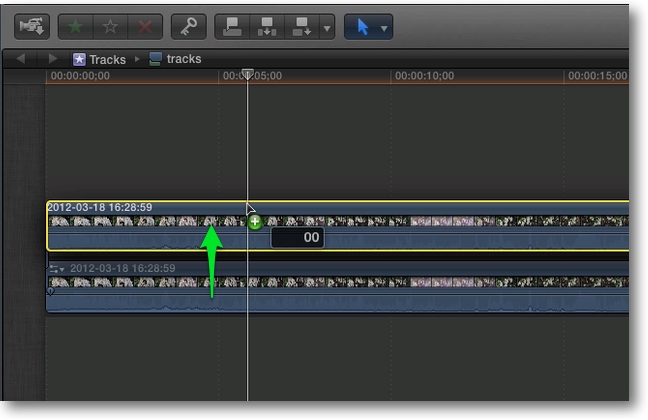
In the Timeline, select this clip and Option drag it up to make a duplicate above the first clip.
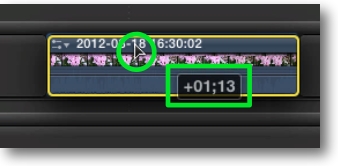
Make sure the beginning of both clips align and are at the start of the Timeline.
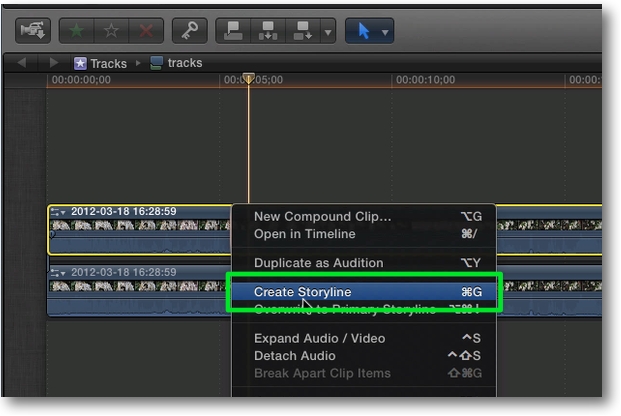
Right click on this top clip and choose "Create Storyline" or use Command - G.
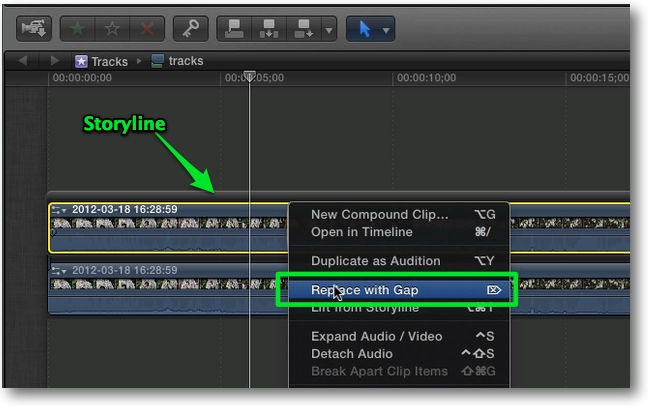
Right click on the clip inside of this Storyline and choose "Replace with Gap" or press the Delete key. In FCPX, gap clips in a Secondary Storyline are transparent and will allow what is below them to show through. You can make this Gap Storyline any length that you'd like by dragging its end to the right (longer) or to the left (shorter).
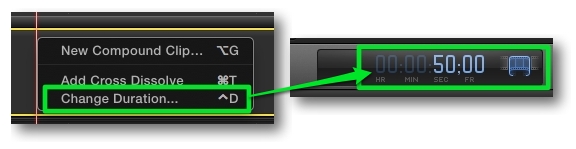
To make a custom project length, select the gap clip inside of the Storyline (not the Storyline itself) and right click and choose "Change Duration" or use the keyboard shortcut Control - D. Enter your custom length in the toolbar Timecode field and the Storyline will conform to the length of the gap.
From here on out I will be using the term track to mean Secondary Storyline.
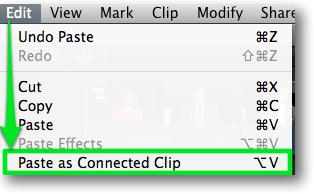
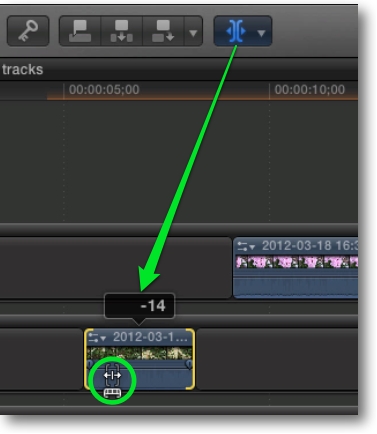
Select the track (not the Gap clip inside of the track) and choose Edit > Copy. Then move your Playhead to the beginning of the Timeline and choose Edit > Paste as Connected Clip or use the Keyboard shortcut Option - V.
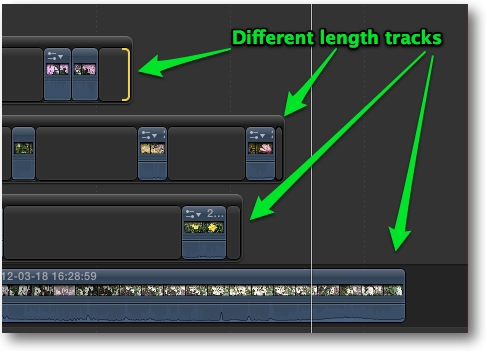
Repeat this procedure to make as many tracks as you'd like. Any track only has to be as long as the last clip inside of it so you can have different length tracks.
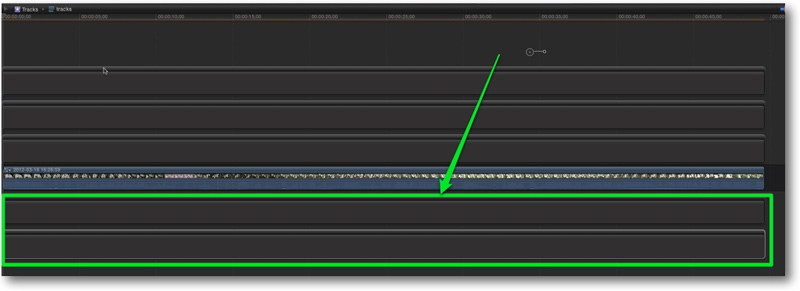
To add tracks below the Primary Storyline, like FCP7 audio tracks, just Option drag a track copy there.
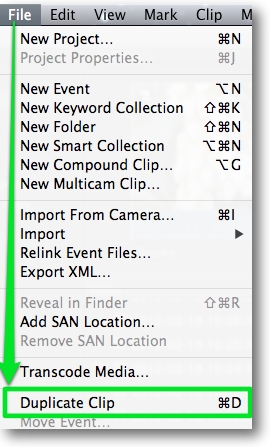
Once you have your tracks set up as you'd like, select your Compound clip or Project and make a duplicate of it to use as a template for future track based editing.
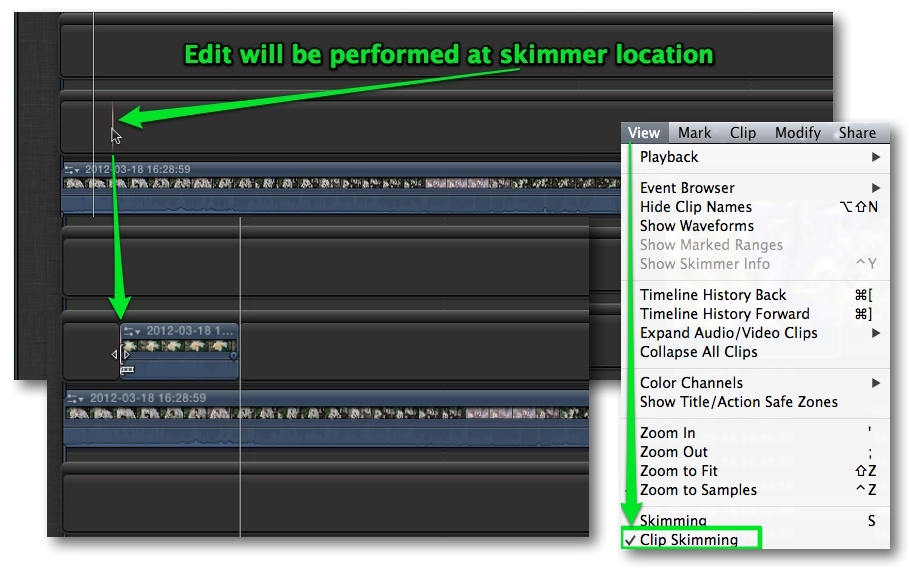
Now let's do some editing in our tracks. One of the neat things about track based editing in FCPX is you don't have to select a track (or use autoselect as in FCP7) to target a track for your edit. In whichever track your skimmer is located the edit will be performed at the skimmer location. Make sure Clip Skimming is checked on in the View Menu.
The main edits that you would use to place clips in your tracks are Insert, Overwrite and Append. Select your clip in the Event Browser, set an in and out point if needed, place the skimmer at the location of the edit in the track and then perform your edit. D is the keyboard shortcut for Overwrite, which will not change your track length. For some reason, there is no toolbar button for the very common Overwrite edit. To Insert a clip at the track skimmer location, use the keyboard shortcut W. Or you can select your track, place the playhead and click the insert Button in the Timeline toolbar.
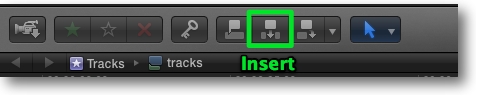
An Insert edit will ripple your track length and make it longer by the same length as the clip you inserted. If you want to edit Video only or Audio only, change the drop down menu or use Option - 2 for Video Only and Option - 3 for Audio Only before you perform your edit.

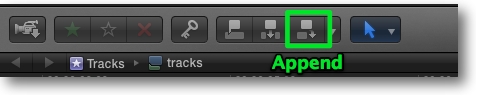
To Append a clip, place the skimmer anywhere in the track and press the E key. Or you can select the track, place the playhead and use the Append button in the toolbar. This will place the clip at the end of the track regardless of the skimmer location in that track. Append will make the track longer by the clip amount.
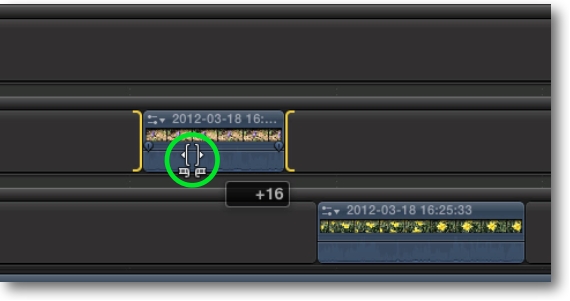
Once your clips are edited into your tracks, you can continue to edit them the same way you can a clip in the Primary Storyline. For example you can freely move them left or right in the track using the Position tool (P key). You can also drag clips up or down from track to track. If you use the Select tool you will have its magnetic editing properties in your tracks.
You can Slip a clip in a track using the Trim tool and click hold and drag in the clip left or right...
...or slide a clip with the Trim tool and Option key. You can also trim their length by edge dragging and the track will ripple accordingly.
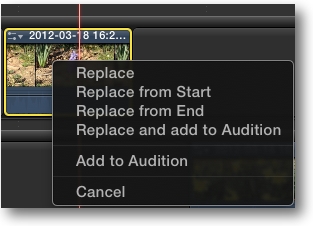
You can drag a clip from the Event Browser to a track clip and Replace it or make an Audition.
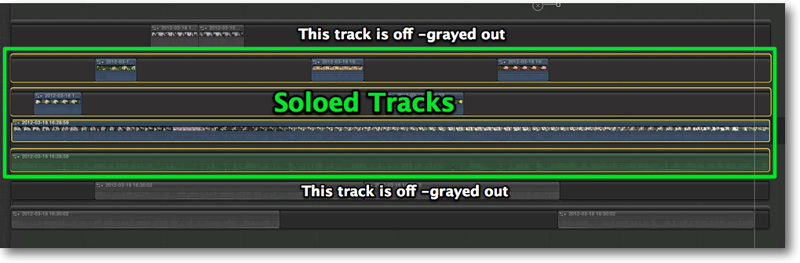
For some reason you can't enable or disable a Storyline in FCPX but you can solo them. Just select the track or tracks and click the solo button in the toolbar or use the keyboard shortcut Option - S. You can also disable individual clips in the tracks.
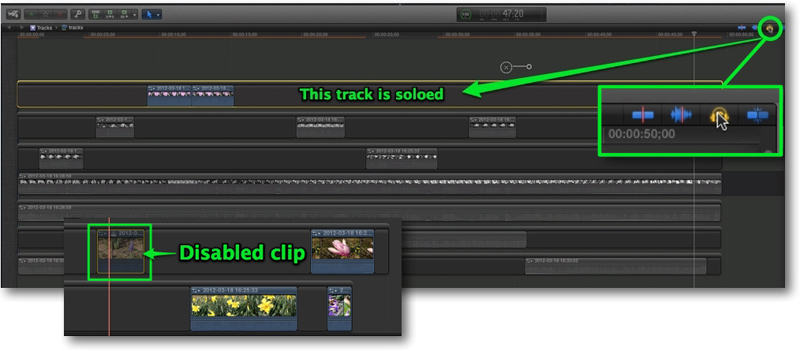
While editing, you can effectively turn a track "off" by soloing other tracks.
You can also use Roles and keep the clips assigned the same Roles organized in a specific track. Then you would be able to turn the clips in a track on or off for exporting via the Index Menu.

Most, if not all, FCPX editing techniques should work OK when using tracks.
So there you have it, an alternative track-based way of editing in Final Cut Pro X.
copyright © Richard Taylor 2012
Richard Taylor is a Level 2 Apple Certified Trainer for Final Cut Pro and does on-site FCP training and consulting in the Washington DC/Baltimore Maryland area. He can be reached via his FCPX website or you can follow him on Twitter @RichardTaylorTV
This article first appeared on FCPX.TV and is reprinted here with permission.
|