Introduction
We live in a world that is full of poorly
color balanced video. We see it everywhere on television. From
those cheap looking local TV commercials to the location shoots
for the news programs. Even if the video was shot with a top
of the line camera, poor color balance severly degrades the image.
I have always found the process of color
correcting video to be extremely painful. I wanted better tools,
but nothing really existed that could make the job easier. This
was the motivation for creating the Fleshscope which is part
of the Veescope
Signals Filters for Final Cut Pro. In this article, this
is the tool that I want to talk about and how it can make color
correction a lot easier.
The Problem Becomes the Solution
One of the things that tells us a video
is poorly color corrected are the skin tones. It is a dead give
away when someone has the wrong skin color. It is easy to spot
what proper skin color should look like but when the skin color
is off in the video, it stands out like a sore thumb.
It turns out that the problem is actually
part of the solution. All human skin is a consistent hue value
when captured by a camera. For years, this principle has been
incorporated into the Vectorscope.
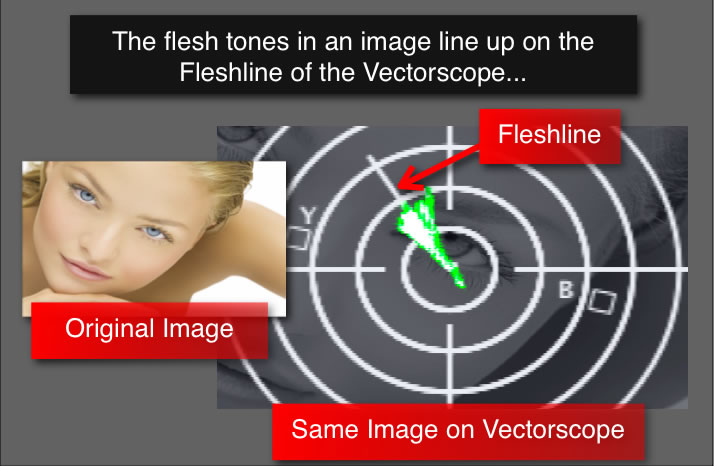
Color can be defined in terms of hue,
saturation and brightness. A Vectorscope plots all the hue and
saturation values contained in a video around a circle. There
is a straight line extending out from the center of the circle
located between the colors red and yellow. If the video is properly
color corrected, all shades of human skin should be centered
on this line. This is why this line is called the Fleshline.
Below is a sample image which contains mostly skin tones and
how it actually appears on the Vectorscope.
The problem with the Vectorscope is that
it does not give us enough information about the flesh tones
in the image. To solve this problem, we need a scope that displays
only the skin colors and this is what the Fleshscope does.
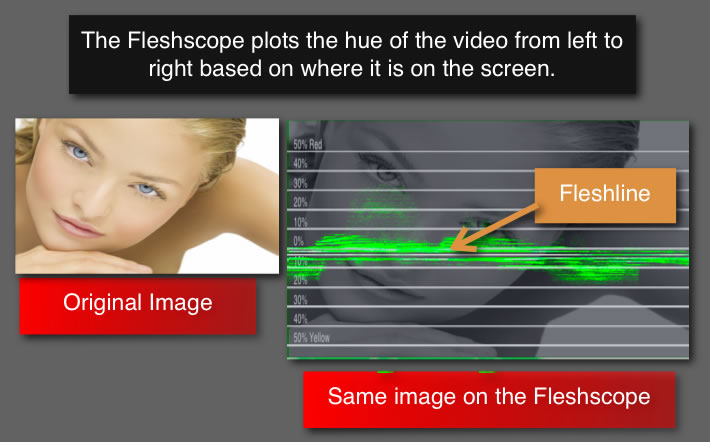
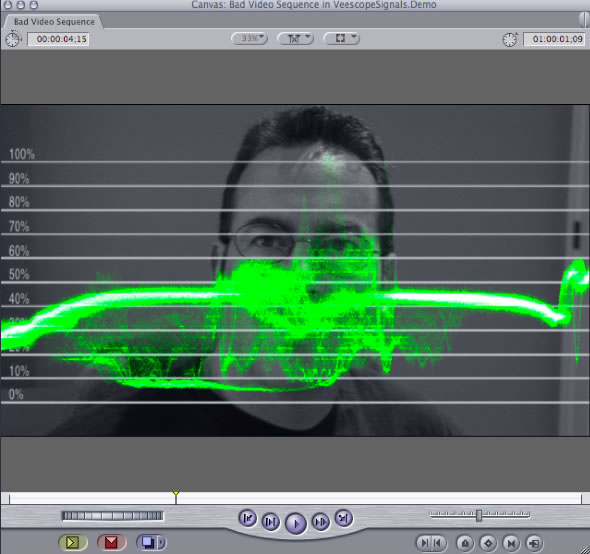
The Fleshscope works like another common
scope called the Waveform Monitor. Both scopes graph the video
left to right across the screen. Rather than plotting the brightness
of the video, the Fleshscope plots the hue of the video. The
very center of the scope is where all of the skin colors should
line up if the video is properly color corrected. The center
corresponds to the Fleshline of the Vectorscope.
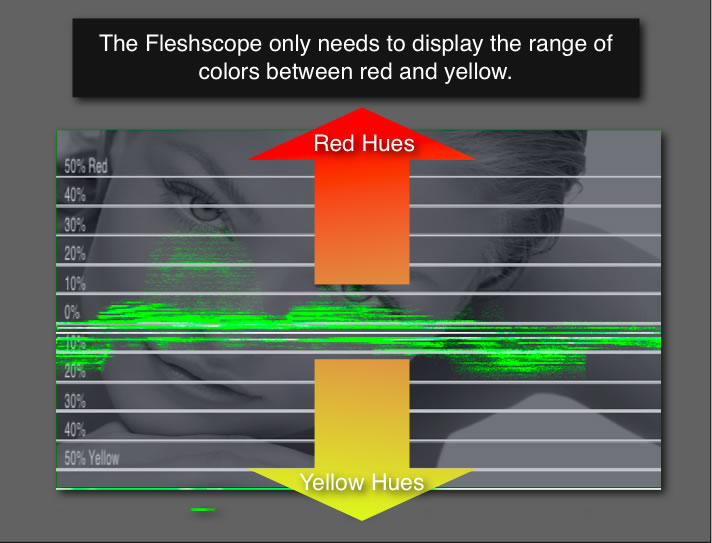
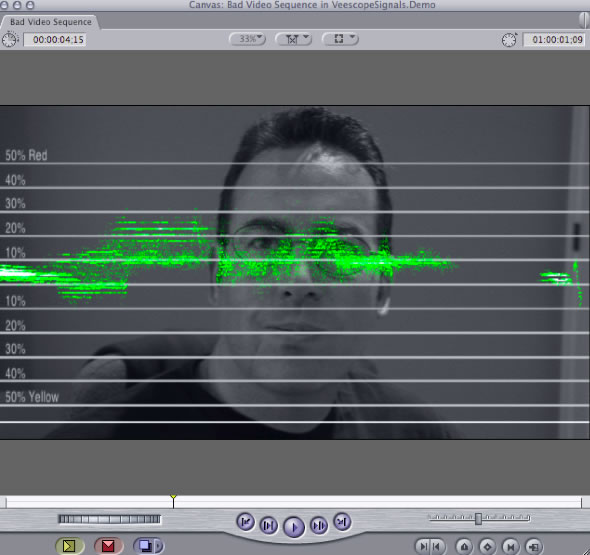
The Fleshscope does not show as much color information as the
Vectorscope. Since we are only interested in the Flesh tones,
only the colors nearest to the flesh tones need to be displayed.
Therefore, the Fleshscope only displays the colors between red
and yellow. Colors that are redder than skin colors are displayed
above the center line and colors more yellow than human skin,
are displayed below the center line.
Comparing the same image on both the
Vectorscope and the Fleshscope, the Fleshscope tells a lot more
information about the skin colors.

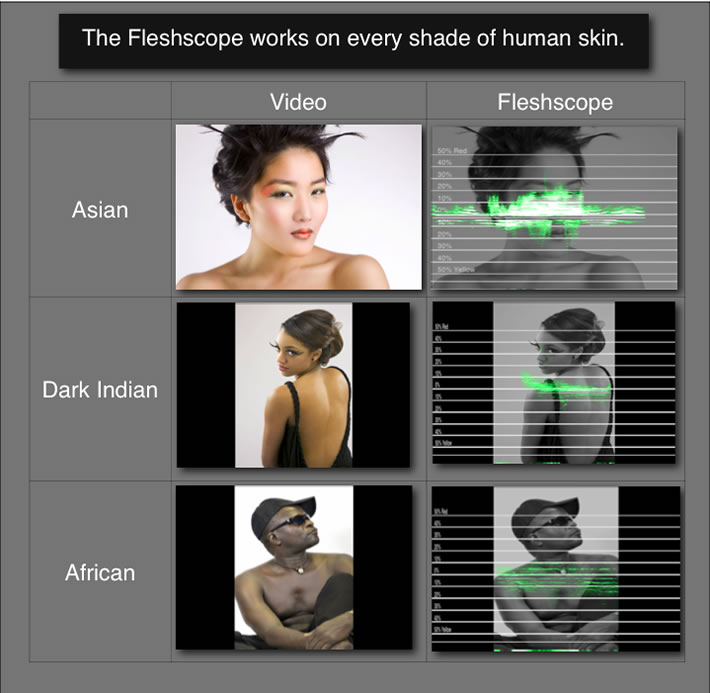
The Fleshscope works on all colors of
human skin, because all human skin is the same constistent hue
value. This principle means that the skin of any person appearing
in a video can be used as a reference point for color correction
using the Fleshscope.
Consider this video shot with the camera
set to the wrong color balance setting. It was shot under tungsten
lights while the camera was set for a day light color balance.
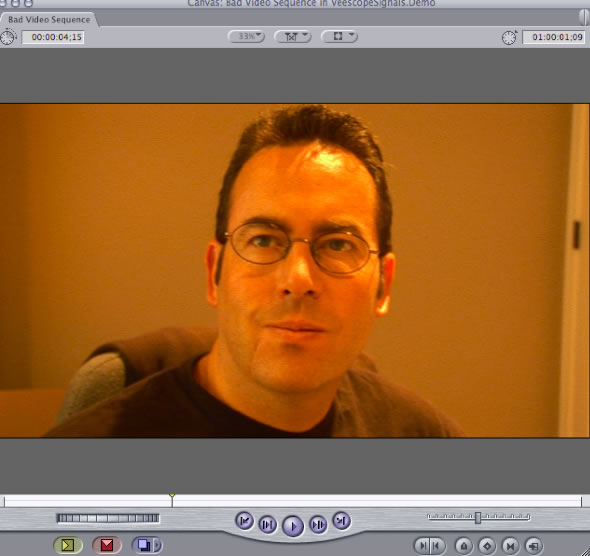
In order to color correct this video,
drag the 3-way color correction filter on to the clip in the
timeline.
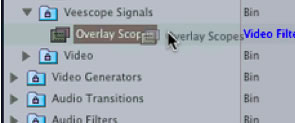
Next, drag the Veescope Signals Overlay
Scopes filter on to the clip.
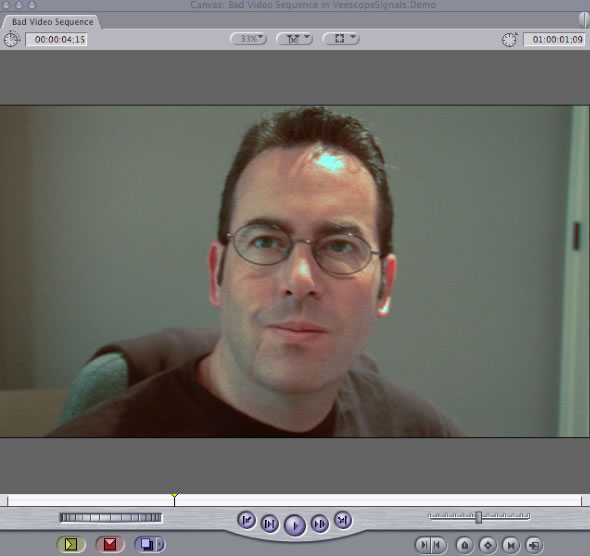
After applying these filters, open the
clip in the Viewer.
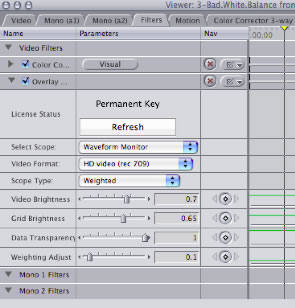
The video should also now have a Waveform
Monitor overlayed on top of the image.
In the Veescope Signals Filter section,
select the Fleshscope.
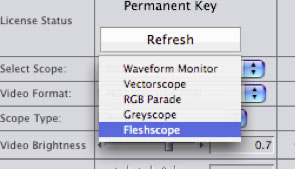
The Fleshscope should now be displayed.
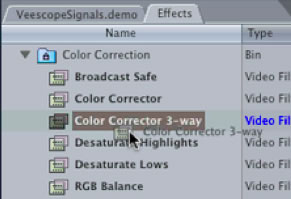
Click on the "Color Corrector 3-way"
tab so you can make adjustments the with the visual interface.

You should now see the visual interface
for the color corrector.
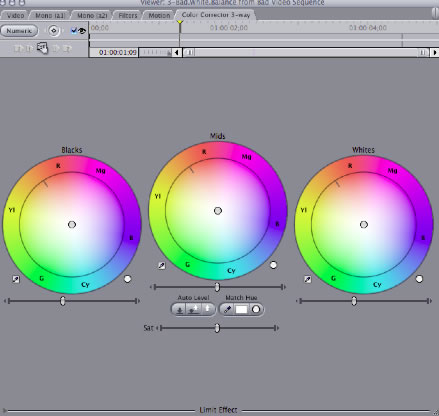
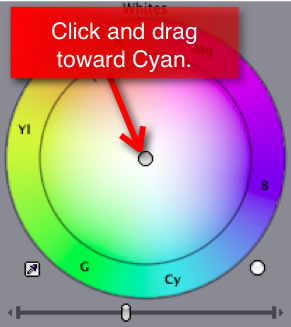
The video is really too orange looking,
so select the "Whites" controller on the color wheel
and start moving it in the opposite direction between "Blue"
and "Cyan".
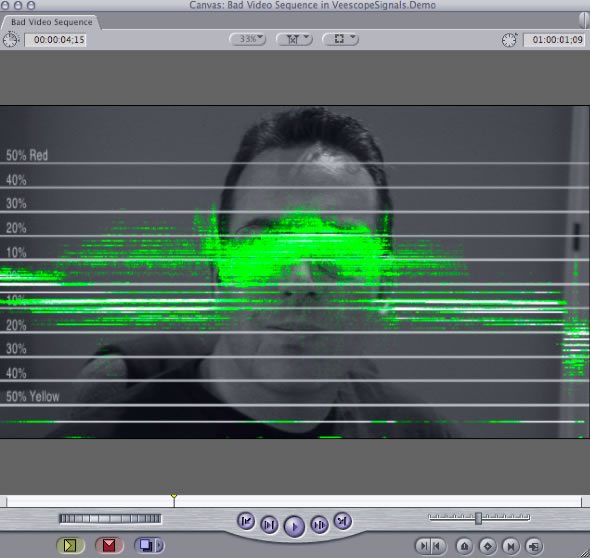
As the color adjustments are made, the
Fleshscope changes dynamically. You should start seeing a clump
of green forming around the face. This clump of green represent
the flesh tones.
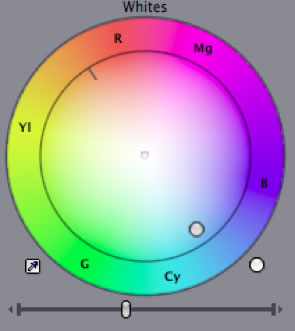
Keep moving the controller until only
the green clump is around the face and has disappeared from the
wall. The optimal setting for this video should be between cyan
and blue, as seen below.
Continue adjusting the controller until
the clump is near the center of the screen on the 0% line.
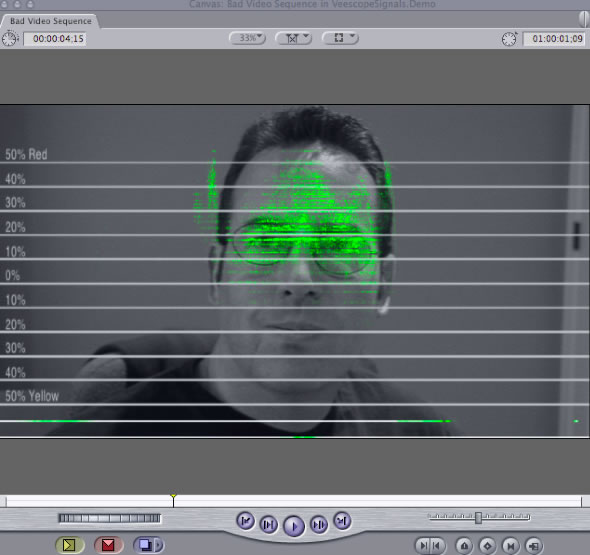
Drag the controller around the circle
until the clump that represents the skin tones are as near the
center as possible. Now, disable the Veescope Signals filter
and take a look at the color corrected video.
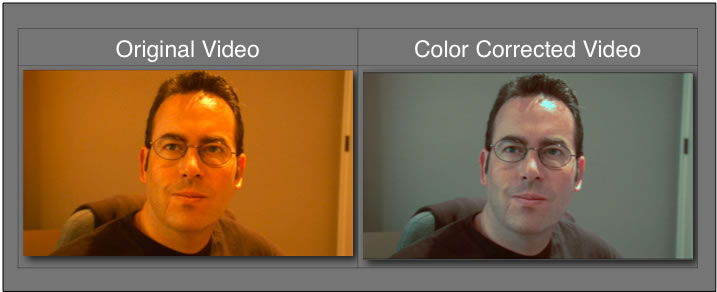
It will probably still look a bit too
orange, but it has improved dramatically. You may want to go
back and make further adjustments to the video to make it brighter
or bring the flesh tones closer to the Fleshline by adjusting
the "Mids". However, you can see just how easy it color
correct some really bad video. Here's a look at the before and
after side by side.
Conclusion
Color correcting video is a lot easier
when you have the right tools. The Fleshscope really does make
it easier to color correct video. You can download a demo version
via the website .
Hopefully, it will make your next color correction job much easier
copyright©Brad Wright
2008.
Brad Wright is the creator
of DVDxDV,
HDVxDV, Veescope Live, Veescope Key, Veescope Signals and Veescope
Hub. He worked as a software engineer during the technology
boom period of the 90s for various companies watching other people
get rich. Being unemployed during the technology implosion
of 2001 inspired him to start his own company, DVDxDV.
He now sells his products to major television and film studios
world wide.