Introduction
HDV is a tempting video format because
it offers high quality video images at a fraction of the price
of other HD solutions. However, creating the right HDV editing
workflow for a particular project is a difficult task. As the
creator of HDVxDV, a program which translates HDV video to many
different HD and SD formats, I'll explore the advantages of using
a non-native HDV editing workflow and show how HDV can be converted
to Quicktime with HDVxDV and edited in Final Cut 4.5 HD and above.
Native HDV Editing Drawbacks
A common misconception is that HDV is
just a high definition version of the mini-DV format. However,
the two formats are so different that about the only thing they
have in common are the letters D and V. While DV or DVC Pro are
very easy for the computer to edit, HDV in its native form is
extremely difficult for the computer to handle. Many native HDV
software and hardware based editing solutions claim to have better
quality than non-native solutions. However, even a simple cut
in a native HDV editing system will cause some kind of change
to the video. This means that new video has to be generated which
taxes your computer's CPU. More complicated things such as color
correction, titles, and resizing video frames will cause all
of the affected video to be re-generated. Therefore, in many
situations, native HDV editing offers little or no advantage
because so much new video needs to be created.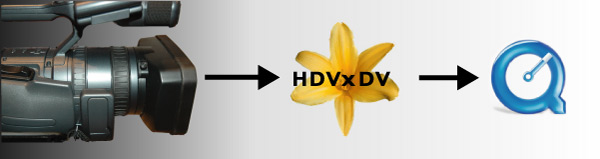
Another problem for native HDV is that
HDV and DVD use the same video encoding scheme, and therefore
have many of the same limitations. There are many types of scenes
that HDV doesn't handle well. If you've ever watched a slow fade
to black on a DVD, you may have noticed that the picture breaks
up into squares. This happens because the video encoder has hit
the limit on how much video it can compress. When this happens,
it leaves ugly squares scattered all over the video frame. Editing
in native HDV, forces these limitations on you. It will affect
the quality of the effects and transitions that you put in your
video.
Get it into I-Frames
To avoid these problems, the best thing
to do is convert HDV into an I-Frame based video codec. There
are several good choices for this, such as DVC Pro HD, the Apple
Intermediate Codec, and Uncompressed 8 bit and 10 bit. Once the
video is converted to one of these formats, editing becomes a
lot easier. The computer doesn't have to work so hard decompressing
the HDV video.
I-frame based codecs don't require re-rendering
when a cut edit is made.
I-frame rendering is a lot less CPU intensive and many effects
can be done in real-time and displayed on an external monitor.
This means more streams of video can be combined on the screen
in real-time.
The downside of converting video from
HDV to another format is that it requires more hard drive space
and it takes time to do the conversion. First the HDV video has
to be captured to the computer and then converted to another
codec. This conversion process can be very fast for codecs such
as the Apple Intermediate Codec or Uncompressed HD, but DVC Pro
HD will take much longer because the video must be re-sized to
fit. While the HDV video file requires 14 gigabytes per hour
of video, DVC Pro HD requires 4 times as much space for 1080i.
Uncompressed HD requires as much as 500 gigabytes per hour. However,
the cost of the extra hard drive space may be trivial compared
to the amount of time and money you save in editing and post
production.
Capturing and editing video with HDVxDV
Setting up a Sony HDV Camcorder or
Tape Deck for capture
In the menu settings of your Sony HDV
camcorder or tape deck make sure you have the followings settings:
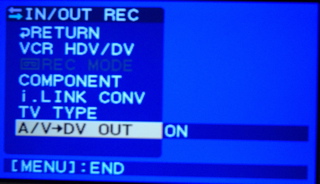
Make sure that the setting A/V->DV
OUT is set to ON.
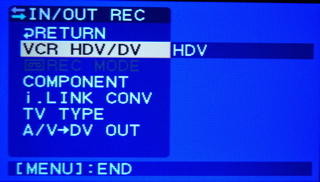
The device must be in HDV mode.
Make sure that the VCR HDV/DV setting is set to HDV.
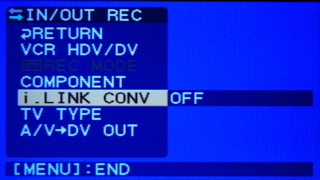
The i.Link CONV setting must be
OFF.
Capturing HDV from an HDV device
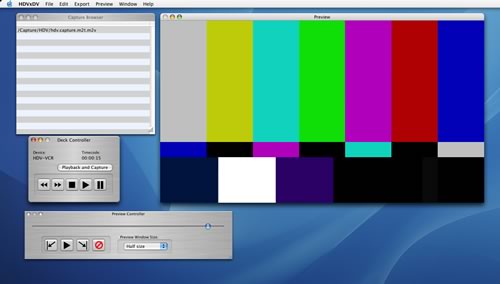
Start HDVxDV and you should see the following
-
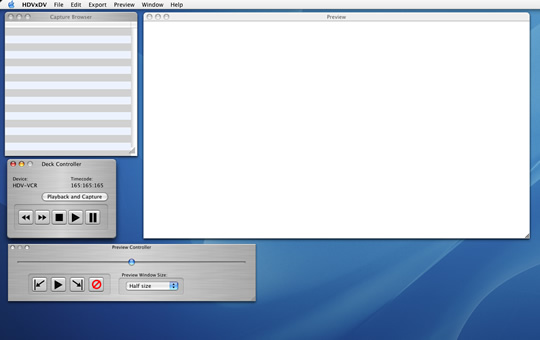
If your HDV device is connected, the
Deck Controller window will look like the this.
You should see a device listed under
the Device: text and the buttons for controlling the deck
should be enabled. If you don't see this, try checking the connection
between your computer and your HDV device.
Use the Deck Controller to locate
the section of the tape that you want. You will need a separate
monitor to preview the video from the HDV device. HDVxDV doesn't
allow you to preview the video until it is captured.
Once you have found the location you
want to capture, press the Playback and Capture button.
You will see the following dialog appear.
Specify a name and folder to place the
new capture file. Make sure that this disk drive has plenty of
space to handle the capture file. You will need at least 14 gigabytes
of space per hour of video.
If the HDV device is stopped, HDVxDV
will start it. If you have the HDV device paused, you will need
to press the pause button again to resume playback. The Playback
and Capture button will change to read Stop Capture.
Press the Stop Capture button
when you are ready to stop the capture process. The HDV file
that you created should appear in the Capture Browser.
Converting to Quicktime
Once you have captured an HDV file you
are ready to convert the video to a Quicktime movie. If the file
you want to convert isn't already loaded in the Capture Browser,
use the Open Capture File command from the menu.

Once you have loaded the file, you can
use the Preview Controller to scrub through the timeline.

If you would like to adjust the size
of the preview window, use the Preview Window Size control
button to change the size of the window.

The first step in exporting video from
HDV to Quicktime is to determine the frame size that you want
to use. To do this open the HDVxDV preferences panel by
selecting it from the menu.
The HDVxDV preferences panel will appear:
In the preferences panel, you can pick
the output resolution under Frame Size.
Select the size of the video that best
fits your needs. If you plan to export the video to the Apple
Intermediate Codec, use the Leave as is option. If you
want to export to DVC Pro HD, you must use the correct frame
size for DVC Pro HD 1080i or 720p.
You may need to change the field ordering
as well. Set the Field Dominance setting which best reflects
your needs.
Once the preferences have been set, select
one of the two export menu items. The first way to extract is
Batch Encode Movies...

This option allows you to export all
the movies in the Capture Browser. This is the best setting
if you want to convert a great deal of HDV files into Quicktime
movies. You can load the same HDV file into the Capture Browser
multiple times and mark different in and out points
for each copy. This way you can convert selected scenes into
Quicktime movies.
After selecting this option, the Export
panel will appear.
This is where you select the video compression
codec to use in the Quicktime movie. Here's a brief explanation
of the options.
DVC HD 1080i60
- This setting is for creating video with 1080 lines of resolution
using DVC Pro HD.
DVC HD 720p60
- This setting is matched for video with only 720 lines of resolution
using DVC Pro HD.
8 bit (4:2:2) Uncompressed and 10 bit (4:2:2) Uncompressed both
of these settings require a large amount of hard drive space
and Final Cut Pro must be installed on the system.
Expert Settings
- This setting allows you to select any Quicktime codec that
is installed on your computer. Use this selection to get a list
of codecs that are installed on your computer. From this list
you can select the Apple Intermediate Codec.
After selecting the codec, HDVxDV will
ask you for a folder to save the files to.
This folder is where all of the Quicktime
movies will be saved to. The names for the individual files will
be the same as the names of the capture files. If there are any
duplicate capture files in the Capture Browser, they will
have a number appended to them.
After pressing the Export button,
the progress panel will appear:
Once the conversion is complete, the
progress panel will disappear and the Quicktime movie will be
ready to use. You can press Cancel at any time during
the conversion.
If you want to convert only one of the
files that is in your Capture Browser, use the To Quicktime
Movie... selection in the menu. It works the same as the
Batch method, but it will only convert one file.
Bringing The Video Into Final Cut
Pro
After converting the video, the next
step is to bring it into Final Cut Pro by dragging it into the
your Final Cut sequence. Make sure you have set the sequence
settings to match the video format you are trying to import.
You will notice that there is an orange
bar at the top of the sequence. This is because Final Cut imports
the video with a distort setting of 33. Select the clip and press
return to bring it up in the Viewer window.
In the Viewer window, click on the Motion
tab.
Open the Distort parameter.
Change the Aspect Ratio setting
from 33.33 to zero.

The orange bar should disappear.
You are now ready to edit the video.
If you turn on the timecode overlay, you will see that the timecode
from the original tape is preserved. This is because HDVxDV puts
the original tape timecode into the Quicktime file when it does
the conversion.
Final Thoughts
Working with HDV is very easy when you
convert it to an I-Frame based codec. For monitoring HD, I use
a Black Magic
Design Decklink HD card combined with a Black
Magic HDLink connected up to an Apple Cinema display. This
solution will display video encoded at 1440x1080 resolution and
output it at 1080i HD (1920x1080). If you have a Sony HDV camera,
editing video at this resolution is ideal, because you don't
have to re-size it during the conversion process. You can create
a custom sequence in Final Cut Pro 4.5 HD and edit at 1440x1080,
but see the video displayed at 1080i on an HD monitor. The Apple
Intermediate Codec and 8 bit or 10 bit uncompressed both support
the 1440x1080 resolution.
copyright©2005 Brad Wright
Brad Wright is
the creator of the very similarly named DVDxDV
and HDVxDV
applications. Brad has been a featured speaker at LAFCPUG meetings
four times and appears on the "HDV
Night" Lafcpug on DVD. From time to time Brad also appears
on the Inside Mac Radio
Show.