|
   
| Tutorial: It's Alive! How to Make Cut-Out Animations in FCP. |
November, 2005
It's Alive!
How to Make Cut-Out Animations in FCP.
by Jude Cotter
When I was little, I had a felt board.
It was basically a board made of felt that came with a set of
felt cut-outs in the shape of animals. You could make the animals
stick to the felt stage and drag them around to create your own
little performances. It wasn't sophisticated, but it gave me
hours of fun.
I haven't seen a felt board for years
now, but just recently while I was making a short animation using
a photoshop file it occurred to me that I was still using the
felt board method - only these days it's called 'cut-out' animation.
This tutorial outlines a simple way of
making cut-out animations similar to the style used in programs
such as 'Monty Python's Flying Circus', 'Angela Anaconda' and
'South Park' with FCP. This is an intermediate level tutorial,
and a basic working knowledge of Photoshop and FCP is required.
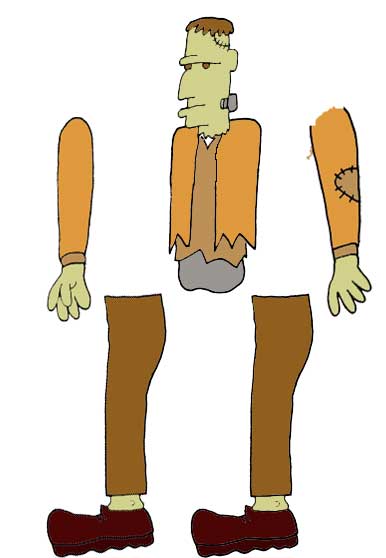
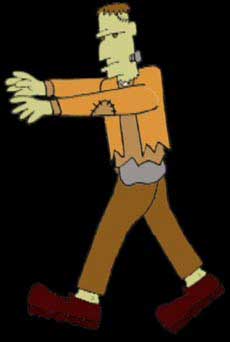
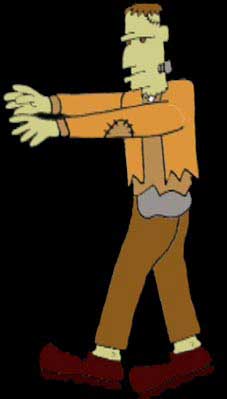
The first thing you need to do is to
make your character. For this example my good friend Shaun
Salmon sketched a Frankenstein's monster for me, which I
scanned into photoshop and coloured.
I chose to use the Franky character
for two reasons:1. It's kind of amusing to demonstrate animation
using the original (re)animated object and 2. Franky lurches,
and that means his walk cycle is a lot easier to follow than
something with working knees, ankles, elbows and so on.
If you want to work with the example
character you can download it HERE,
but as always, feel free to use your own material to work with
if you prefer.
You can see that in the Photoshop document
below each part of Franky has been put onto a separate layer,
and that each part has a transparent background. Both
of these steps are critical for using them as puppet parts in
FCP, so keep that in mind if you are designing your own character.
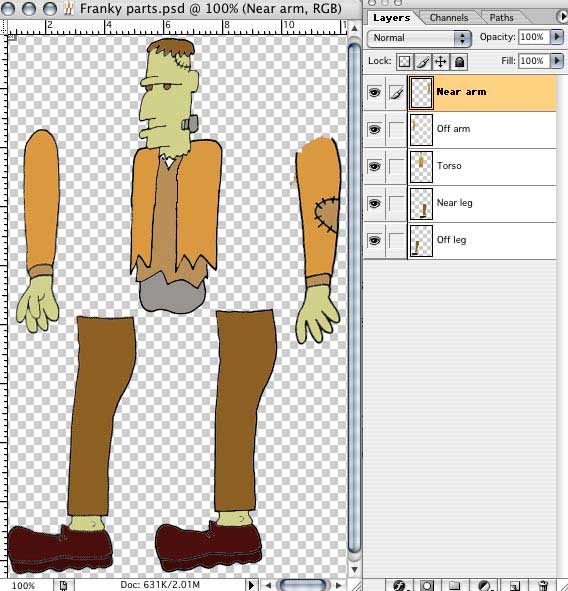
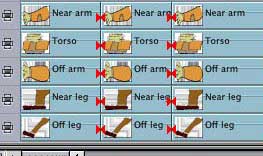
It also helps if you name your layers
in a way that will let you easily identify them in FCP. For example,
I have the layers "Near Arm" "Torso",
"Off Arm", "Near Leg" and "Off
Leg". (The 'near' and 'off' thing is my own quirk -
you can call them "Left" and "Right" or "Wibbly"
and "Potook" if you want, as long as it makes sense
to you what things are when you need to know.)
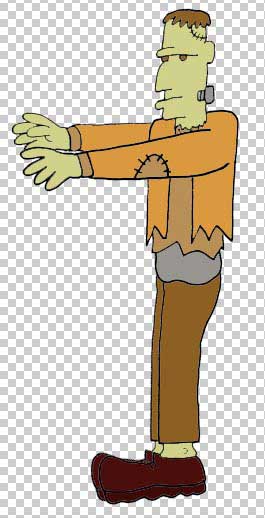
While you're still in Photoshop, use
the move tool (or Edit > Free Transform) on each of
the layers to assemble your character and test that all the bits
fit together correctly.
Now we're ready to jump over to FCP and
get started on the fun stuff.
To get there, save the document as a
Photoshop file - being careful not to merge or flatten
the layers. Then open FCP and select File > Import > Files
> and select the file from the popup menu.
Double click the franky file in the browser
and you will see that in FCP the photoshop document is magically
transformed into a layered sequence.
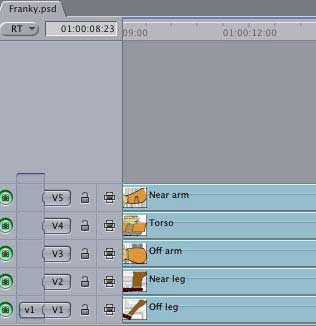
This means that each layer of the character
can be manipulated separately, allowing you to move single parts
like legs and arms without affecting the rest of the image.
Due to the wonders of modern technology
all we need to do to make our characters move is use the rotate,
scale and positioning tools on the layers to move
the parts to their extremes, and then use key frames to
tell FCP when the parts should arrive at those positions. All
the hard work of 'tweening' (drawing the positions that occur
in between those extremes) is handled by FCP.
That might sound a little confusing,
but it's really quite simple once you get started. To demonstrate
let's just do something easy like getting Franky to travel
across the screen.
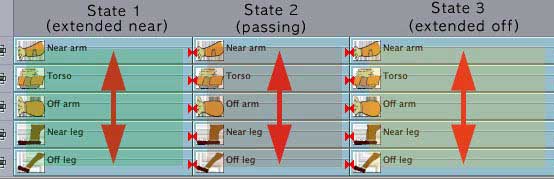
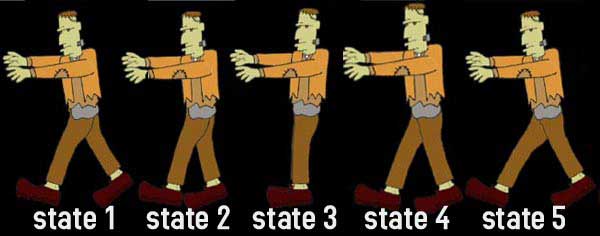
In any animation the simplest way to
begin is to decide on your extremes - the points of extreme
motion. In this very basic walk cycle there are three
of these -
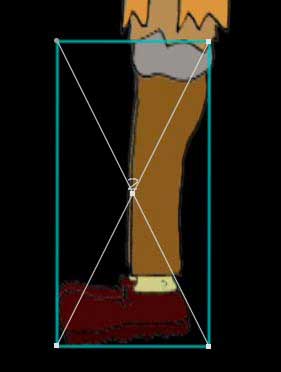
1.
The near leg at the most extended forward position like this
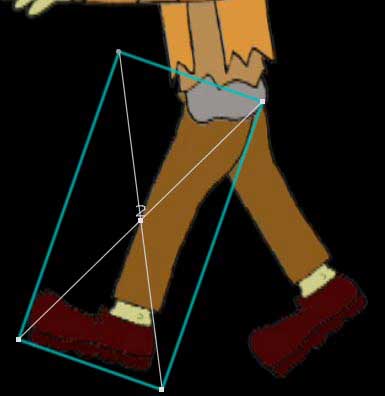
2. The
off leg at the most extended forward position like this
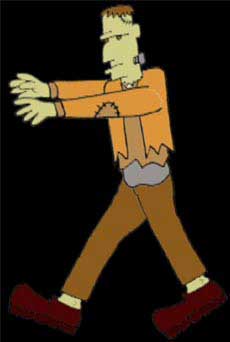
3.
The middle (passing) position.
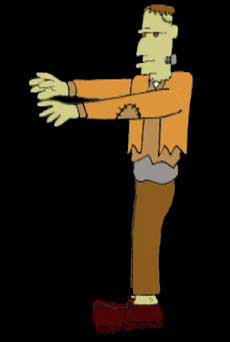
Don't forget that you also need to animate
the upper parts of your walker - here Franky's torso and head
lurches forward and backwards and his arms move slightly to reflect
this lurching.
So how do we make these extremes? With
care and patience and the wireframe function, of course.
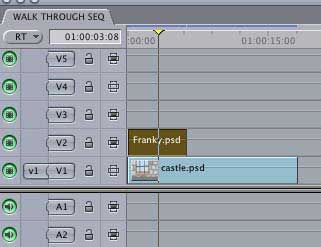
Before we get into that, to reduce confusion,
at this point it would be a good idea to close all your open
timelines and make a brand new timeline. Call this timeline
'WALK THROUGH' and double click it in the browser to open
it.
Now put a copy of the franky.psd
(or your own character's .psd) on the WALK THROUGH timeline and
double click it on the timeline to open the layers.
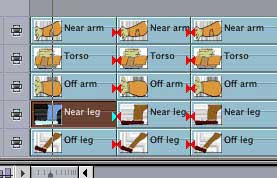
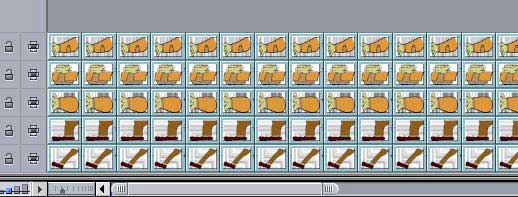
Using the blade tool, or control-v,
make a series of inline cuts across all tracks of the .psd, until
you have three sets of parts like this.
Don't worry too much about how long or
evenly spaced the sections are - we will be adjusting these later.
Once you have done this each of the sections
in each layer is a separate entity that can be manipulated independently
of all of the others - that is, if you move one version of the
torso, it will no longer affect the other torsos in the same
timeline.
So, let's make the three extremes.
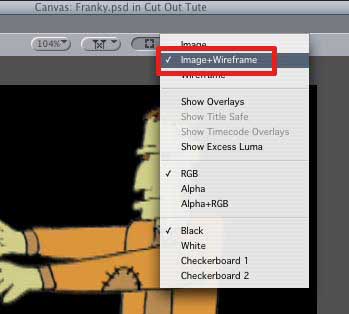
In your canvas, turn on Image and
Wireframe
Choose the body part you want to move
by selecting it in the timeline.
You should see a blue bounding box
appear in the canvas around the part you selected
Now using the arrow tool in the
canvas, you can shift and rotate the parts to where
you want them to be. To move a part, click and drag anywhere
inside the blue bounding box. To rotate, move the arrow
tool over a corner of the box until you see a rounded arrow,
then click and drag left or right.
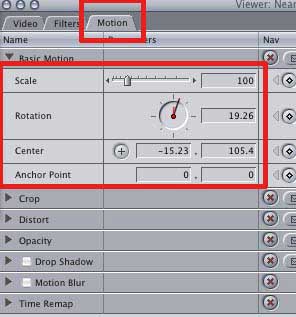
If you want more precise movements, you
can use the motion tab controls for each part of the animation
- just be sure to double click what you want to adjust on the
timeline first to load the correct version into the viewer.
If you need to do any foreshortening,
use the scale and perspective tools - it's quite amazing
what you can fudge in this mode with a bit of motion quick trickery.
So, go ahead and make your three extremes
- remembering that each group of vertical layers in the timeline
is a separate version of your character in a different state
of movement.
Now that you have the three extremes,
you need to repeat them so that you can do a test of your
character walking on the spot to see how it looks.
This is easy enough. First reduce the
length of all your sections to about four frames and butt them
up against each other. If you were doing faster movements you
might work in two frame units, or even single frames. Slower
movements use more frames or more pictures.
Use the arrow tool to lasso all
of the layers and copy them, then put your playhead at
the end of the group and paste. And paste again, and again
and again, until you have a reasonable set of repeats of your
extremes.
Now go back to the head of the timeline
and play this down to see how it looks.
Terrible, right? Well, what did you expect?
You've only been in the animation business for twenty minutes.
Geez!
So now we want to make a few more stages
to go in between the big extremes to smooth off the movement
a little. These are called (wait for it) in-betweens.
So let's take a copy of the first state
(in my example this is the near leg fully extended) and adjust
the legs, arms and torso so that they are about halfway between
the fully extended position and the fully closed position.
Insert this new state between the first
and second states, so your timeline goes : near leg fully extended,
near leg half extended, feet together. Then make another one
of these for the off leg so you have an in-between for both legs.
Insert the new states in the correct
positions on the timeline - meaning you should now have : near
leg fully extended, near leg half extended, legs together, off
leg half extended, off leg fully extended, off leg half extended,
legs together and so on.
Play the timeline to check that everything
is in the correct order and functioning the way you want it to.
Add more in-betweens for smoother movement, or experiment with
extending and/or shortening the number of frames for the different
states.
Once you have your character walking
nicely on the spot, its time to make them walk around inside
his or her own world.
In Photoshop, make yourself a background.
Here I've got a nice bit of castle wall and floor from Shaun,
but you could import a photograph or a scanned image or even
work over the top of video. Its up to you.
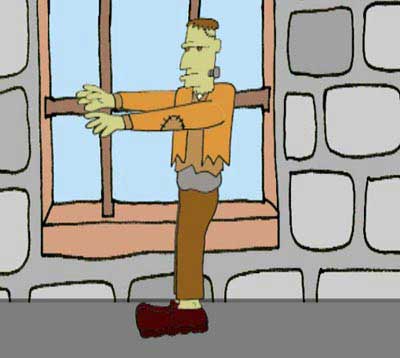
So, bump the franky.psd on the timeline
up to V2, then import your background and put it on the
timeline on V1.
You should be able to see something like
this in the canvas.
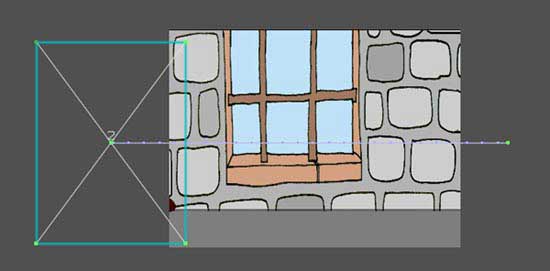
Now to make your character travel from
one side of the screen to the other, we just need to set a couple
of key frames.
First, put your playhead at the beginning
of the clip and select the franky.jpg in the timeline with a
single click. Then in the canvas drag the whole thing to the
extreme right of frame so that the entire character is off screen.
Mark a key frame by hitting the add motion key frame button,
or pressing control-k. You should see the cross in the
bounding box turn green to tell confirm that your key frame has
been set.
Then put your playhead further down the
timeline and drag the franky layer to the extreme left of screen,
so that he is entirely off screen, and add a key frame.
You should be able to see the motion
path you have created in the canvas, like this.
And now, with a little rendering,
your character should walk right across the screen.
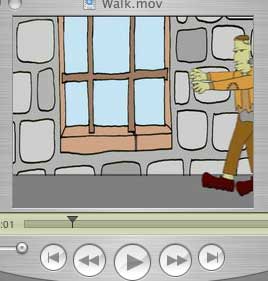
Click on above to watch QT
movie. 1.8MGBs
And that's pretty much all there is to
it.
Of course you can apply the same principles
to any movements that you need your characters to make - just
remember that the parts of the character are moved in their own
layered sequence, and the whole character in is moved in the
canvas.
I hope this tutorial comes in handy -
and gives you as much fun as my felt board circus did all those
years ago.
By the way, the Franky character and
castle background are copyright©Shaun Salmon. You can check out some of Shaun's weekly strip, "All Our Yesterdays." HERE.
Copyright©2005 Jude Cotter
Jude
Cotter lives and works in Australia as a freelance broadcast
editor, FCP trainer and trouble-shooter.
All screen captures and textual
references are the property and trademark of their creators/owners/publishers.
|