How
to Create an Alpha Mask Using Motion 2
By Steve Douglas
You've shot some nice video but now you
would like to take the subject out of the foreground and background
and place it on top of another background scene. It is one thing
to do this if you were shooting with a blue or green screen and
could chroma key it all but, alas, you were outdoors on location
and didn't have that luxury. As an underwater film maker, this
situation is the norm for me. Sometimes I like to play and be
a bit creative with it all and with the particle emitters in
Motion there are all kinds of possibilities. Sure Motion comes
with its own aqua balls, leaves and butterflies but does it have
lions, tigers and bears? Oh my, no it doesn't and that is what
you want. In fact, you want a whole bunch of lions and tigers
and bears and even have that footage from the zoo you shot or
the safari you went on.
Creating the necessary mask in
Motion is not a difficult procedure so lets begin with this effective
but simple tutorial.
1.
Once you have selected the frame from which you wish to separate
the object from its surroundings, import it from your Motion
File browser into the canvas. Keep in mind that we are
working with a still image here which you can make and export
to Motion from Final Cut Pro. You can use a moving image
but only if it is pretty much stationary like a talking head.
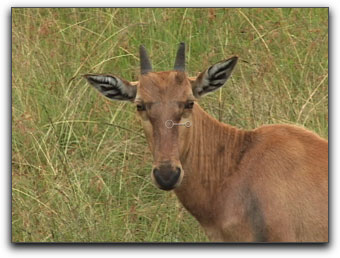
Original
Frame from Video in Canvas
2.
Create a mask image by hitting Command/ Shift/M which will then
show up in your layers tab. Drag the image mask above the object.
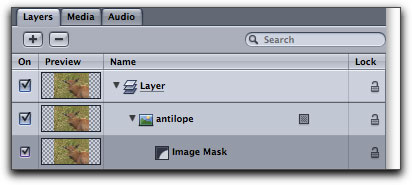
Creating the Mask image |
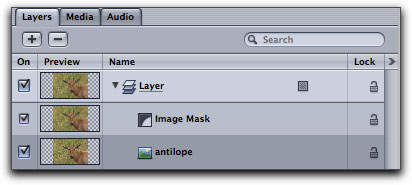
Bring the Image Mask to
the top of the layer |
3.
Highlight the object itself, not the image mask.
4.
Use the B Spline tool to separate your image from the background
and foreground.
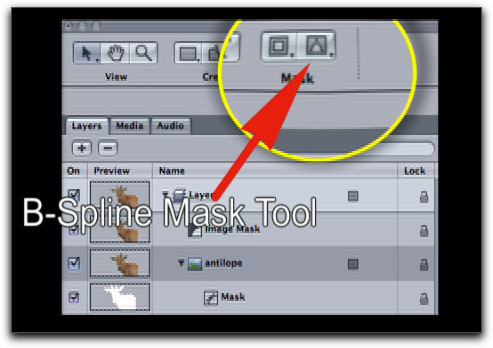
B-Spline
Mask tool
When you have gone all the way
around your image, the last connecting dot will loop them all
together in one complete mask. When applying the dots which make
the mask I will frequently zoom in on the object in the canvas
to 200% or more. This enables me to follow the outline, separating
the image more closely from its surroundings. Each of the b spline
markers or dots can individually be moved and adjusted by simply
clicking on them and making your manipulations at that point.
As you can see from the image, because I have zoomed in while
applying my mask points, they appear very close together. This
enables me to get a more specific mask without 'accidently' including
unwanted back or foreground material.
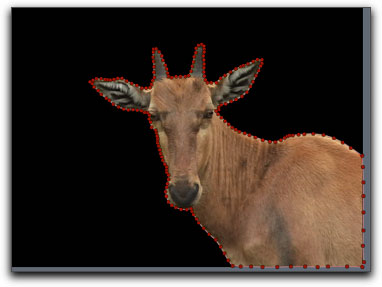
The
completed mask is now ready for Export
5.
Now we highlight the image mask in the layers tab.
6. Go
to 'File/ Export and name your mask if you have not already done
so in your layers tab. You may export this mask to your
desktop or, as I do, export it to a special mask folder to house
your collection of masks for current or future projects.
7.
Check the under 'Kind' it says Quicktime Movie and click 'Options"
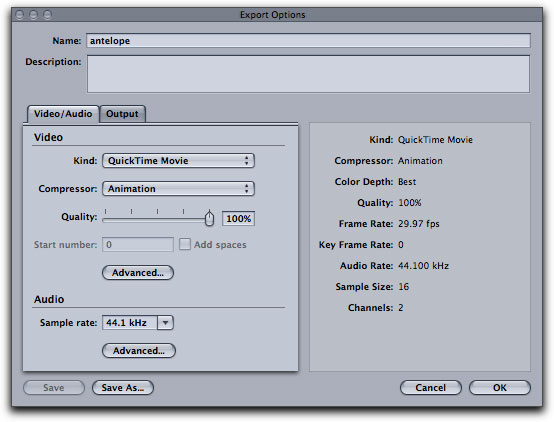
Export
Options Window
8.
A new window comes up repeating that it is a Quicktime movie,
however below 'kind' it allows you to set the compressor. Set
it for Animation and click on 'Advanced'
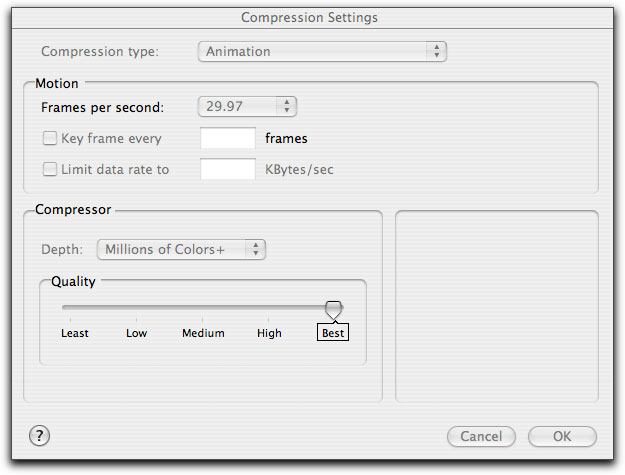
Compression
Settings Window
9.
Your compression settings window will open up. Under 'Depth'
I click on Best Quality and 'Millions of Colors +'
10.
Click OK , close your windows and export.
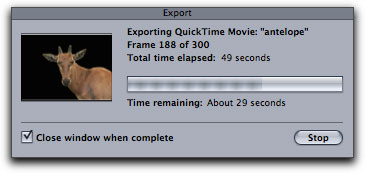
Exporting
is a breeze
Congratulations, you have created an object mask with an Alpha
channel in Motion. This can now be looped and placed in your
particle emitter or replicated to create herds of creatures .
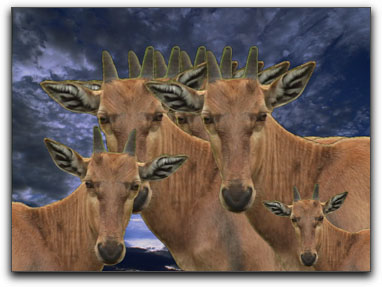
Funny
looking herd, I was rushing (gg)
Bottom line, you can have a lot
of fun playing with masks, they have hundreds of enjoyable and
creative uses. Hope this is one you'll find yourself using.
HAVE FUN!!!!!!!
Steve Douglas,
is an underwater videographer and contributor to numerous film
festivals around the world. A winner of the 1999 Pacific Coast
Underwater Film Competition, 2003 IVIE competition, 2004 Los
Angeles Underwater Photographic competition, and the prestigious
2005 International Beneath the Sea Film Competition, Steve has
also worked on the feature film "The Deep Blue Sea",
contributed footage to the Seaworld parks for their Atlantis
production, and is one of the principal organizers of the San
Diego UnderSea Film Exhibition. Steve leads both underwater filming
expeditions and African safaris with upcoming filming excursions
to Kenya, Bali and the Red Sea. Feel free to contact him if you
are interested in joining Steve on any of these trips. www.worldfilmsandtravel.com
copyright © Steve
Douglas 2005
This article first appeared on www.kenstone.net and is reprinted here with permission.
All screen captures and textual references
are the property and trademark of their creators/owners/publishers.