It's probably
one of the most frequently asked questions on the Motion forums.
Here's the scenario: you use Motion to create some nifty animated
text for your Final Cut Pro project. It looks great. You bring
it into Final Cut. It looks awful. What happened? Can it be fixed?
Read on.
Text in Motion
Here's an example of some text created in Motion for use in a
Final Cut Pro sequence. Since this Final Cut project uses DV
footage, the Motion project is set to DV. In Motion, the text
looks nice and crisp.
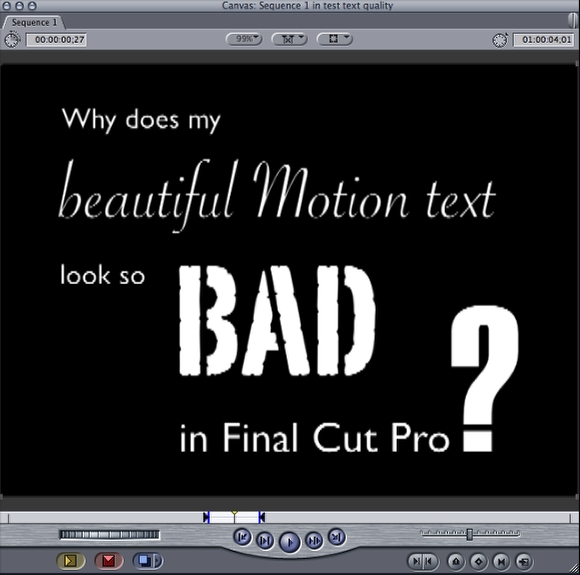
Text in Final Cut Pro
Here's the same text, after importing the Motion project final
into Final Cut Pro, and dropping into a sequence. Notice how
jagged the text has become. What happened?
Why your text looks bad: reason #1
Because you are looking at FCP's Canvas.
That's right. If your program is
an DV program that is intended to be viewed on a television set,
then the only way you can judge the quality of your video is
by viewing it on a monitor - preferably a calibrated monitor
at that. Interlace flicker, title safe, and color space: these
issue can only be accurately assessed on a monitor.
Why your text looks bad: reason #2
Because you are looking at FCP's Canvas.
Okay, that sounds like reason #1,
but stay with me here. You see, by default, the Canvas is only
showing one field of your video - and in DV, every frame has
two fields - so you are only seeing half the lines of resolution.
Plus, the Canvas is scaling your
video to account for the difference between square computer pixels
and the non-square pixels of DV video.
Both of these factors combined
can make your text, which may look good on a monitor or on export,
look terrible in FCP.
Here's how to get a better sense
of what your text really looks like, even if you don't have a
monitor:
Accurately evaluating text in the Canvas

To view both fields in the Canvas, click the first of the three
pop-up menus at the top of the Canvas window and change the size
to 100%. Then, select the "Correct for Aspect Ratio"
menu item to uncheck it.
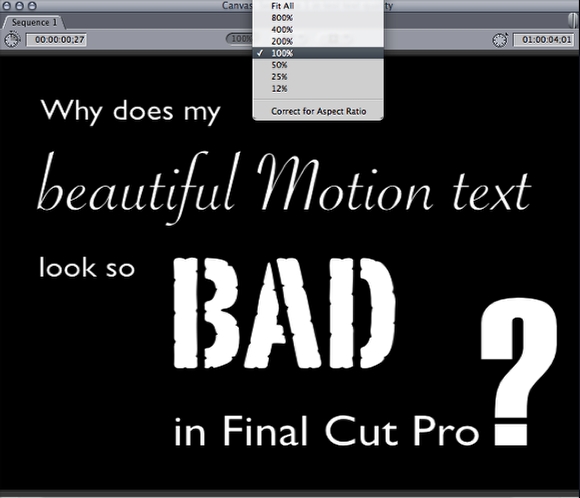
With the Canvas set to 100%, you
now see both fields. And with Correct for Aspect Ratio turned
off, FCP isn't doing any scaling.
The text won't look quite exactly
like final output because it's no longer being scaled, but as
you can see, it's now as crisp and clean as it was in Motion.
Note that while this is helpful, the Canvas still won't reveal
interlace flickering, especially on animated text - again, a
monitor is crucial.
After checking it out, I recommend
turning Correct for Aspect Ratio back on - so you get an accurate
view of your text's proportions. I would als set the Canvas to
Fit to Window, in order to make sure you see the whole Canvas
and to improve playback performance.
Why your text looks bad: reason #3
Because you are using the DV codec.
Even if you use an external calibrated
monitor or make these adjustments to the Canvas, your text still
might look worse in Final Cut Pro than it did in Motion. If you
are adding the text to some DV video in a DV sequence, it will
get rendered to the DV codec. And while the DV codec is good
for video, it's not so great for text.
What to do? Use a large, sans serif
font. Fine lines, especially horizontal ones, are going to look
bad. Partly due to the DV codec, but even more so due to the
interlaced nature of NTSC or PAL television - an issue you cannot
see in the Canvas.
What if you are only going to the web?
If your end product will only be viewed on the web, then you
don't need an external monitor - the Canvas with the adjustments
above should work just fine. You will probably want to deinterlace
your video when you compress it for the web to eliminate any
interlace artifacts.
The good news with going to the
web is that, even though you may be working in a DV sequence,
when you export, your titles will be compressed directly to your
chosen codec, and not be destroyed by the DV codec. In order
for this to work correctly, you need to watch out for a couple
of things:
1) First, make sure you are using
a Motion project in FCP, or exporting out of Motion with the
Animation codec. If you export from Motion as DV (to avoid rendering
again in FCP), you have crunched your text into the DV codec,
and then it will get further compressed into your web codec.
2) In FCP, choose to export using
Compressor or to Quicktime conversion - do not first export a
self-contained or reference movie with the current settings,
and bring that into Compressor. If you do, you'll just once again
put your text through the DV codec before compressing for the
web.
A few other tips
For the best possible text, you may also want to check the following:
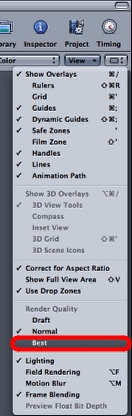
1) In Motion, set the Render Quality
to Best. This is important particularly if you are moving the
text close to the camera in 3D or scaling it up very large.
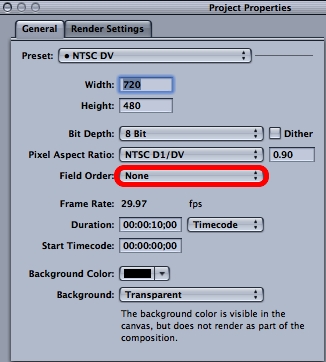
2) If you are going straight to the web, in Motion's Project
Properties, set the Field Order to None.
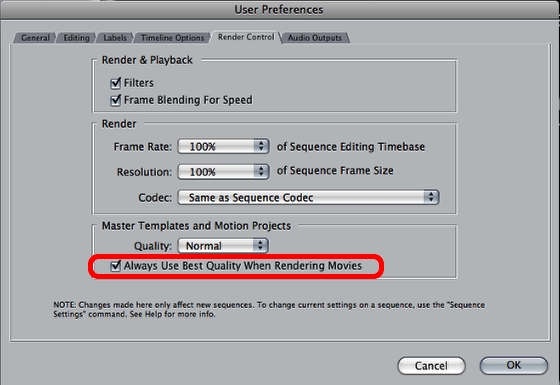
3) In FCP, in the Render Control tab of User Preferences, make
sure that the Always Use Best Quality When Rendering Movies checkbox
is checked (it is by defaul).
I hope these tips will save you some frustration next time you
create some nice titles in Motion for your Final Cut Pro project.
If you want to learn how to get
the most out of Motion, please check out my Motion
3 Fast Forward and Motion
3 Deep Dive tutorials from Ripple Training.
Mark Spencer is a freelance producer/editor, Apple-certified instructor, and
the author of the Motion 3 Fast Forward and Deep Dive tutorials
from Ripple Training.
copyright © Mark
Spencer 2008
This article first appeared on
www.kenstone.net and is reprinted here with permission.
All screen captures and textual references are the property and
trademark of their creators/owners/publishers.