|
   
| Tutorial: WHEN TO SCALE TO FRAME SIZE IN PREMIERE PRO CS6 |
December, 2012
WHEN TO SCALE TO FRAME SIZE IN PREMIERE PRO CS6
BY STRYPES
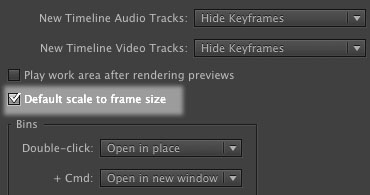
For those of you coming to Premiere Pro from FCP7, there is a preference in Premiere Pro called "scale to frame size". In FCP7, when you insert a clip into a timeline, the clip is automatically scaled to the dimensions of the sequence, and the scale percentage is automatically set in the Motion tab. In FCP7, this is preference is called "always scale clips to sequence size", and it can be found in the editing tab under user preferences.
In Premiere Pro, when you check "scale to frame size" in preferences, any images or footage that you import into the project from that point onwards will automatically be scaled to the frame size of the sequence when you insert it into a timeline. So this function can be particularly handy when you are working with mixed formats or different frame sizes. Note that checking this preference does nothing to assets that are already imported into Premiere Pro.
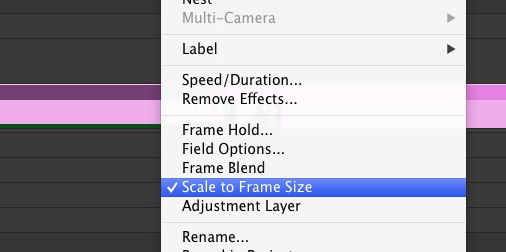
If the image is already in the timeline, you can toggle the "scale to frame size" setting on a particular clip by right clicking on a clip in the timeline and checking "scale to frame size". You can also map this function to a keyboard shortcut.
There is an important difference between the way FCP7 and Premiere Pro work with this particular preference setting. In Premiere Pro, with "scale to frame size" applied to a clip, you will realize that scale is still at 100% in the Effects Controls tab.
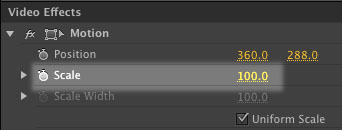
Why is this so? Because when scale to frame size has been applied to a clip, and you want to do a zoom, it applies the zoom on top of the first transformation. How does this work?
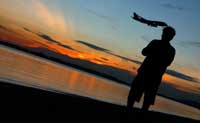
Here is a photo with a resolution of 2500x1667 which was edited into an SD anamorphic timeline, with scale to frame size turned off, leaving the image unscaled.
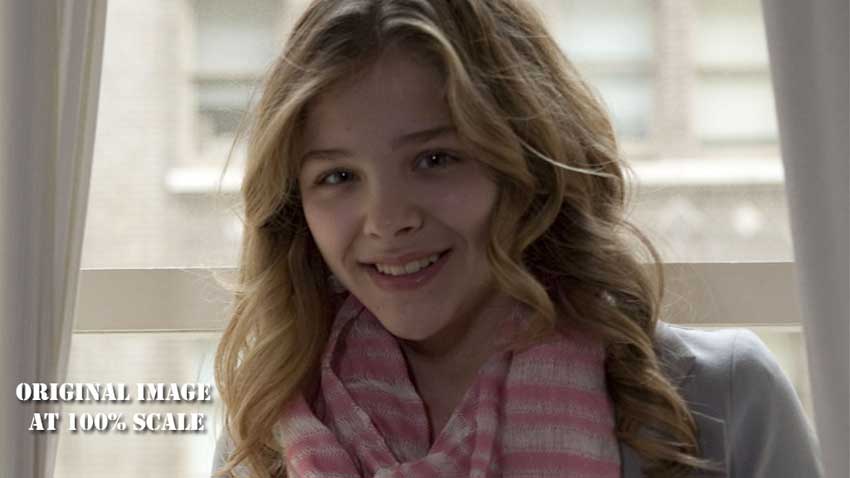
click here for full resolution version
And this is the same image with "scale to frame size" turned on, and scaled up to match the size of the first image, hence I added a zoom somewhere around 300%.

click here for full resolution version
Here are the results zoomed in to 300% to accentuate the differences. Notice that the image on the left (with scale to frame size applied) is visibly softer.

click here for full resolution version
As you can see, although "Scale to Frame Size" is a handy function when you are working with mixed formats, this is also a function that you want to turn off when you need to perform any additional scaling or zooming on the image.
Copyright © 2012 Gerard Tay. All rights reserved.
**The photos are credited to Jim Merithew/Wired.com and licensed under the Creative Commons (CC BY-NC), the article from which the picture was taken first appeared here, and the original high resolution image can be downloaded here.
 Gerard is a freelance broadcast editor and fellow geek who works in the small but congested urban jungles of Singapore. When he is not too busy swinging between editing suites and solving the intricacies of the L-cut, he keeps a blog and posts on the LACPUG (like everyone else should). Gerard is a freelance broadcast editor and fellow geek who works in the small but congested urban jungles of Singapore. When he is not too busy swinging between editing suites and solving the intricacies of the L-cut, he keeps a blog and posts on the LACPUG (like everyone else should).
|