Enhancing Storyboards with Photoshop
by Richard Harrington and Robbie Carman
Excerpted from Video Made on a Mac: Production and Postproduction
Using Apple Final Cut Studio and Adobe Creative Suite by
Richard Harrington and Robbie Carman.
Copyright © 2010. Used with permission of Pearson Education, Inc.
and Peachpit Press.
Purchase HERE from Amazon for $37.97
Whether you draw with a tablet or use pen and paper, you’ll want to clean up your storyboards to improve their appearance. If you’re building an animatic (an animated storyboard), you’ll want to add thick lines to avoid flicker on a television set. If you’ll be printing or presenting your storyboard, you’ll also want to add color and shading to fully express your creative ideas.
Cleaning up contrast
The first step for your sketch is to get tight lines. One of the easiest ways to do this is to use a Levels adjustment to fix the black and white points in the image.
1. Launch Adobe Photoshop and create a new 8 by 4.5 inch document at 300 pixels per inch. This will create a print resolution canvas with a 16:9 aspect ratio. If you are scanning a sketched storyboard, scan at 300 pixels per inch.
2. Draw your first panel or open a scanned document. For this exercise, download the file Storyboard_Cleanup.tif from HERE.
3. Add a Levels adjustment by pressing Command+L or by choosing Image > Adjustments > Levels to darken the lines in your document.
4. Drag the Input sliders (both the Black and White Input sliders) toward the center (Figure 1.14). This will restore proper contrast to the image. Click OK to apply the adjustment.

Figure 1.14 Dragging the Black and White Input sliders will restore contrast to the sketch.
Enhancing the storyboard with lines
You can enhance the panels of your storyboard within Photoshop. To thicken the lines in your drawing, harness Photoshop’s flexible Brush engine. By enabling options such as Scattering, Texture, and Wet Edges, you can create realistic strokes. You’ll also find useful brush presets that will work. The Dry Media Brushes and Thick Heavy Brushes are particularly well suited for this task. It is also a good idea to isolate each brush stroke to its own layer when drawing to preserve its initial flexibility. These several strokes can then be merged when you are satisfied with the effect.
Another approach is to slightly blur the line drawing. You can then run a Levels adjustment and pull the Black Input slider to the right to thicken the line. You should then experiment with the Artistic and Brush Stroke filters to enhance the lines (Figure 1.15).

Figure 1.15 Cleaning up the lines in a sketch can improve its appearance. In this case, a slight
blur was applied followed by a Levels adjustment and the Brush Stroke filter.

Figure 1.16 Adding color to your storyboards helps the viewer understand the look you plan to capture on set.
Enhancing the storyboard with color and gradients
To colorize your storyboard, you should explore the use of gradients. Photoshop offers the Gradient tool so you can easily fill a selected area with a gradient. A gradient is a gradual blend between two or more colors. These gradual transitions work very well on video and also look good when printing the storyboard (Figure 1.16). The colorization process is fairly easy.
1. Make an empty layer and select the area you’d like to colorize using one of Photoshop’s selection tools (such as the Lasso or Marquee tool).
2. Choose the Gradient tool, and then click the Gradient thumbnail in the options bar to open the Gradient Editor.
3. Adjust the loaded colors for the gradient until the colors you’d like to blend are loaded.
4. Draw with the Gradient tool to fill in color for the selected area (Figure 1.17).
5. Repeat the process using as many layers as needed. When you are finished, you can clean up the lines of the image by using a layer composite.
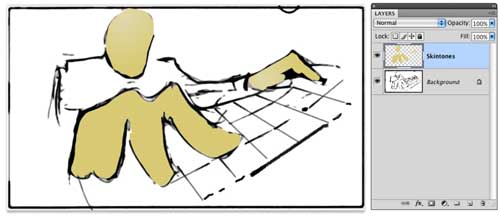
Figure 1.17 A gentle blend of colors creates attractive shading.
6. Duplicate the background layer with the line drawing and place it as the topmost layer. Set the layer to the Multiply blending mode to drop out the lightest areas and leave the dark strokes behind. This composite effect helps keep your gradient fills “inside the lines” (Figure 1.18).
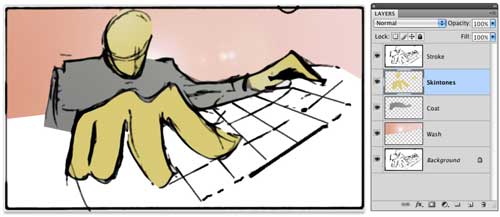
Figure 1.18 Placing a copy of the original sketch at the top of the stack and
setting it to Multiply cleans up the final composite.
Excerpted from Video Made on a Mac: Production and Postproduction Using Apple Final Cut Studio and Adobe Creative Suite by Richard Harrington and Robbie Carman.
Copyright © 2010. Used with permission of Pearson Education, Inc.and Peachpit Press.
Purchase HERE from Amazon for $37.97