by Johan Polhem
This tutorial is meant for those who have no or
little experience using Shake. We will briefly cover Keying,
Tracking, Rotoshaping and some basic compositing. The aim is
to create an alpha channel.
Not long ago I shot a skateboard pro
in our local skatepark in Bondi Beach to try out my new Panasonic
HVX 202.
I was interested in seeing the capabilities
of the DVCPRO HD codec in terms of compositing. DVCPRO is only
8-Bits but it has a color sampling of 4:2:2 which in theory should
make it decent for chroma keying.
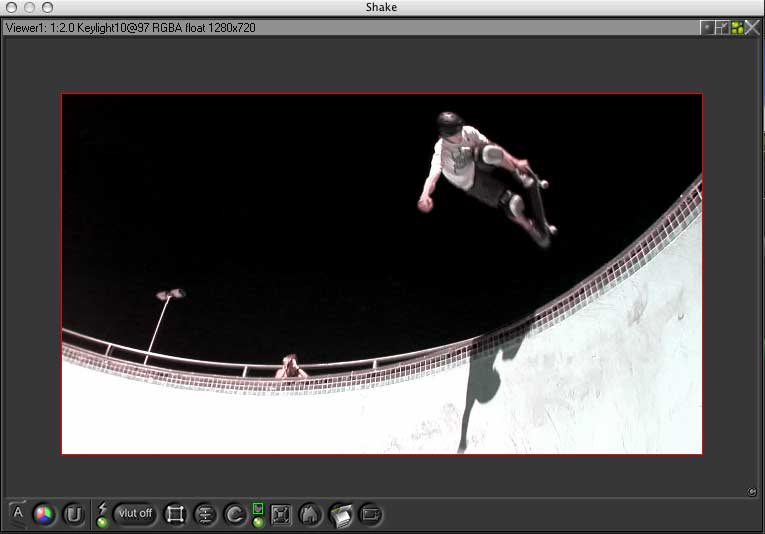
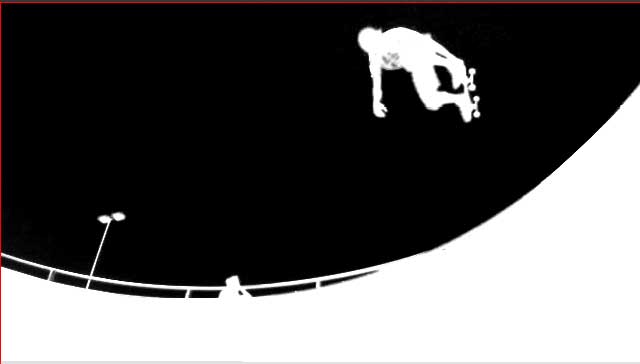
This is what the footage looked like
ungraded straight from the camera:
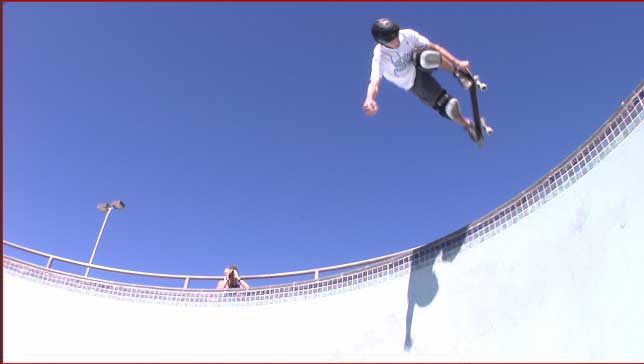
As you can see, the bowl is very overexposed
but that was a necessary evil in order to get the perfect blue
in the sky needed for the key. Australia has very harsh lighting
conditions in the middle of the day and this is what happens
with such a limited format.
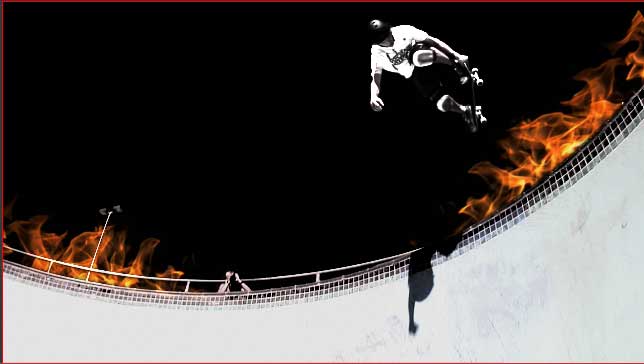
This is what the footage looked like
after some compositing and color correcting/grading in Shake
and with added footage:
Since the Skater is only in the air for
a few seconds, the footage I am using is only 43 frames originally.
I slowed that down to about 150 frames using the Speed function
in Shake. This was only possible since I shot it on 50fps in
the first place as opposed to 25fps which would have made it
impossible due to the lack of information between the frames.
This is what the footage will look like after tutorial 2.
This first tutorial is written for basic
Shake users. There are certainly many different ways of reaching
the same results and this is only one of them.
The purpose of this tutorial is to give
you a good starting point from which to explore this application
more in-depth.
Keylight
We will start by removing the blue sky
using Shake's Keylight. Keylight is an incredibly solid keying
tool that lends to almost infinate flexibility. Those of you
that are used to keylight in After Effects will be impressed
by the difference.
1) Import
To import your footage into shake simply
drag from your folder onto the viewer in Shake. Alternatively,
go to Image/filein.
You will find that Shake displays a different
file structure than most other applications as it uses Linux
to navigate rather than OSX front end.
2) Change Bit-depth
Before we apply Keylight we are going
to add something to our footage. Select file you imported and
go to "other" in the menu tab.
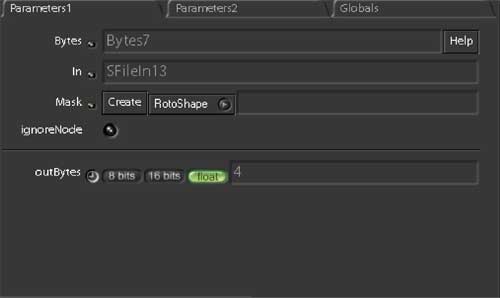
In "other" there is a node called Bytes. Apply this
node by clicking on it once.
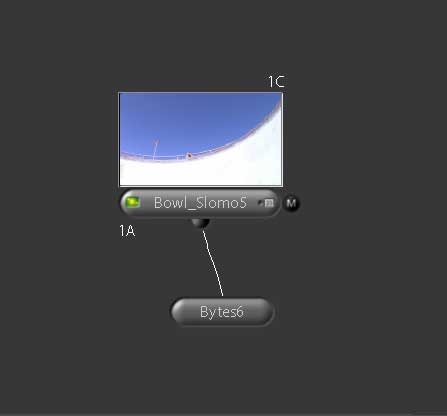
Click on the tiny square on the right
side of the new node and the parameters will be loaded into the
window on the bottom right of your screen.
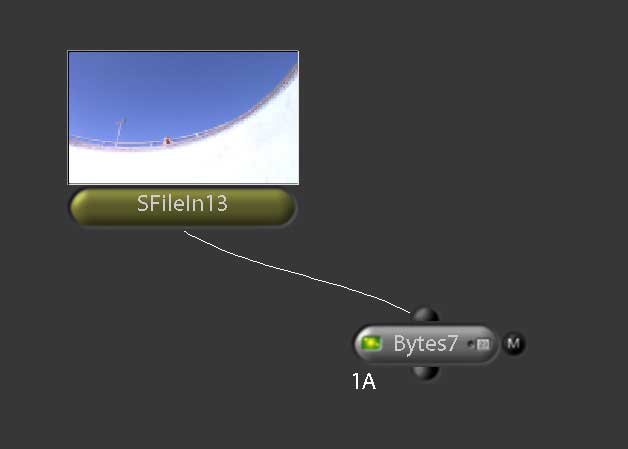
The right square loads the parameters
but leaves the viewer as is whereas clicking the box on the left
side of the node loads the visuals of that node into the viewer
but leaves the parameters as they were. Double clicking on the
node loads both. You can see which node you are viewing by checking
the color of the left box. If it is green that means it is active.
You will see that node and all the nodes that are above it to
the left. That's the way the node "Trees" hierarchy
works in Shake. It starts at the top left and moves down to the
right.
In the "Parameters 1" tab you
will get some information about the node.
Don't worry about "Parameters 2"
or "Globals" at this stage.
Change the outBytes option to "float".
Although this node does not increase
the quality of the image, this node does enable you to apply
some effects and grades of higher bit-depth than before.
3) Apply Keylight
Select the Bytes node in the viewer.
Go to the Key tab on your menu and choose [CFC] Keylight.

As you can see, Keylight has 4 inputs
on top as opposed to "bytes" which only has one.
If you drag your mouse over the inputs you will get an explanation
of what they are for in the very bottom of the screen, just under
the timeline.
You are currently connected to the input furthest to the left,
which is the Foreground or "fg".
The next input to the right is the Background
image, the third is a "holdoutmatte" which I will explain
later in this tutorial. The fourth Input is for a garbage mask.
All nodes also have an input on the right side titled "M".
M stands for Mask. The mask is useful if you would like to limit
a node's effect to only a part of the image.
Now open the parameters of Keylight.
If you place the mouse over that [or
any] window and press spacebar the tab will automatically take
up the entire screen, making it easier to tweak the sliders.
(Press Spacebar again to go back)
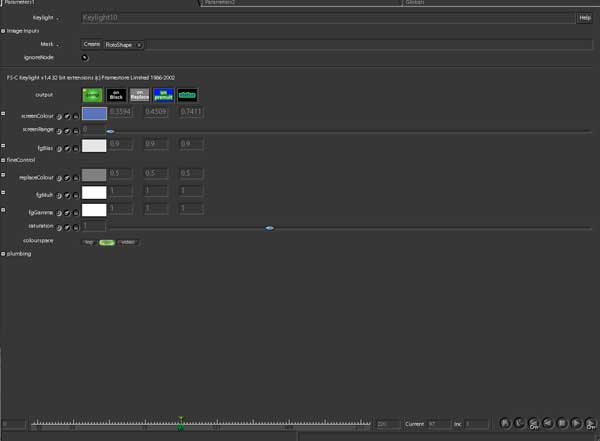
Lets start by choosing the color we want
to key or "remove".
Select the "ScreenColor" color
palette and it will load up in your viewer.

We will select our color by dragging
the mouse over the blue area we want to key.
This only works after selecting the screenColor box with the
yellow outline
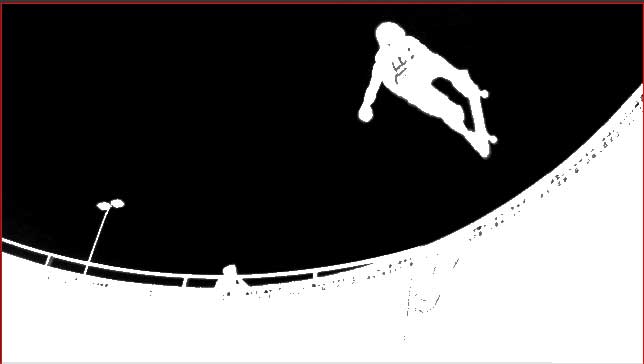
When you drag the mouse over the image
you will see that the grey color is replaced by black.
That black is the newly created Alpha
channel.
At first glance it looks like a decent alpha channel.
Lets have a closer look.
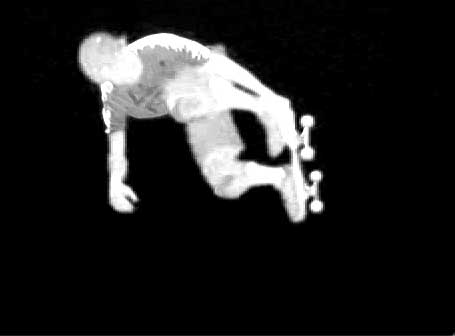
Move the mouse cursor over the image
and press "a" on your keyboard. Pressing "a"
shows you the alpha channel.
You can press "c" to go back to color but lets leave
it on alpha for now.
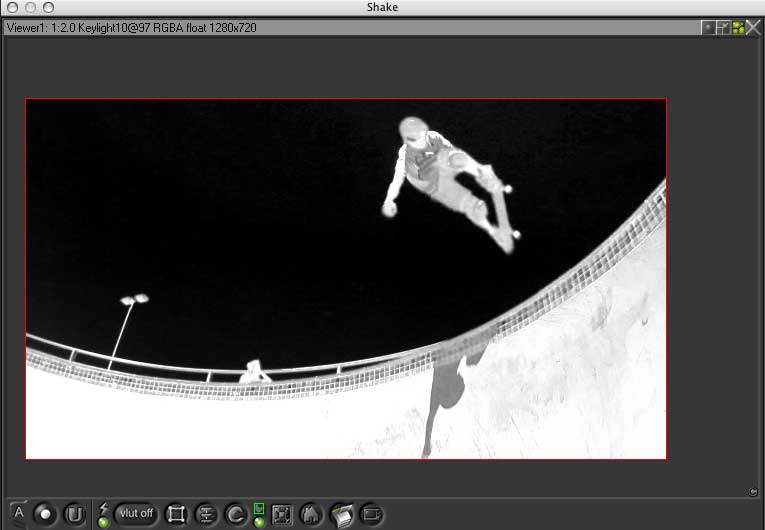
As you can see now the alpha is not perfect.
The skater is not perfectly white as he should be. Neither is
the bowl.
The area around the skater on the other hand, is quite black,
indicating a decent alpha channel.
(The black alpha is not really 100%
perfect and this can be checked using different gamma lookup
tables but lets not get into that right now)
Since we are happy with the alpha around
the skater lets concentrate on the skater himself. He needs to
be perfectly white for the alpha to be good. Any black or grey
areas on the skater indicates lower than 100% opacity, making
him partly see-through which is not really what we are after.
One way of doing this would be to get
to the "screenRange slider" in the Keylight parameters
and crank it up.
Give it a try.
You'll find that although this makes
the skater whiter, it also ruins the feathered edges and makes
the alpha "pixelated" and rough.
Screen range works well if only applied
slightly, so crank it up to about 0.016
This will remove some of the grey spill in the black section
just above the skater.
We are now presented with a problem:
The edge of the skater is fine, but the area inside the skater
is mostly grey, not white.
We could apply a mask and rotoshape the
grey and black bits of the skater. Or we could paint the sections
white and keyframe it.
This would work but it's a pain in the
arse to say the least, and it would take way to long.
Usually those options are used for the
final touches on an alpha if the key does not work perfectly.
Lucky for us, Framestore UK, the company
that developed keylight thought of this and included a great
solution called HoldOutMatte.
A holdout matte is simply another keylight
applied to the same image. The holdOutMatte however is applied
on top of the first key and then shrunk (or eroded) so that the
edge of the alpha is not touched leaving the edge soft and the
alpha sharp.
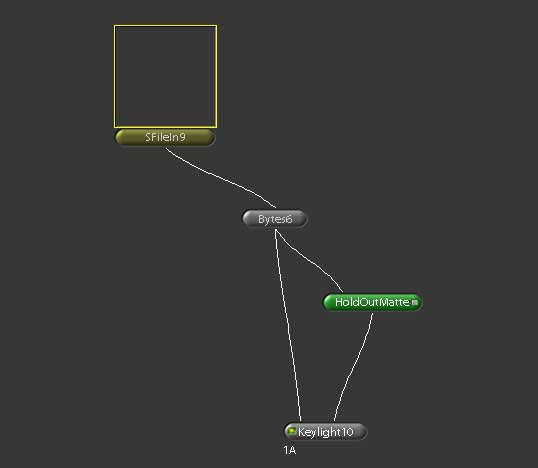
To apply a holdOutMatte simply copy the
first keylight node and then paste it back. (Apple C + Apple
V)
Attach the new Keylight node to the Bytes
node and then attach it to the third input from the left on the
original kelight node. Rename the new KeyLightNode and call it
"HoldOutMatte".
Now open the parameters of the holdoutMatte
keylight and increase the screenRange until you are happy with
the result. I pulled it up to about 0.1. This makes the skater
almost completely solid.
To fix the edges we are going to shrink
the holdOutmatte and then blur its edges.
Apply a DilateErdode node to the holdOutMatte. In the "pixels"
parameter inside the DilateErdode node set the value to -0.6.
You can do this by dragging the mouse
over the value or by just inserting the number straight into
the value box.
Applying a positive value to this node
will dilate rather than erode, but since we want to reduce the
size of the HoldOutmatte we will applya negative value.
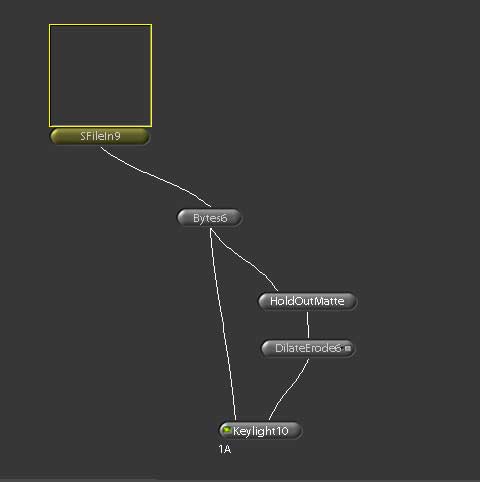
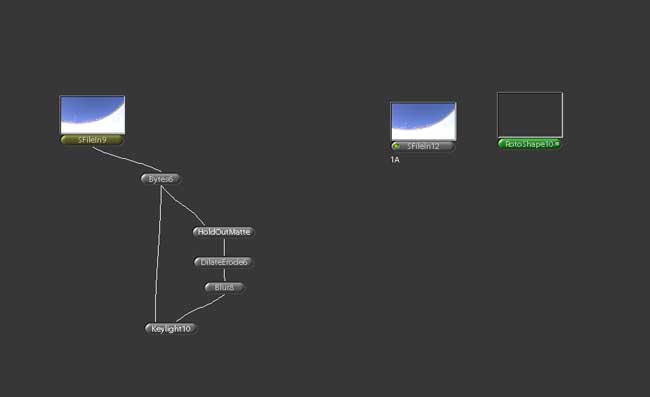
Our tree should now look something like
this:
The next step is to feather the edge
between the HoldOutMatte and the original keylight.
Simply apply a blur node to the DilateErode node to create a
more feathered edge.
I applied a gaussian blur of about 10 pixels in diameter.
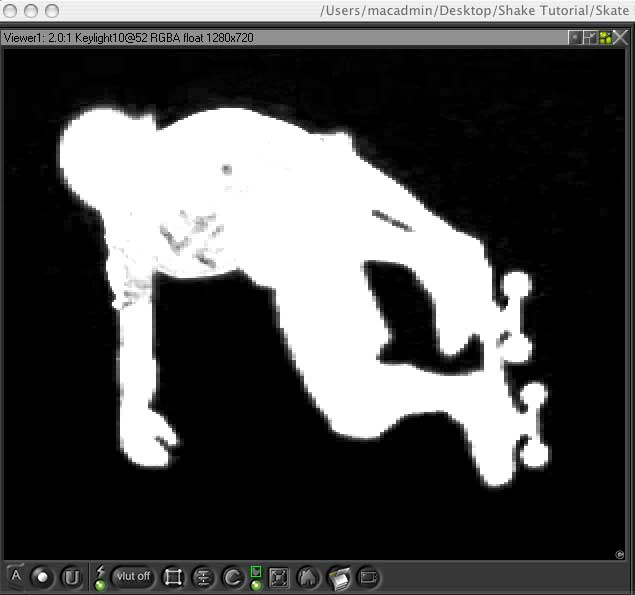
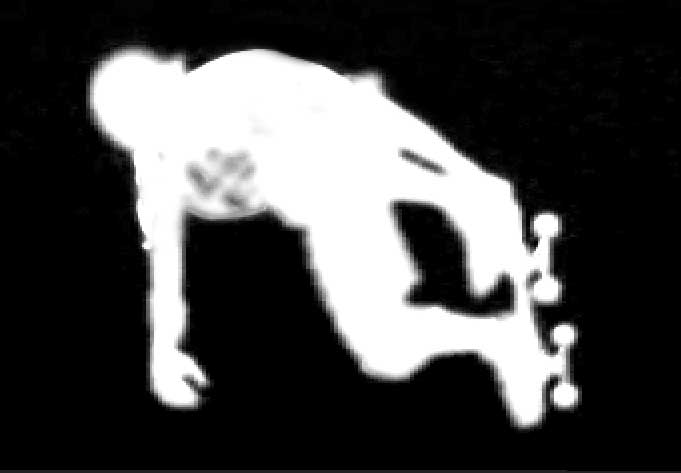
Our skater and tree should now look something like this:
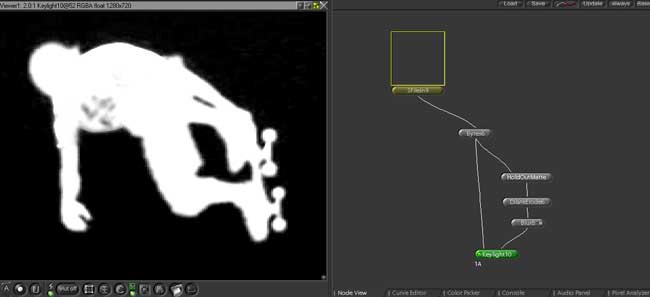
The skater still has some "holes"
of grey in his alpha due to the fact that his shirt had some
graphics on it that were blue, the very same color we tried to
key out. These imperfections are can be removed with a number
of different techniques. I generally just paint them out or mask
them, but for the sake of this tutorial we are going to pretend
that they are not there.
Since we are happy enough with the skater
we will now move onto the bowl. As you can see, the edge of the
bowl is fairly good as it is, although there are some sections
of the bowl that have "holes" in it.
We could paint these holes out but there is an easier way, we'll
just apply a mask and then match move the mask with the [minor]
movements of the camera.
This sounds complicated but it is actually
very simple.
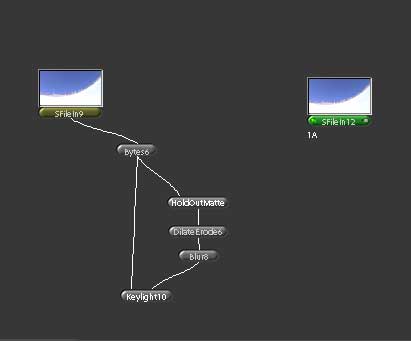
Start by duplicating the file-in only so that you have a separate
source file with no effects/nodes attached to it:
Now go to the "image" tab and
select the "Rotoshape" node.
Click on the small square on the left side of the Filein to load
it into the viewer. Then click on the square on the right side
of the Rotoshape to load the mask tools:
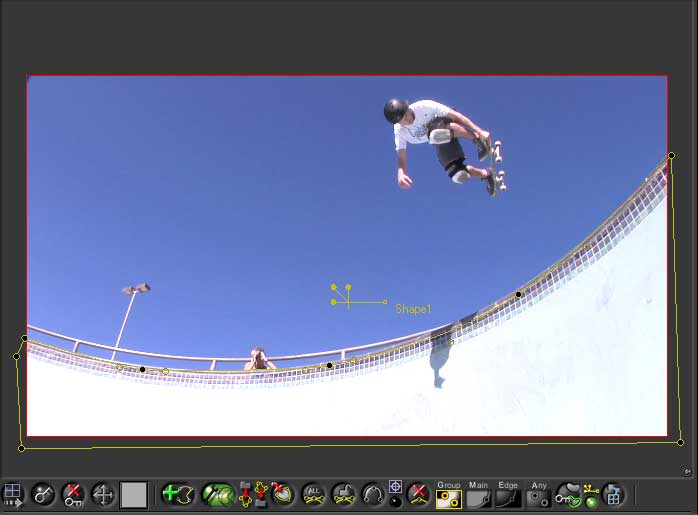
Select the tool which has a mask shape
and a Plus-sign on it, (five from the left in bottom of viewer)
and simply draw a mask similar to the one in the image:
Now we are going to track the movement
of the camera so that we don't have to animate the shape of the
mask.
Start by applying a Tracker node to your filein node.
The Tracker node can be found under the
"Transform" tab.
Move the tracker to a spot on the screen
that has a sharp edge. I chose to move it to the corner of the
street lamp.
You can zoom in on the image by leaving
the cursor over the image and pressing +. - Will zoom out again.
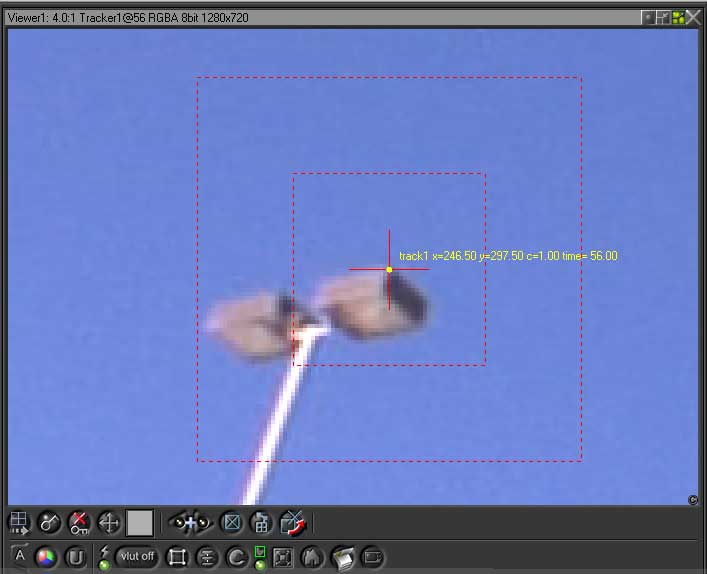
The two boxes that surround the tracker
cross are the there so that you can select the area you want
Shake to search for your mark within. If your image moves a lot,
then make this area bigger. You can also choose to use several
trackers on one image which is very handy if you want to track
rotation or skew but we don't need it at this stage.
The Tracking node within Shake is very
accurate. Those of you that have used After Effects will know
what I mean, the difference in is quite impressive.
When you have found a spot you are happy
with set the tracking range. I am only interested in working
with the frames 34-77 so that's all I will track.
It can be useful to name your track so
scroll down to Track1Name and type something in. I chose "SkatingTrack".
To start the tracking simply move the
timeline marker to frame 33 and press the right arrow on this
button:

If you press the left arrow Shake
will track backwards in time.
If nothing happens you have not selected
the "Keyframe" function. Make sure this is selected
before you begin the tracking process:

Scroll the timeline to see how it worked
out.
As you can see Shake has created a perfect
track.
(Well, if you scroll the timeline you can see it)

Now all we have to do is apply this movement
to the mask we just made.
First attach the Rotoshape to the mask input on the FileIn.
The input marked "M" on
the right side of the node
Stay on the frame 33 in the timeline. You can toggle between
enabling and disabling the mask by clicking this button:

Then remove the "tracker" node.
We don't need that anymore. Instead, attach a Stabilize node
to the Rotoshape node.
In the Stabilize node, select the "active" function,
then select "match". The next step is to load the track
we just created. Scroll down to track1Name and rightclick. Select
load and choose the track we created before: Skater.
All done.
Now all we have to do is place this comp
OVER the other comp where we used Keylight. This is simply done
with an Over node.
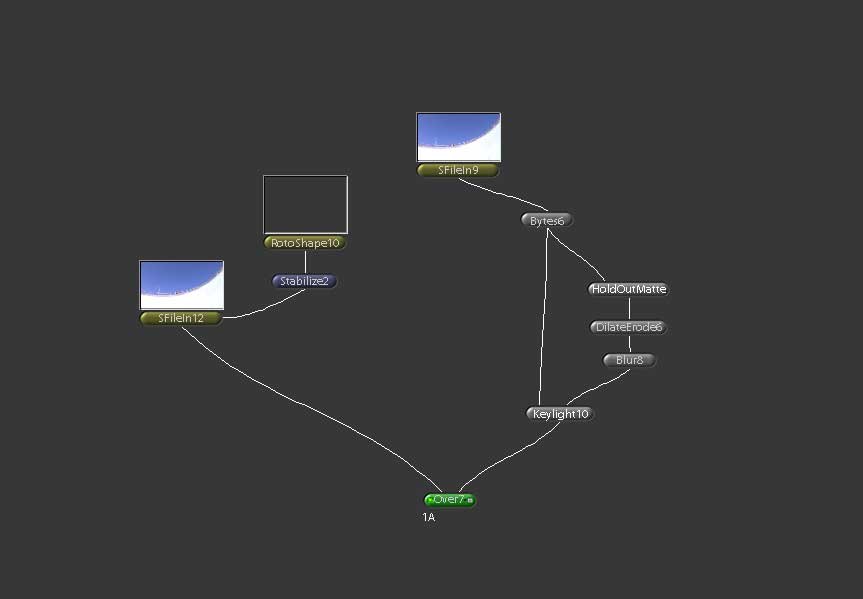
The Over node can be found under the
"Layer" tab.
Check the alpha channel.
As you can see the bowl is now perfect (well almost):
All done.
Our Alpha is now good enough to move
on.
In the next tutorial we will paint out the grey areas on his
shirt, slow the footage down, grade it and then add the fire.
Find Part 2 HERE
copyright©2007Johan polhem
All Rights Reserved