June, 2004
Review
- DV Enlightenment
By DVcreators.net
DVD: Runtime 55 minutes.
Price $99.00
Discount Price $75.00
Review By Ken
Stone
People are always asking, 'How do I make
my video look more like film?'..... well for starters, light
it like film, that is to say, light it professionally. I have
been a still photographer all my life and I can tell you that
it is all about light. So many people pick up a camera, turn
on auto-exposure, set white balance and start shooting away,
totally unaware of the fact that they are neglecting one of the
most important elements of composing a scene, lighting. It is
lighting that adds mood and character, time and place, depth
and tone, light is an actor in your story, a most important actor
at that.
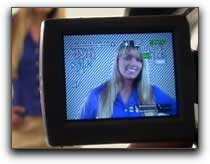
DV Enlightenment is the first tutorial
from DVcreators.net's new DV Cinematography series and is a complete
course in Professional lighting for the beginner, for people
ready to learn the art of lighting. If you sit down with this
55 minute tutorial you are going to come away with an excellent
understanding of lighting, not just the basics of lighting but
how to use light to help tell your story. You will be surprised
to learn what you can do with light, how to do it, how easy it
is to employ the lessons of this tutorial and what a huge difference
it will make in your finished story. Bad or even just ordinary
lighting is something that can not be fixed or enhanced in post
production, it must be done right at the time of shooting.
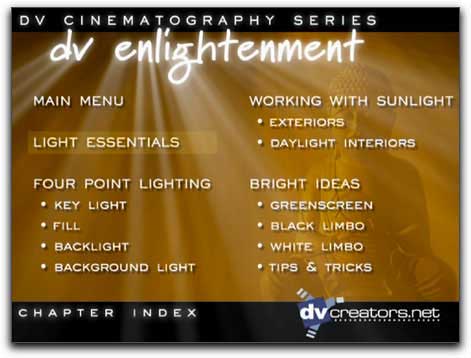
This tutorial starts off with 'Light
Essentials', a basic primer on light and then moves on to the
four main sections: Four Point Lighting, Working with Sunlight,
Lighting Green screen/White/Black Backgrounds, and Bright Ideas.
It is not necessary for you to
be shooting with a Professional camera nor to have a large budget
for lighting to employ professional lighting in your work. This
tutorial is for DV shooters as well as users of large format
video cameras. The video on this tutorial DVD was shot with Canon
Prosumer cameras and the lights used, for the most part, are
from a basic Lowel lighting kit. Aside from a basic lighting
kit, most of the additional accessories used are inexpensive
items like white reflector boards, gels, black wrap (cinefoil),
barn doors, flags, gobos, scrims, diffusing fabric and even 'clothes
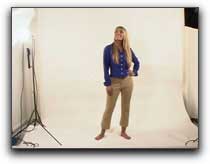
pins'. Before I give you a quick tour of this tutorial I want
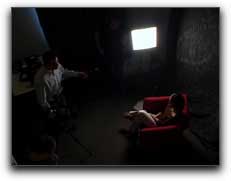
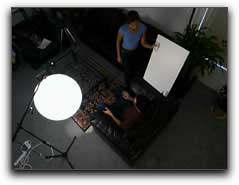
to explain how it works and why I think it works so well. Josh
Mellicker is our host and instructor but is on screen only briefly
as he introduces each section. The lessons are demonstrated or
played out on screen as Josh covers the topic. If the discussion
is about light direction we see a 'gaffer' slowly moving the
light on set and as the light is moved we can see the effect
that this is having on the subject. It's one thing to talk about
something, another to actually show it on screen. This is where
this tutorial excels, seeing how light can be used and all of
the options and possibilities brings understand and a flood of
creative ideas.
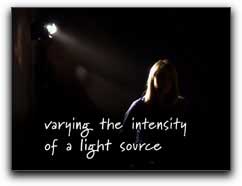
Light Essentials
This first section goes into the basics of light, point source
and diffused light, light intensity, color direction, color temperature,
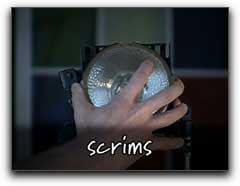
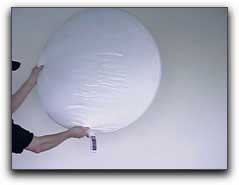
ND (neutral density) and colored gels, scrims and some of the
other simple tools used in a basic lighting setup. It is in this
section that we learn about the basic properties of light and
how to use these properties to advantage.
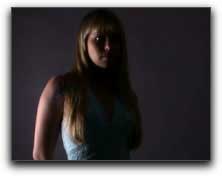
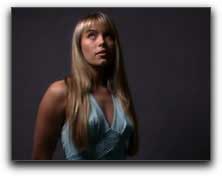
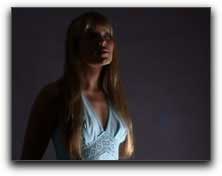
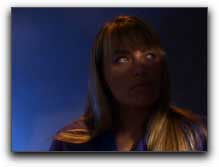
Light direction and placement is one
of the more important elements in lighting and can dramatically
change the way the subject looks. Above, below, left, right and
combinations of these dramatically change the mood and feeling
of a scene. Remember when you were a child and you held a flashlight
under your chin in a darkened room, scary.
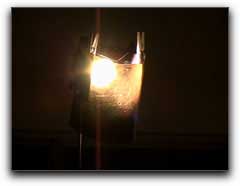
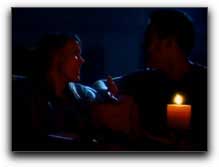
A very important concept, color temperature
of light, is demonstrated and lessons given, to correct for and
work with different color temperatures of light that you might
find in your shooting situation. Even how to simulate different
color temperatures to create a special ambience or to match to
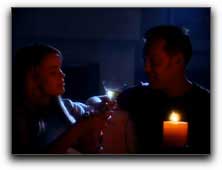
other scenes. Shown below; incandescent light, outdoors and sunlight,
fluorescent light and simulated candle light and moonlight.
Four Point Lighting
Method
Since the first photograph was
taken, photographers have been working with lighting to achieve
unique results. Over the years, it has been recognized that there
can be up to four differing components of lighting, four different
light sources, each one having it's own function and each one
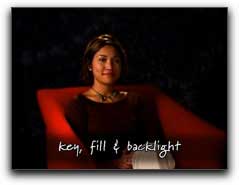
adding to the ambiance of the scene in it's own way. 'Key Light',
which is the primary or main light source. 'Fill' light, which
is light that bounces or is bounced into the shot. 'Back Light',
a light source that comes from behind the subject. And 'Background
Light', light striking the background or background area of a
scene. Understanding these four different sources of light will
enable you to create the lighting 'look' that you want for your
movie. A good understanding of the 'Four Point Lighting Method'
is essential to producing professional lighting in your movie.
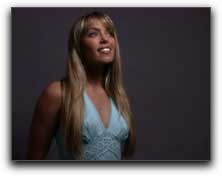
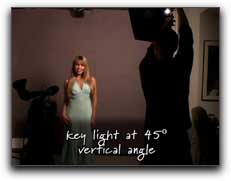
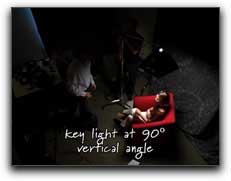
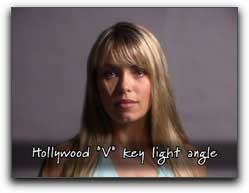
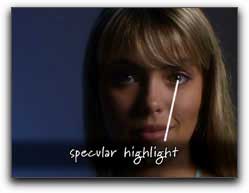
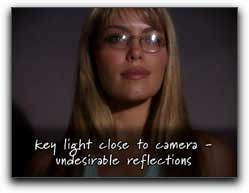
Key Light
is the main light source in the shot, the primary source of illumination
and can be the sun when you are shooting outside, sunlight or
moonlight from a window or skylight, or often an artificial light
source. The Key light sets the tone and feel of the shot and
can be varied depending on position of the light in relationship
to the subject, both vertical and horizontal placement. A spectral
or 'point light' source will produce vastly different results
than a soft or diffuse light source. Most often this is the first
light that you will set as the Key light has the largest impact
in the lighting environment of your scene.
Fill Light,
most often the Key light will be striking the subject at an angle,
from above or below, left or right. This will cause a shadow
on the side of the subject opposite to the Key light. The greater
the angle of the Key light to the subject, the greater the shadow.
If you are looking for a very dramatic effect this will work,
but often, this is not what you are looking for. Fill light is
most often produced by bouncing light back into the shadow area,
opening it up and allowing for detail to be seen. Almost anything
can be used to bounce light on the subject. A white piece of
foam core, a store bought reflector, or even a wall will bounce
light. If you have ever shot at the beach with white sand or
in the mountains with snow on the ground, then the sand and snow
are acting as a fill, bouncing light up onto the subject. Adding
fill light gives us the opportunity to control the dramatic look
of the scene.
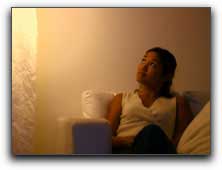
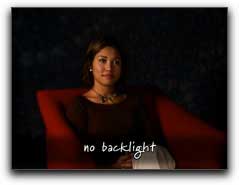
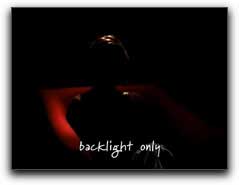
Backlight
(aka edge or rim lighting) is often used when the area behind
the subject is dark causing part of the subject to disappear
into the background. A light source coming from behind the subject
will light the edges of the subject causing the subject to stand
out from the dark area behind. Lift and separate. One common
use of backlighting is to add highlights to the subject's hair.
Backlight can be use to add dimension and intrigue to the scene.
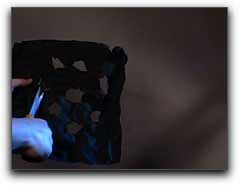
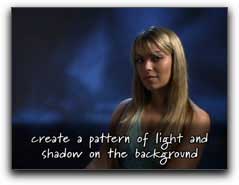
Background light.
Often when shooting there will be a natural background in the
shot, however, sometime the background will be a plain wall or
other uninteresting backdrop. Using a background light with a
colored gel or irregular light patters can turn a dull background
into something a bit more interesting. Shown below center, is
a piece of black wrap with holes cut in to create a mottled lighting
effect. Black wrap is nothing more than extra heavy duty aluminum
foil with a heavy black coating on one side.
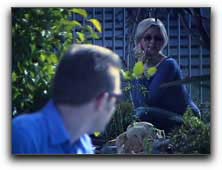
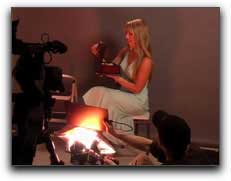
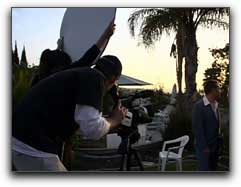
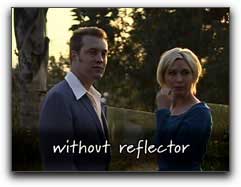
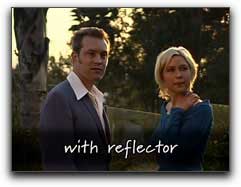
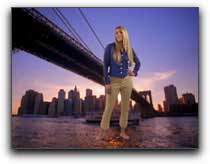
Working with Sunlight
Shooting in sunlight can be a challenge. You need to think of
the sun as being one huge Key light. Direct sunlight is difficult
to work with, overcast days provide a much softer light. One
common technique is to place your subjects with their backs to
the sun, so that it becomes like a backlight and then use a reflector
to bounce light onto the subjects. When shooting inside with
sunlight entering into the shot, you will want to gel your lights
to match the color temperature of sunlight.
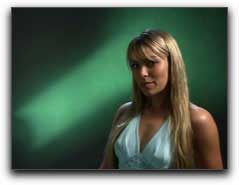
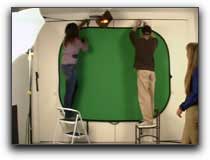
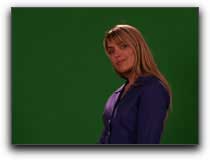
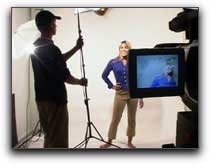
Lighting Green screen/White/Black
Backgrounds
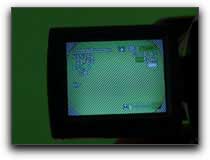
When it comes time to Chromakey in FCP you will quickly discover
that success in FCP is totally dependent on how the chromakey
was shot in the first place. Proper lighting, placement and exposure
of the colored background is essential and using the camera's
'zebra stripes' plays an essential role in shooting good chromakey
footage. Proper key light and back lighting will help you to
pull a good key.

Interesting visual effects can be achieved
when shooting against a solid black or white background, exposure
here is critical and using zebra stripes in the camera is a must.
You can pull a key from an all white background using a luma
or color key.
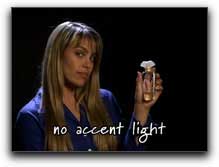
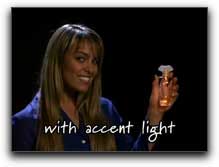
Bright Ideas
This section covers other important lighting concepts such as
'Motivated' and 'Practical' lighting, simulated moonlight and
candle light using colored gels, lighting large areas and the
use of broad lights. The use of accent lighting to draw attention
to a specific area or subject and using fog and other lighting
elements to add special qualities to your shot.
Lights get very hot and can draw a lot
of power, top heavy light stands and electrical cords are areas
where proper safety on the set can help prevent fire, injury
and disaster. The DV Enlightenment tutorial gives proper attention
to safety issues.
Conclusion
Over the years I have worked with
a number of tutorials from DVcreators.net and have always felt
that the production values of their products are excellent, this
DV Enlightenment tutorial is true to form. I found this tutorial
to be exceptional. It explains and demonstrates the different
components of lighting and does so in a clear and interesting
manner, it makes professional lighting seem intuitive (which
it really is once you have understanding). There are reasons
that this tutorial works so well. It is thorough and covers the
basics of four point light, who's understanding is fundamental
to producing professional lighting. It demonstrates that you
can produce professional light 'on the cheap', with just a few
basic lights and inexpensive accessories. It teaches you how
to use creative lighting that will help add visual mood and ambience
to your work, which will help you tell your story. It does all
this on screen, you actually see the crew setting up lighting
for different situations; indoors, outdoors, mixed light and
green screening. You see how light is controlled and shaped for
use, testing and controlling exposure using the zebra stripes
in your camera, work with different color temperature light,
the positioning of lights for effect and even the aesthetics
of light and the uses for spectral (point source) and soft light.
This DV Enlightenment tutorial from DVcreators.net is one of
the best I have ever seen.
Enjoy,
--ken
Special Price $75.00
Review copyright ©
www.kenstone.net 2004
This article first
appeared on www.kenstone.net and is reprinted here
with permission.
All screen captures and
textual references are the property and trademark of their creators/owners/publishers.