| Review: The
Easy Guide to Final Cut Pro |
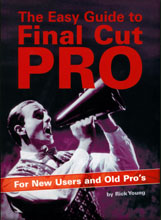
April, 2002
The
Easy Guide to Final Cut Pro
Publisher - Digital
Production Ltd.
By Rick Young
ISBN 0-9542160-0-8
List price: $25.95 U.S.
CD ROM PAL version only
128 pages
Purchase at the lafcpug
Store
Review By Ken
Stone
Book excerpt follows review.
The Easy Guide to
Final Cut Pro, by Rick Young, is a great little book and at 128
pages this is a 'little' book compared to some of the behemoths
that are out there. The Easy Guide owes its brevity to the fact
that it is a 'simple' basic FCP book and deals with the different
FCP functions in short, clear and concise lessons. This is not
a 'nuts and bolts' book and does not go into great depth in areas
such as set up. One page is devoted to Easy Set up for those
using DV NTSC or DV Pal.
This is the first book that I have
reviewed that has Color art as well as Black and White. The use
of color in depicting the Viewer, Canvas, Timeline and other
FCP windows helps demonstrate what is going on and is particularly
helpful in showing FCP overlays.
The Easy Guide to Final Cut Pro
was recently reprinted and briefly covers the new features found
in FCP 3, but again, not in depth. The Easy Guide does cover
all aspects of editing in FCP for the beginner and devotes most
of it's pages to this subject. The section on Output, like Set
up is brief. At the end of the book there is a rather complete
section on authoring and burning DVDs. The book comes with a
CD that contains video material that the reader can use in doing
exercises and working their way through the books lessons.
Table of Contents
- Set-up
- The Interface
- Capturing Media
- Organizing Clips
- Editing
- The Interface in Detail
- Effects
- Audio
- Printing to Video
- Killer Features - FCP 3
- Burning DVD's
- OS X
The Easy Guide to Final Cut Pro
is very much a 'hand book', a 'primer' if you will. Short, clear
and to the point. It provides an excellent quick introduction
into FCP editing. It will get you up and running on FCP in short
order. I like the book.
Short book - short review. (grin)
Enjoy,
--ken
Book Excerpt from 'The Easy Guide
to Final Cut Pro'.
By Rick Young
Distinguishing Between
Insert/Overwrite
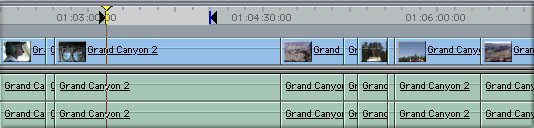
In the Timeline you should now
have several shots edited together. Position the Scrubber Bar
in the Timeline at the beginning of the Sequence. Press the upward
arrow on your keyboard (located to the right of the Space Bar)
and you will find you are now able to skip forward between each
of the shots. Press the downward arrow and you will find you
can skip backwards through your shots, one by one.

Skip Forwards |
|

Skip Backwards |
Now, position the Scrubber Bar in the
middle of the Sequence.
1 Open
a shot in the Viewer and mark the "in" and "out"
points.
2 Drag
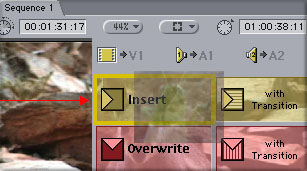
this shot over to the Canvas, however, this time, instead of
releasing it over the Insert button, position it over the Overwrite
button (marked red). Now release your mouse button.
3 The
shot will be edited into the Timeline but it will not push
all of the other shots in front of it further along in the Sequence.
Instead, it will write over a portion of the Sequence beginning
where your Scrubber Bar is positioned.

RIBBED END |
If it is not obvious that this has happened
it may be necessary to condense the overall spread of the shots
on the Timeline. To do this, look to the bottom of the Timeline
and find the bar with two ribbed ends. Drag either of these ribbed
ends and you will see that the Timeline can be expanded or contracted.
This does not affect the length of your movie in any way. What
it does is to affect the display of your Sequence.
EXPANDED VIEW |
|
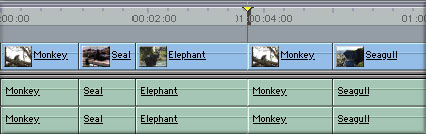
CONTRACTED VIEW |
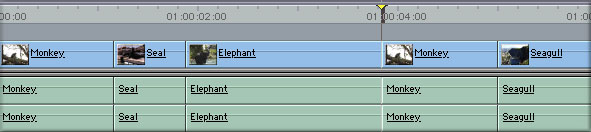
This is very useful when you have a Sequence
that is long, and you wish to be able to view the entire Sequence
on the screen in front of you. It is also useful when you wish
to expand the Sequence for fine control to allow precise positioning
of the Scrubber Bar.
To make completely clear the difference
between Insert and Overwrite editing it is advisable to condense
the Timeline so the entire contents are visible on screen. You
will then be able to determine the type of edit: if the Timeline
has been made longer, you have performed an Insert Edit; if the
length does not change you have performed an Overwrite Edit.
To be able to see the difference between
Insert and Overwrite editing:
1 Position
the scrubber bar on a shot change in the middle of the Timeline.
2 Open
a shot in the Viewer and mark an "in" and "out"
point.
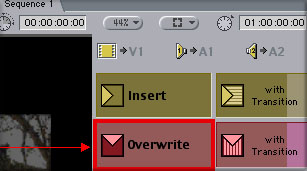
3 Drag
the shot from the Viewer to the Canvas and position it over the
Insert button. Observe the Timeline as you release the mouse
button and notice all other shots get pushed further along the
Sequence.
4 Hold
down the Apple key and press the letter 'Z'. This will undo the
action you have just performed.
5 Repeat
the procedure of dragging the shot from the Viewer to the Canvas,
however, this time, release it over the Overwrite button. It
should be apparent that a different effect has taken place. The
shots in the Sequence are not pushed further along the Timeline
they all stay in exactly the same position. What has happened
is that the shot you have just edited into the Sequence has written
over a portion of the Timeline. The length is determined by your
"in" and "out" points in the Viewer.
If you look at the top left of the Viewer
you can see the duration of the shot you are working with. This
is measured in seconds and frames. If you change the position
of either your "in" or "out" points Final
Cut calculates the new duration.
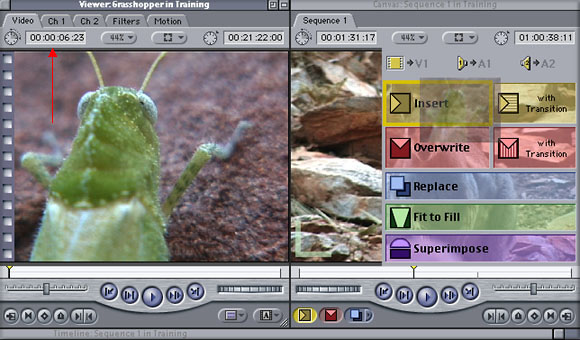
Note:
it is not necessary to drag the video from the Viewer to the
Canvas to perform an Insert or Overwrite Edit. If you prefer,
mark the "in" and "out" points in the Viewer
and press the yellow or red button at the bottom of the Canvas.
Providing that you can remember that yellow is for Insert and
red is for Overwrite then the functions can be accessed in this
way.
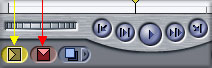
It is also possible to perform these
functions with a single keystroke: F9 can be used for Insert
Editing and F10 for Overwrite Editing.
Apple has designed Final Cut Pro so that
the same result can be achieved in a variety of ways. Providing
that you learn one way to perform these essential functions you
will then be able to complete the task at hand. Alternative methods
can be learnt as you become more proficient with using the program.
You can purchase 'The Easy Guide to Final Cut Pro' at
Digital
Production Ltd
Copyright © 2002 by Rick Young
All Rights Reserved. This material is excerpted from The Easy
Guide to Final Cut Pro and is used with permission.
Review copyright ©
www.kenstone.net 2002
This article first appeared on www.kenstone.net and is reprinted here
with permission.
All screen captures and
textual references are the property and trademark of their creators/owners/publishers.