| Review: Red Giant Software's Magic Bullet Instant HD |
June, 2006
Instant HD

RedGiant Software
http://www.redgiantsoftware.com
$99.00
Review by Steve Douglas
When I heard that Red Giant software, already well known for the Magic Bullet Suite, had come out with a conversion plug-in for After Effects, Final Cut Pro and Premiere Pro that would enable the editor to up-convert standard DV video into a variety of HD formats, I just had to take a look. Think of all the footage that lies within the libraries of so many shooters which were shot in the Standard DV format and who have now moved on to one of the latest and greatest HD or HDV camcorders. Were they stuck having to re- shoot in HDV and hope for the same great shots they have lovingly preserved? In my case, being primarily a nature shooter underwater or in Africa somewhere, I really doubted that I could bribe a Great White in S. Africa into practically swallowing me as it rushed up when I leaned over the motor mount. Those wide-open jaws came within a foot of my face and the camcorder I was holding and I never moved a muscle so as to get the shot. It was close though and I really don't want to try that one again. However, I shot that scene with a Sony DCR-VX2000 and now I use the Sony A1-U for my underwater work. Red Giant's Instant HD to the rescue and what's more....IT WORKS.
The cost of Instant HD is gratefully low. For all that it is capable of doing I am surprised. Now the editor may be able to integrate their original SD video into their next HD or HDV project; they can up-convert NTSC or PAL SD to HD; convert web cam or cell phone source material to SD Video (not sure I will ever want to do this though) and be able to scale SD video for pan and scan adjustments. Instant HD may also be used to scale still images to HD, conform standard definition motion graphics for high definition broadcast, and, along with their Magic Bullet Suite, produce professional "film look" HD masters.
Instant HD is a plug-in which is simply downloaded and placed in the Final Cut Pro or After Effects plug-ins folder. It is aimed at the user for Final Cut Pro version 4.1 or later and After Effects version 6.0 or later along with a Mac OSX 10.3 G4 or higher with, at least, 512 gigs ram.
And just how does this work? Instant HD is primarily a scaling tool. Scaling is the process of changing the pixel resolution of one image to another. If scaling from SD to HD or HDV the missing pixels must be generated and Instant HD provides a high quality method for the conversion. You can customize your settings or you may make use of several preset resolutions to make it an easy task to integrate your DV video into your next High Definition production. There are five basic tools that enable you to accomplish this; Output size, where you set the size of your original clips, the filter type, which denotes the quality of the final image, draft or best or something in-between, Sharpness, Quality Settings and Antialiasing.
However, this is not just a simple plug-in that you drop onto a clip and wait to render. There is a very real workflow here and learning it is a must. Fortunately, Red Giant has an excellent tech support staff and it was John Kerr of Red Giant who helped straighten me out when I was unsure or had questions. Even though I was initially confused as to the workflow, once I understood it, it became a simple procedure.
In order to up-convert your Standard Definition footage to make it compatible with your HD or HDV clips, the SD footage must be converted from interlaced to progressive. This must be done before ever applying Instant HD. This is not a difficult process as the deinterlace filter found within Final Cut Pro will certainly do the job. I used both the FCP deinterlace filter as well as the Magic Bullet Suite for After Effects which will also deinterlace the footage. Once the source footage is imported into Final Cut Pro you must create two sequences whose settings are identical. Since I was using a clip shot in 4:3 with a Sony DCR-VX2000 I wanted to convert it so as to be able to use it in a sequence made while shooting with my Sony HDV-A1U. Thus, I needed to enable a 4:3, 720x480 clip to fit in with the new sequence settings of 1440 x1080i. The workflow was not difficult to follow. First I created a new sequence and set the sequence settings of 1440x1080, I changed the pixels to 'square' and Field Dominance to 'none' and kept the same time base of 29.97 seconds. You have full access to set the settings to fit any project or camcorder that you may be using.
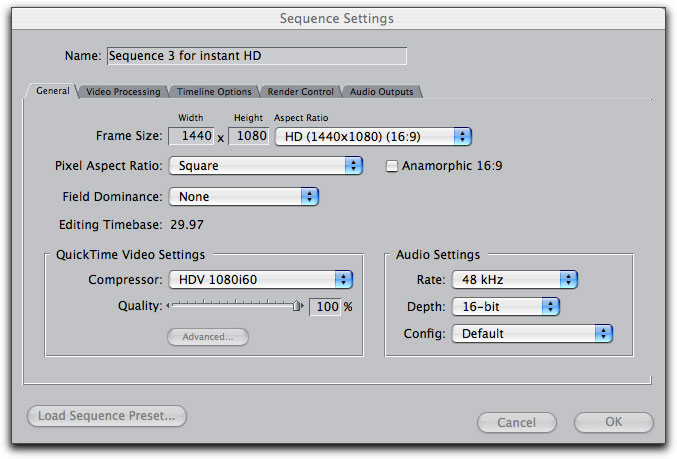
Sequence settings for upconverting SD 4:3 to HDV
Once I have created my sequence I control click and duplicate the sequence remembering to properly label them so as not to get the two sequences confused as I am working.
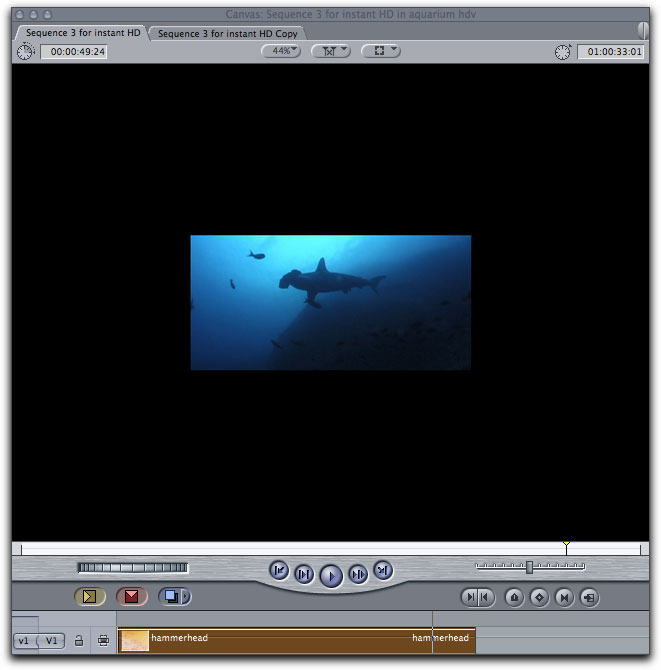
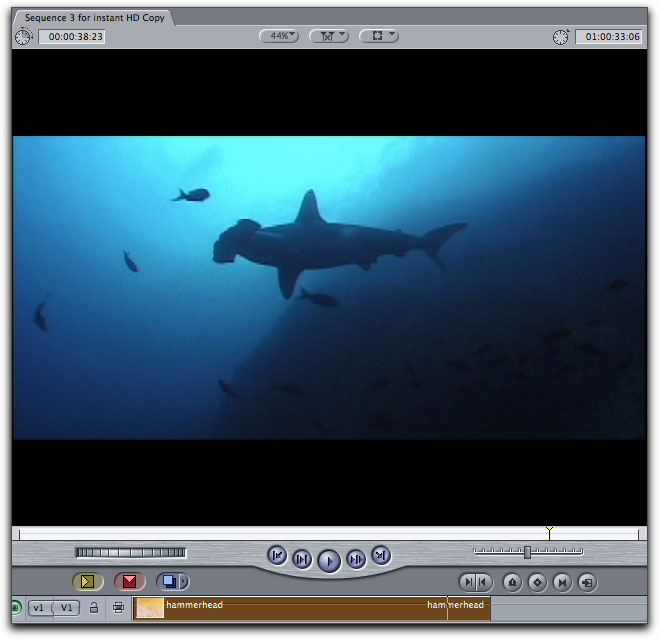
Image as it will appear in sequence one before applying Magic Bullet's Instant HD
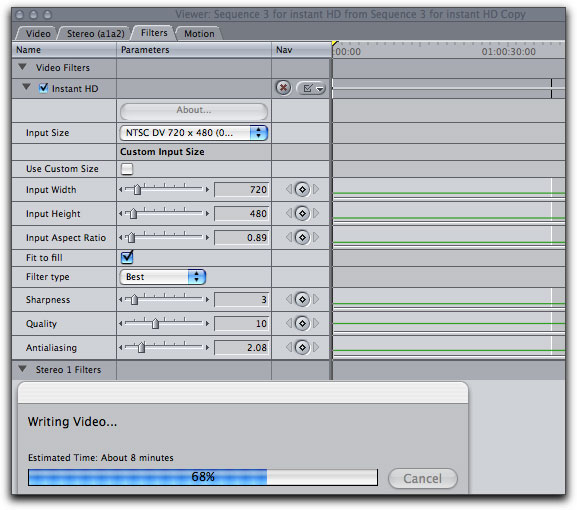
At this point I drag my original source clip down to sequence one and then drag the sequence one icon in the browser down into sequence two. Here is where the magic begins. Now that your first sequence is nested into the second you bring over the Instant HD filter installed in your Final Cut Pro plug-ins folder, and found in the browser with the rest of your effects, and drop it on the clip. Control clicking the sequence you then open that into the viewer and in your filters tab you will find the Instant HD filter parameters.
Checking the fit to fill box and changing the Filter Type to 'Best' is the way to go. Do not confuse the input size designation and think you must change that to the 1440x1080i output that you expect. The original size WAS 720x480 and should be left that way. Should you want to customize the output size with specific height and width settings just unclick the Fit to Fill box and set things the way that will be most productive for you. Once this is accomplished all you need to do is render. Here is the one negative in that it does take some time to render. In my 2 Ghz DP G5 with 2 gigs of ram, the same 37-second clip, one with a widescreen filter placed on it and the other with nothing other than the Instant HD, took 24 minutes to render. Therefore, this might be a good time to have a cup of java and relax while waiting.
Hey, let's head over to Starbucks.
When rendering was done the results were excellent displaying sharpness of detail and good color saturation.
Your final product ready to be used with any of your latest HDV footage. Color and detail are all top notch.
When working in Final Cut Pro you cannot bring the final Instant HD processed clip into another sequence set for HD. Instead you must bring your HD or HDV footage into the sequence where you created your Instant HD upconvert. This worked just fine without a hint of instability.
For all the editors out there who have made one hour movies in standard definition and now want to upconvert it to HD or HDV, this is not the tool you want. Rather this is an excellent editing tool to incorporate standard definition clips into your HD or HDV timeline sequence. Personally, I have hundreds of hours of nature footage that I would hate to sit through days of rendering just so as to be able to use them with my HDV films. However, I am thrilled that I can now easily convert several clips, that I may want to use, which were originally shot in 4:3 SD, in a new HDV sequence.
The bottom line on Magic Bullet's Instant HD is that it is a welcome product for the many who have sizeable SD stock libraries that they wish to use along side their budding HD footage collection. While I fault Magic Bullet's website for not providing tutorials for the new user, once you get used to the workflow, it absolutely does the job retaining and even improving image detail and color saturation.
Steve Douglas is
an underwater videographer and contributor to numerous film festivals
around the world. A winner of the 1999 Pacific Coast Underwater
Film Competition, 2003 IVIE competition, 2004 Los Angeles Underwater
Photographic competition, and the prestigious 2005 International
Beneath the Sea Film Competition, Steve has also worked on the
feature film "The Deep Blue Sea", contributed footage
to the Seaworld parks for their Atlantis production, and is one
of the principal organizers of the San Diego UnderSea Film Exhibition.
Steve leads both underwater filming expeditions and African safaris
with upcoming filming excursions to Kenya, Bali & Komodo,
the Philippines, and the Red Sea. Feel free to contact him if
you are interested in joining Steve on any of these trips. www.worldfilmsandtravel.com
copyright © Steve
Douglas 2006
This article first
appeared on www.kenstone.net and is reprinted here
with permission.
All screen captures and
textual references are the property and trademark of their creators/owners/publishers.