By Ken Stone
I'm a still photographer and I purchased my first Mac to run Photoshop almost 17 years ago. For the first number of years I did photo enhancement for my photography business but about 10 years ago I started working with Final Cut Pro and in those early days FCP users relied heavily on Photoshop to create all of the text and titles that we used in FCP, including creating credit rolls. We also used PS to prep photographs so that they would have the correct aspect ratio for video. In the past decade FCP has received a number of updates and there are now a large number of third party plugins that do much of this for us right inside FCP.
But having said that, I still use Photoshop every day for both still work as well as for video. So, why am I looking at PS Elements? The reason is quite simple. With a multitude of new Final Cut Pro users, many people want or need Photoshop but balk at paying $699.00 for the application. It is lot of money. The question here is; 'for Final Cut Pro users, does Photoshop Elements ($79.99) contain enough tools and features to be used in place of the more expensive Photoshop?'
In a word, the answer is 'Yes'. I will get back to the tools later in this article, but for now, I want to go over the Elements' interface as it is rather different from Photoshop and offers different levels of abilities and complexity depending on the user's skills and needs.
Elements Interface
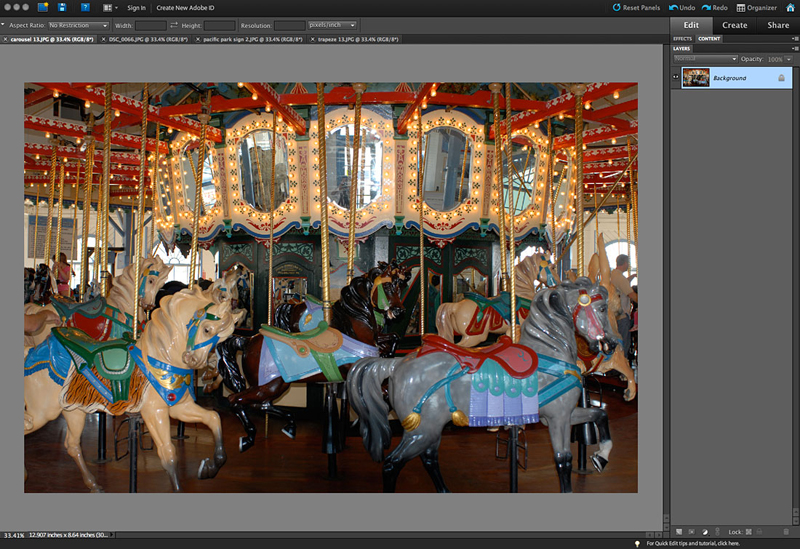
There are a number of different ways that you can run Elements. The default interface is a basic 'all in one' interface, shown below.
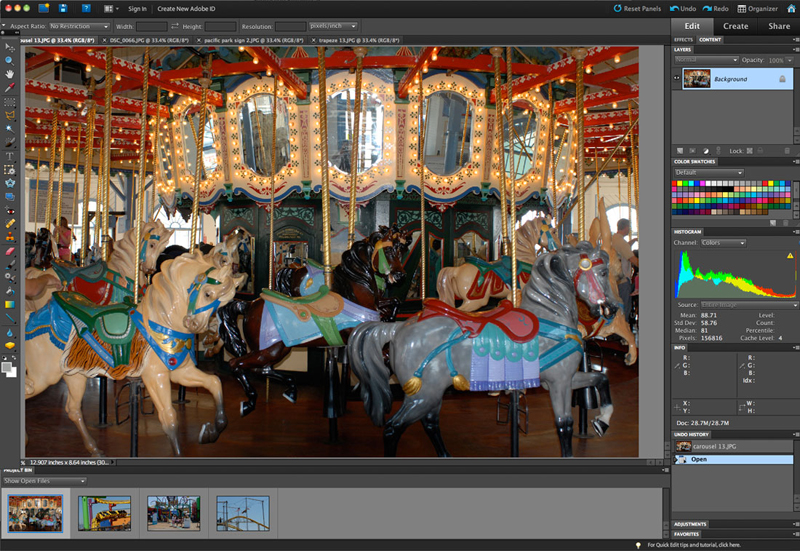
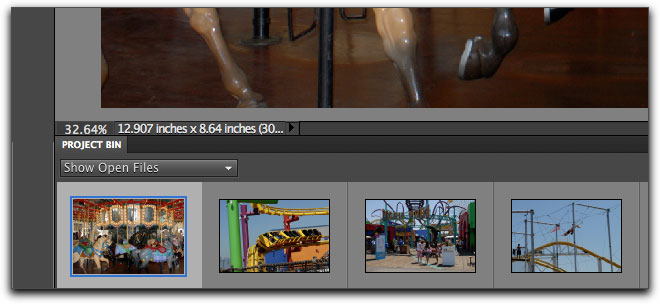
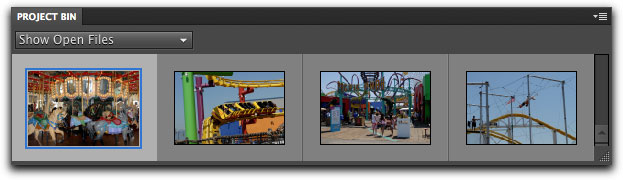
At the very bottom of the Element's interface is the Project bin. Any photos that you have opened in Elements will be displayed in the Project bin. To switch from one photo to another in the main window, simply click on the photo in the Project bin. In the Windows version of Elements you can drag photos at any time, from anywhere, into the Project bin, but this feature does not work in the Mac version.
The Elements' Tool Box is positioned along the left hand side of the interface, shown below left in two columns. All of the remaining palettes and controls are stacked in a column on the right hand side. At the very top are three tabs; Edit, Create and Share, below right, with the Edit tab selected (lighter gray background).
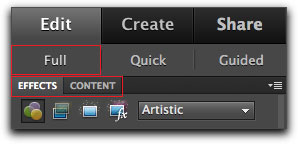
When in Edit mode there is the option of three different levels of Editing; Full, Quick and Guided.
'Full' offers access to all of the tools and effects much like Photoshop. The 'Quick' tab enables simple photographic adjustments, not unlike the controls found in iPhoto, using simple sliders. 'Guided' offers step by step instructions and supplies the tools that are required for the chore at hand. Interestingly, in both Quick and Guided while there is a 'Reset' button at the bottom of the panel to undo anything that you might have applied, in the 'Full' mode there is no 'Reset' button.
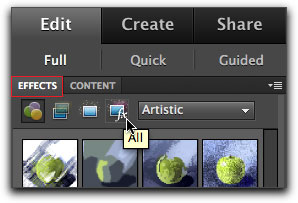
Full. As I stated, when in Full mode, all of Element's tools are available from both the Tool Box and from the menu bar at the top of the interface. With Full, two additional tabs become available, Effects and Content.
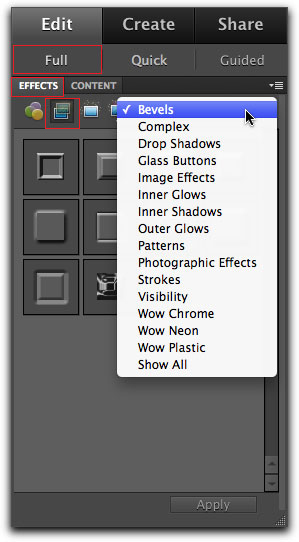
When you have Effects selected four categories become available; Filters, Layer Styles, Photo Effects and All.
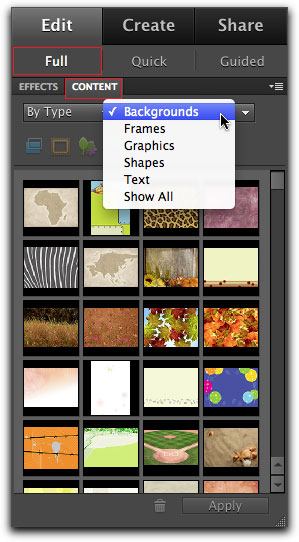
Effects > Layer Styles, is selected below left, showing the Styles that are available. Below right, Content has been selected showing a number of different content categories that are available.
 |
 |
There are a number of functions in Elements, that when applied, produce a green arrow (commit current operation) along side a red circle (cancel current operation). If you want to remove what has been applied, click on the red circle. Using Command Z ('Undo') from the keyboard does not work when the green check mark and red circle are present. If you are happy with the results, click on the green check mark to set it. If you have checked the green check mark and then decide to remove the effect, use Command Z from the keyboard. You can also hit the 'escape' key to remove the effect. These two icons are often found in different locations depending on what you are doing, in the menu bar at the top of the interface, sometimes appearing beneath the photo and in other cases the two icons are found incorporated into the effects controls. Having these icons located in different locations is a bit conterintuitive.
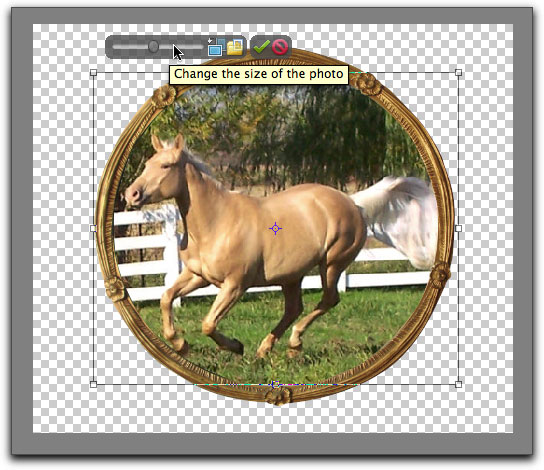
When you apply a Frame to your photo you will get controls that adjust the size of the photo inside the frame. You can also click on the photo and drag to reposition it. After changing the size of a photo, the sizing slider stops working. If you want to adjust the size of the photo further, you will need to click the red circle (cancel current operation) which will return the photo to its default size, then double click on the photo to get the sizing slider back.
When working with 'Text', the two icons, the green check mark or the red circle appear in the top menu bar.

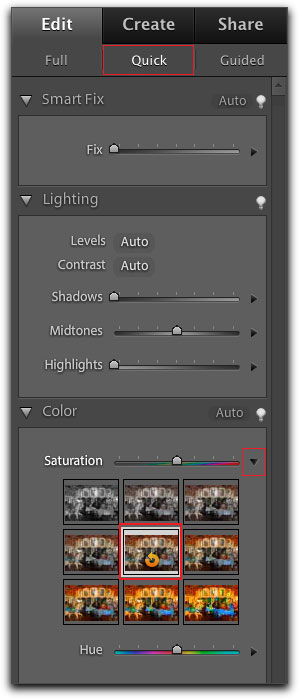
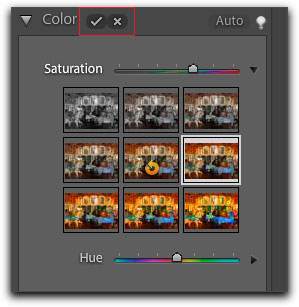
Quick Mode. This mode offers a 'quick' way to make adjustments to your photo. There are five different parameters that you can adjust using slider controls, below left. As you adjust your image by moving a slider, the photo in the Element's main window updates in real time to show the changes to your image. Three of these parameters have an 'auto' button that you can use for a quick correction.
When you spin down a disclosure triangle to the right of each slider (red boxes) a panel opens up to display a set of 9 thumbnails, as shown below right. As you hover your cursor over the different thumbnails, the photo in the Element's main window will update to show the effect. If you click inside a thumbnail and scrub your cursor left or right, you can make slight adjustments to the effect being applied. Click on the thumbnail with the orange return arrow in the center to return the preview to its original state.
 |
 |
Clicking on a thumbnail will temporarily apply the effect. Once you have adjusted your image you can click on the 'Commit button' (check mark) to set the changes, or you can click on the Cancel button' (X) to remove the effect completely. Top right of each effect window is a lightbulb, which when clicked, opens up the Adobe 'Help' for that control.
Guided. I would describe the 'guided' mode as instructional in nature. There are 8 different sections in the guided pane, each section contains instructions, explanations, and the tools associated with performing a specific task.
When you click on the disclosure triangle for any task, the column updates to display the instructions for that task. Some instructions are simple while others are more complex. Each of the steps required to perform the task are numbered and the tools and buttons specific to the task are included in the instructions so you can do your work right from inside the column. This is an excellent feature allowing someone new to photo manipulation and correction to learn the many steps and processes that are an important part of working with photographic images.
In the 'Fun Edits' sections are several very popular techniques, i.e. Reflections and Out of Bounds. You will note below that aside from instructions and tools, some of these instruction sets also include links for 'on-line' tutorials. Very convenient. As you perform each step, the photo in the Element's main window is updated in real time to display what was just done. When you have completed the task or if you wish to cancel out of it, the 'Done' and 'Cancel' buttons are at the very bottom of the panel.
There is another feature available when working in either the Quick or Guided modes but not available in the Full edit mode. Lower left in the Element's main window, just above the Project bin, is a 'View' option menu. From this menu you can select which views of your photo are displayed. Before, After or both. This can be very helpful when judging any effects you might have applied to your photo. To the right of the View menu are two rotation icons, red box below left. In the Project bin, below right, a paint brush icon in the upper right of the photo's thumbnail, signals that an effect has been applied to the photo.
In the Create tab a set of options become available which have to do with the different ways that you can use your photos for final output. Prints, Books, Greeting cards, Calendars, Collages, PhotoStamps and even Labels and Jackets for CD/DVDs. The 'Photo Prints' window is shown below right.
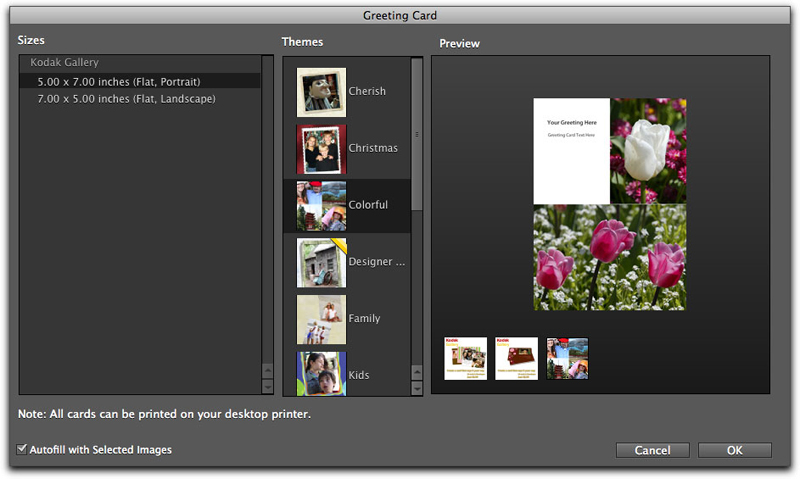
The other options in the Create tab offer templates that you can use to create your books, greeting cards, calendars, as well as make CD/DVDs and PDF Slideshows. The Greeting Card template is shown below.
The last tab on the right Share, offers the ability to post your photos to a number of different social web sites.

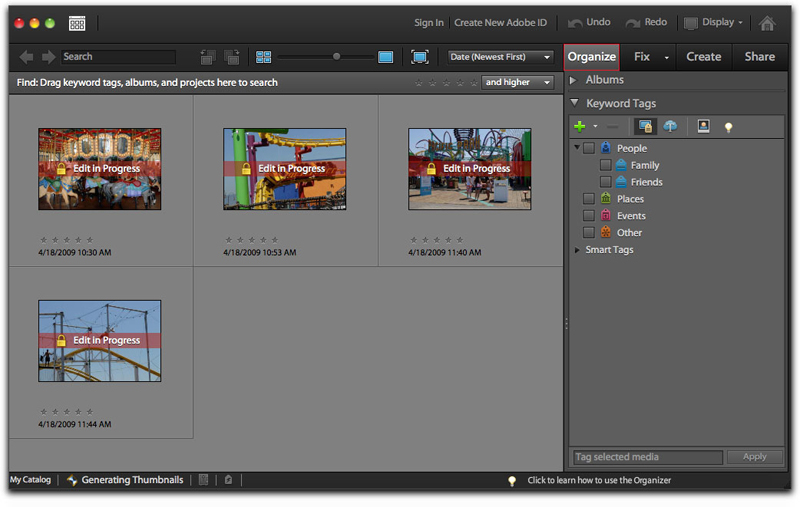
When you select one of the social web sites, Elements will launch the 'Organizer'. According to Adobe, "Elements Organizer is an integral part of both Adobe Photoshop Elements and Adobe Premiere Elements software. You import, manage, and view your photos and video clips in Elements Organizer." Even though the Organizer comes with and installs along side Elements, because it is a separate application, I will not go into it in this article. (I found the Organizer to be a bit unstable on the Mac version of Elements).
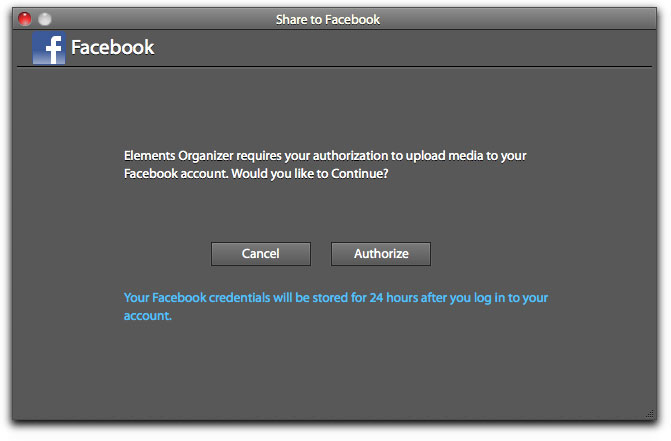
Immediately after the Organizer opens, a separate window, for the social web site that you picked, will open right on top of the Organizer window. I have selected Facebook, shown below.
While I mention that the Element's default interface is an 'all in one', you can still tear off and move the Tool box, palettes and even the Project bin, to suit your own needs. While you can tear off the palettes, maybe place them on a second monitor, the main control panel on the right, which houses the Edit, Create and Share tabs remains in place. Also, the open photo is still displayed affixed to the gray background.
When I work on a photo, I often need to enlarge it greatly and reposition it to do my work. Having the 'Edit, Create and Share' column still in place takes up valuable screen space. I also need to have several different versions of the photo open on the screen at the same time.
Elements has a few controls that makes this application more Photoshop like in layout and workflow.
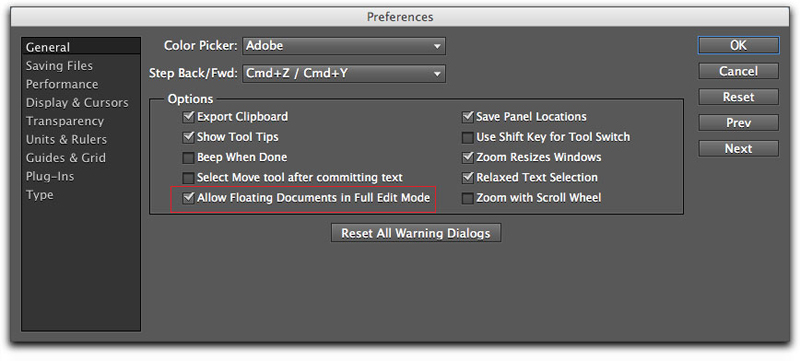
First, while still in the default mode, you can have your photos become independent of the background and the Elements' interface. First you need to go into the Element's Preferences > General tab and put a check in the 'Allow Floating Documents in Full Edit Mode' box.
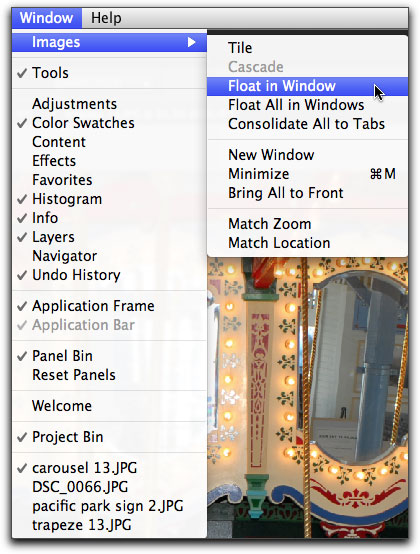
Now, when you choose to invoke this feature go to the Window menu > Images, and select 'Float in Window' (shown below) which will detach the active photo so that you can move it around. You can also select 'Float All in Windows' which will make all of the photos in the Project bin independent from the interface.
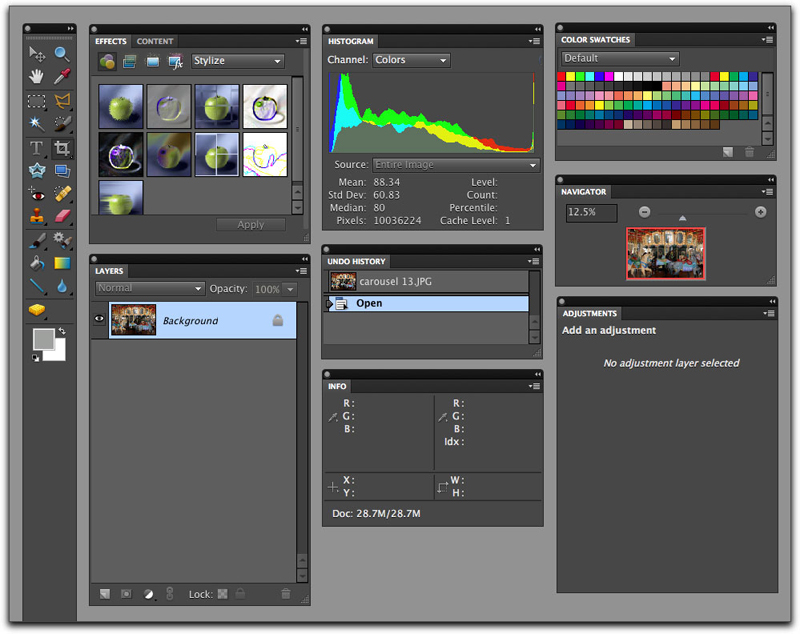
But Elements can take it one step further. If you go into the Window menu and Un-check 'Application Frame', this will remove the gray background and column on the right side of the interface freeing up additional screen space. This is the way that I like to work as, for me, it comes the closest to the Photoshop layout that I have been using for years. This feature, 'Application Frame', is only found on the Mac version of Elements.
In this configuration I have moved all of the Elements palettes to my second monitor.
The Tools
As I said at the start of this article, I wanted to see if the reasonably priced Elements 9 could be used in lieu of the more expensive Photoshop to create titles and prep photos for use in FCP. While you might expect that the Elements 9 Tool set might be greatly diminished from that of Photoshop's, this is not the case.
First off I would like to point out that there are differences between the menu bars and the drop-down menus between Photoshop and Elements.

Photoshop |

Elements |
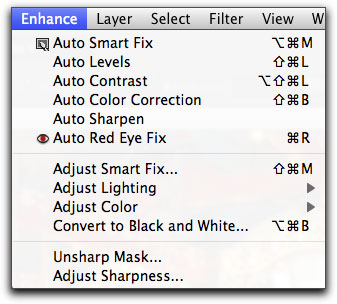
Elements has a menu item in the menu bar, 'Enhance' that is not found in Photoshop.
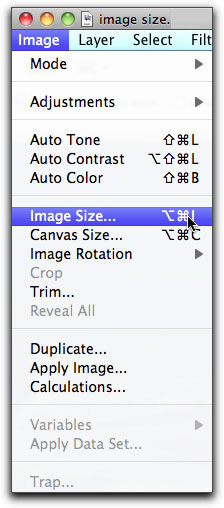
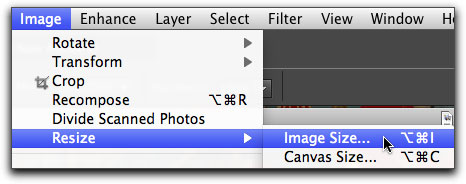
 In the Image menu, Size and Canvas are listed differently. You will also note that in the Elements' Image menu the Crop tool is listed. The Crop tool can still be found in the Tool Box so I wonder why it's listed here.
Photoshop
|
|
Elements
|
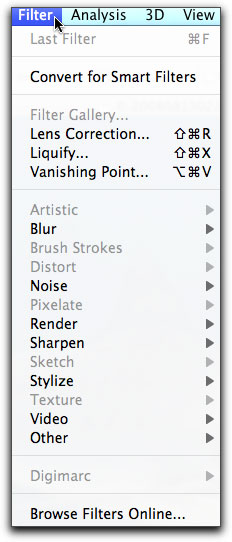
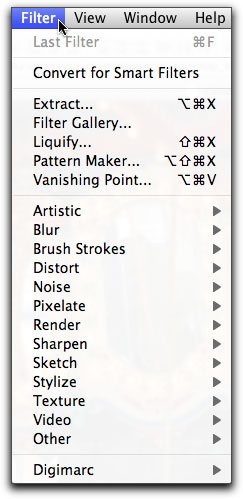
The Filter menu.
Photoshop
|
|
Elements
|
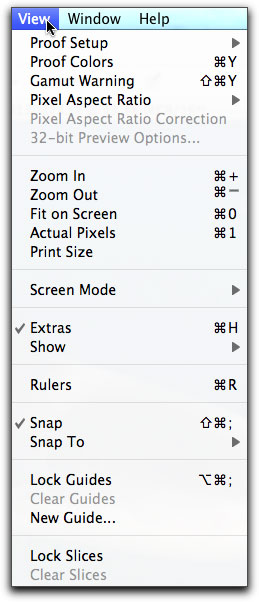
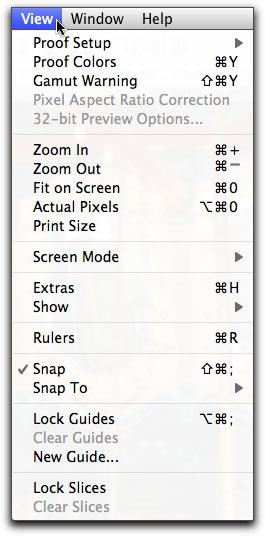
The View menu.
Photoshop
|
|
Elements
|
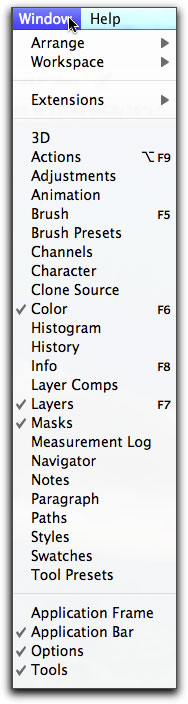
The Window menu.
Photoshop
|
|
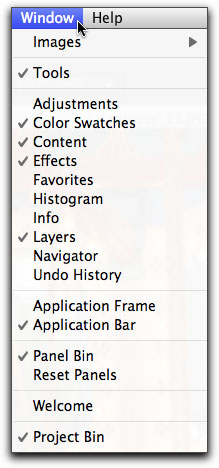
Elements
|
The Tool Box.
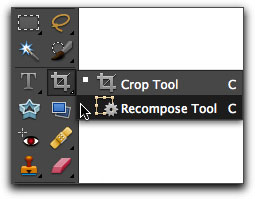
Obviously there are going to be differences between the Photoshop Tool box and the Elements Tool box. The first thing that you'll notice right away is the fact that the tools in the Elements' Tool box are in color, the Tools in the Photoshop Tool box are in Black and White. Both applications share a large number of tools that work in the same way in both applications. Elements does have a few tools that are not found in Photoshop, tools that makes tasks easier for the less experienced user, like the Straighten tool. Elements also has some of the newer tools found in Photoshop like the 'Recompose tool' found under the Crop tool in the Tool box. On the other hand, Photoshop has tools not found in Elements like the Pen (Paths) tool. Additionally, Quick Masks, found at the bottom of the Photoshop Tool box are not in the Elements Tool set.
  Photoshop
|
|
  Elements
|
|
 Elements
|
Selection Tools
There is a rather complete set of Selection tools.
There is also the 'Healing Brush' set as well as the Eraser set, both of which are important tools.
Text Tool
The Text tool in Elements works the same as it does in Photoshop.

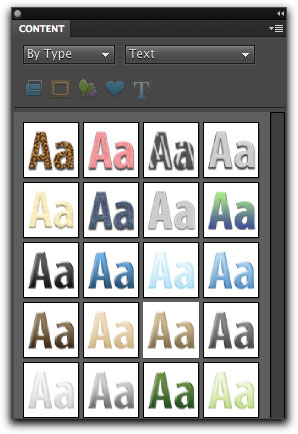
In the Content panel, in the Text section are a number of prebuilt text styles that you can use.
Alpha Channel
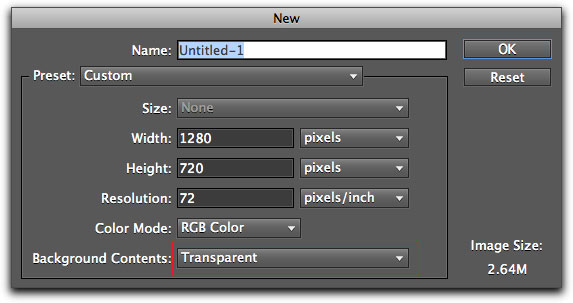
Elements has all the same Alpha Channels abilities as Photoshop. You can create a new file in Elements and select a 'Transparent' background. This feature is very important for creating text for FCP as well as adding 'bugs', graphics or company logo to the video.
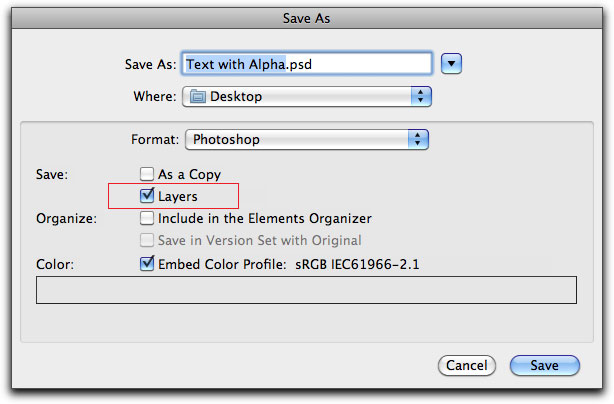
When you are done in Elements you can 'Save As' the File as a PSD (Photoshop) file with layers which you can then import into FCP.
The Layered file will come in as its as own FCP sequence, inside the sequence each layer is a discrete video track.

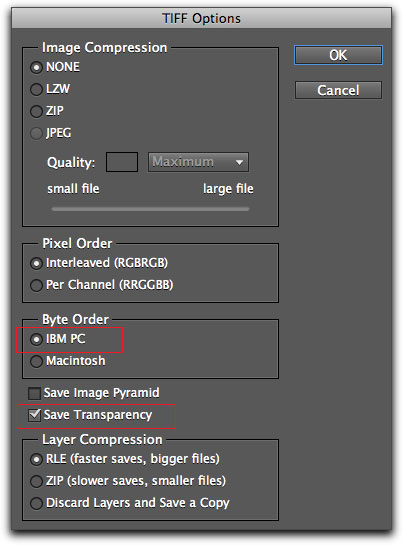
Although a bit off topic, I often need to save files with alpha channels that can be opened on a Windows machine. Elements' 'Save All' option not only allows you to save a TIFF file with alpha channel, but allows you to specifically save it for PCs.
Differences
One would not expect the modestly priced Photoshop Elements to have the full feature set of Photoshop so I'm going to point out some of the features, palettes and abilities not present in Elements. This is not a complete list.
Elements supports Bitmap, Grayscale, Index Color and RGB. It does not support CYMK or LAB color spaces which are used for professional printing and color separations for process color printing. The Elements' Mode menu is shown below left. However, if you import a CYMK image into Elements, it will be converted to RGB for you, below right.
A Photoshop feature that I use often and not present in Elements is the Path tool, Path palette and Text on Path features. Photoshop also has more advanced text abilities.
Another often used Photoshop feature is Quick Mask Mode, missing from the bottom of the Elements' Tool box (shown below). Vector Masks are not available either.
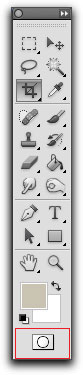
Photoshop Quick Mask, red box
|
Elements, no Quick Mask
|
There are no Channels or Channels palette which divide the image into its basic Color channels, RGB or CYMK, allowing the manipulate of one color channel at a time. The Photoshop Channel palettes are shown below.
Some of the more advanced color correcting tools are not available in Elements; Color Balance, Match Color, Selective Color, and Channel Mixer. Curves in Elements has a different name and is implemented differently than in Photoshop. As shown below, in Photoshop you adjust Color Curves by clicking and dragging in the Color Curves window.
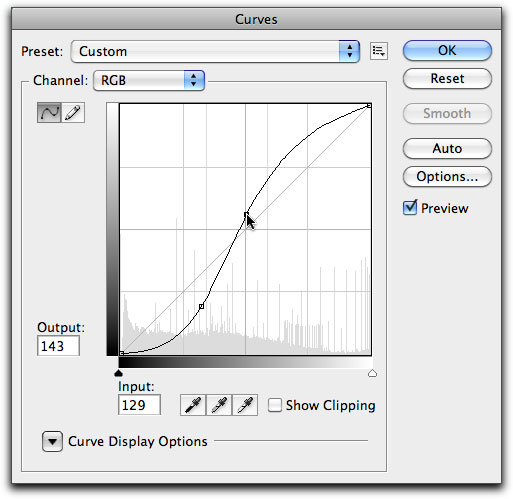
"Curves" in Elements is called "Adjust Color Curves" and is found in the Enhance menu > Adjust Color > Adjust Color Curves.
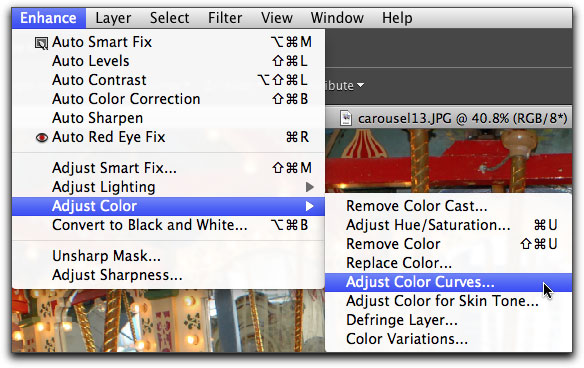
Rather than clicking and dragging on the color curves line as we do in Photoshop, in Elements sliders are used to adjust the color curve. As you move a slider, the color curve in the graphical representation box updates to show the change as does the 'After' image in the preview window.

Also not present; Smart Objects, Smart Guides or the ability to Record actions. Actions created in Photoshop will play in Elements as long as the action's features are supported in Elements. Web features like image slicing and button rollovers are not available either.
Many Photoshop third party plugins work in Elements.
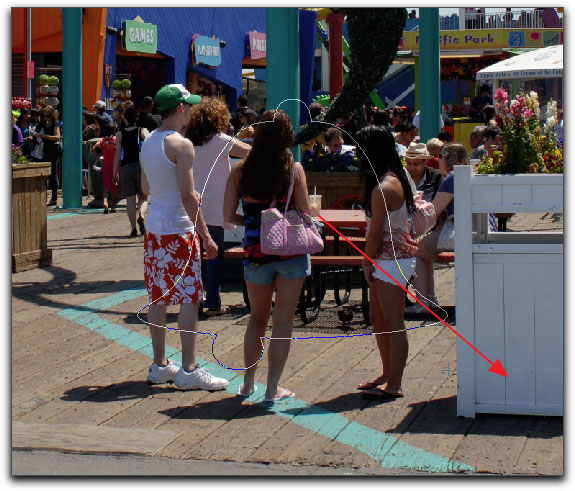
There are a few tools found in Elements not available in Photoshop. The Straighten tool, used to level the horizon in a photo. This can be done in Photoshop using several different tools, so the Straighten tool simply makes the process easier. There is also a 'Cookie Cutter' tool which allows you to insert photos in provided graphic shapes. Using the 'Cookie Cutter' tool does have its own workflow.
First, click on the Cookie Cutter tool in the Tool box (below left). Then, click on 'Shape', top left menu bar (below center). When you click on a Shape, the Shapes' palette opens up, then select a shape from the palette. I have selected the bell shape, the selected shape will have a blue box around it, below right . If you want to apply a Feather to the Cookie Cutter Mask, because the Cookie Cutter tool works by using a vector path to mask the layer and then apply the mask, the Feather is not visible until the mask has been applied.
Now, place your cursor into the photo, click and drag. As you drag you'll see the shape play out over the photo.
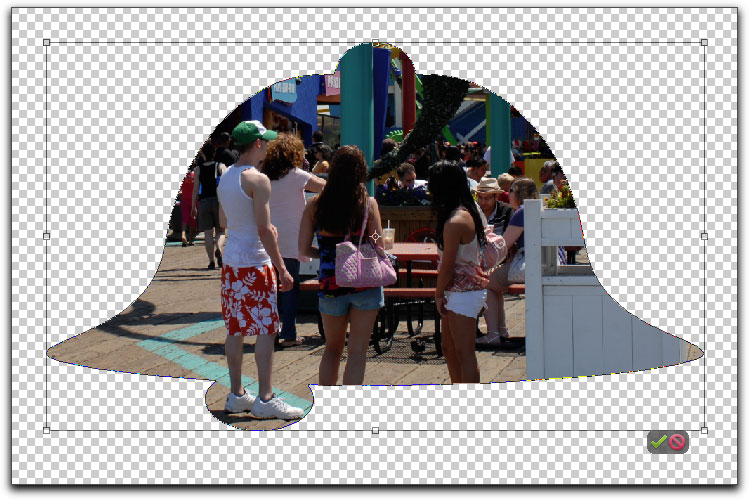
You can control the size and proportions from 'Shape Options' and Feather its edges. You can drag the shape to reposition it over the photo, you can also change the size of the shape. Notice below that the area outside the shape becomes transparent (an alpha channel), for superimposing over another photo or over a video track. While a little cartoonish, this feature is fun and can be useful.
Thoughts
So, back to the question, "for Final Cut Pro users, does Photoshop Elements ($79.99) contain enough tools and features to be used in place of the more expensive Photoshop?". It is my opinion that the answer is 'Yes'. Lets look at a few of the things that a FCP user might need out of Elements.
Resizing photos. If we want to add still photographs to our FCP timeline we often need to resize and crop the image to properly match our sequence settings (or change the DPI). There are also times when we will export a single video frame from FCP for use elsewhere. If the video we are working with is 'anamorphic' then, after FCP export, the image will appear distorted (squeezed) and we would need to take it into Elements to change the width of the image, but, in order to 'un-squeeze' the image we need to be able to tell Elements to 'not constrain proportions' (uncheck the Constrain Proportions).
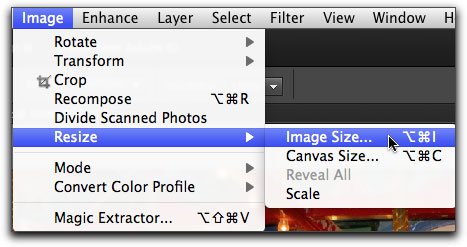
In Elements, Image and Canvas size have been grouped together.
|
|
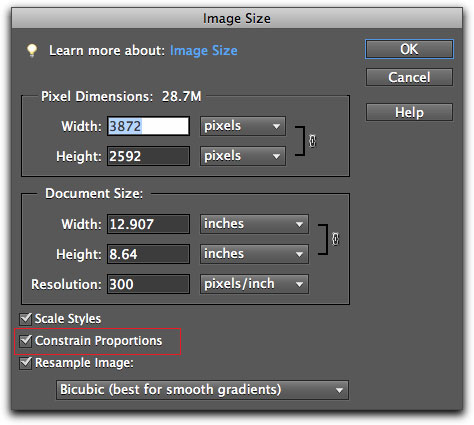
Elements has 'Constrain Proportions'.
|
While Elements' color correcting tools are not as sophisticated as those found in Photoshop and it does not have Curves, the tools are still very useable. There is a new menu item in Elements called 'Enhance' which contains the chroma and luminance tools. A very important tool for me, 'Unsharp Mask' is also included.
Note: While I sometimes do basic color correcting of stills in Photoshop before importing into FCP, I always do final color correcting of stills in FCP, as stills become converted to video in the FCP timeline.
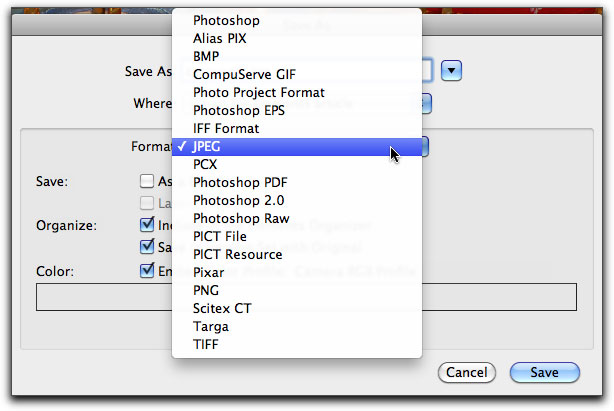
'Save As' in Elements has the full list of export formats.
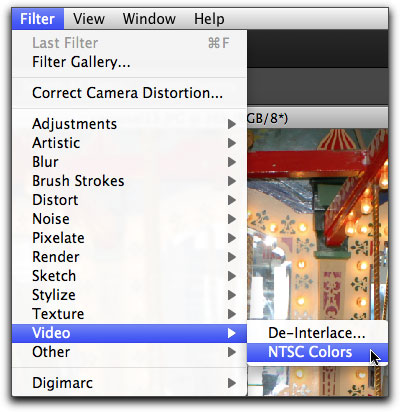
Elements also has the standard De-interlace and NTSC color filters.
I did all of the graphic work for this article in Elements and aside from the fact that many of the features in Elements have been moved and are located in places different than in Photoshop, causing me to hunt around for what I was looking for, I found Elements' abilities up to the challenge, and quite adequate for prepping photos for use in FCP and working with still image exports from FCP.
There are a large number of diversified features and abilities found in the 'Edit - Create - Share' panels that make Elements an excellent photo application, except maybe for 'power users' who need the full set of Photoshop's advanced features.
There are several issues with the Mac version of Elements that work properly on the Windows version, I know, I tested. The Project bin is a good feature but the ability to drag photos into the bin does not work on the Mac. On the Mac, to open a photo, you'll have to go to the File Menu > Open and navigate to the photo you want, or you can drag the photo(s) onto the Elements' icon in the dock.
I use 'Save for Web' a great deal in prepping photos for articles and the web sites I work on. There is an issue with this, in that the quality setting always defaults to 'Low' quality (not what I want) and I need to reset it every time I use the feature. I have also noticed that several other 'setting' boxes have this same issue, settings do not stick. These features work properly in the Windos version.
I also noticed some strange behaviors on the Mac version, like the cursor blinking back and forth between a cursor and a small clock, this just after launching Elements and having not yet done anything. I have also experienced freezes and crashes from time to time, Elements for the Mac needs to be more stable. I found that it is slow, especially when applying some filters, but this is also true on the Windows version.
This quirky behavior does not really interfere with using Elements and I can say that Photoshop Elements is an amazingly powerful photo editing application, given its low price, Elements should be a good option for all those except for the traditional Photoshop 'power user'. There is a Full featured (free trial) Elements 9 demo that you might want to try out.
Enjoy,
--ken
copyright © www.kenstone.net 2011