|
|
   
| Review: - Re:Vision Effects-Twixtor Version 5 |
December 2010
 Re:Vision Effects-Twixtor Version 5 Re:Vision Effects-Twixtor Version 5
http://www.revisionfx.com

Twixtor FX Plug in for FCP-$329.95
Twixtor Pro for FCP-$595.00
Twixtor for Adobe After Effects-$329.95
Twixtor Pro for Adobe After Effects-$529.95
Upgrades from prior versions-$82.49 or $149.95
Review by Steve Douglas
To be completely honest I received Twixtor version 4 a few years ago. Unfortunately, I was so busy with traveling demands, reviews and projects that I never even got around to installing and using it. Re:Vision's Twixtor Version, Version 5, is now completely compatible with both Final Cut Pro and Adobe's CS5 but are separate purchases unless both the plug-ins for AE and FCP are purchased as a set.
Twixtor does for time remapping whether for slow motion or speed remapping footage what the new time remapping functions in Final Cut Studio aspires to. This is not to say the Final Cut's speed tools were not improved in Studio 3 but, from what I can see and test, it does not perform quite as well as Re:Vision's Twixtor.
At the same time, Twixtor can be a bit more complicated to utilize than the 'speed tool' features found in Final Cut Pro.
For third party plug-ins like Re:Vision's Twixtor, Final Cut Pro can not enable the length of the clip on the timeline to reflect the change made to the speed of that clip. When using Twixtor to change the speed of a clip, the length of the clip on the timeline will remain the same. You will have to work around this limitation.
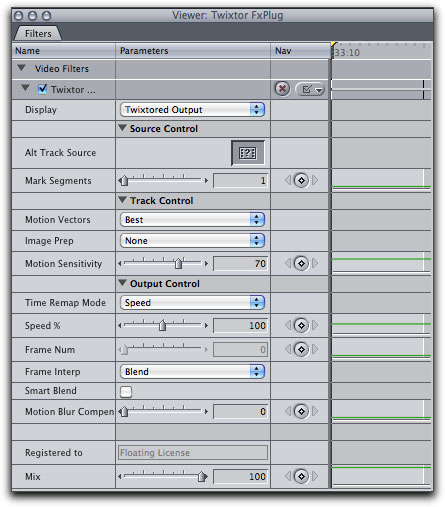
All the settings you need to create slow motion or speeded effects are contained in the Twixtor FX plug in for Final Cut Pro shown here.
The Twixtor Pro plug-in has many more parameters for you to work with.
Speeding up a clip by a specific percentage is quite easy. In the Twixtor parameters found in the Viewer's Filter's tab, you need only to adjust the percentage of the clip found under the filter's Output Control with the Time Remap Mode's drop-down menu set to 'speed'. If you want the clip to be twice as fast, you would set it at 200%. Because the duration of the clip with Twixtor applied cannot be changed, once the clip is rendered and played back, the part of the duration that under Final Cut would have been shortened, will play back as black. This is simple to deal with as all you need do is find the last good frame of the speeded up clip and use the blade tool to cut the unwanted black portion of the clip.

The sped up clip, once rendered, will display many black frames that take the place of duration of the original clip.
Finding the last good frame and blading off the black is a piece of cake.
If you need to time remap a clip's speed by specific frames that is also possible. However, keep in mind that if you are altering the speed of clip using frames, you should change the time code display to the right of the RT drop-down menu to frames, and knowing exactly which frame your clip begins on and each frame number where you intend to change the speed is imperative. The other, and easier, alternative is to do your speed ramping by simply key framing the percentages of your Twixtor placed clip.
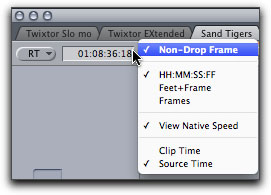
Most editors are used to working in a time-code mode as shown here.
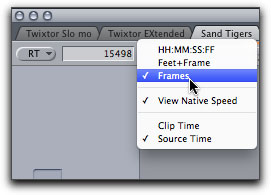
By right clicking in the space between the time-code window and the sequence
you can change the mode to a 'frames' configuration.
Creating a slow motion effect is a bit more complicated than simply adjusting speed. Again, this is because of Final Cut's not allowing plug-ins to affect the duration of the original clip.
This is done by placing the clip whose duration you wish to alter in a new sequence. You then duplicate that sequence into a new sequence two or three times. Create another new sequence and drag this extended sequence into it. Now you can apply the Twixtor plug in. If you attempt to double click on the extended sequence in order to bring up the Twixtor parameters in the Viewer, you will only get the original nested sequence. This is not much of a problem as you need only go up the Final Cut's View/ Sequence and now the Twixtor parameters will show up for you to adjust. Keep in mind that any time you use Twixtor you must render in order to see the results. This can be a bit of a pain as you tweak your effect with any of the parameters after the initial render. Re rendering will always be necessary.
The final results of any plug in are usually the most important aspect to consider. In Twixtor's case, for most footage, the results can be gorgeous. I found it best, when creating any slow motion work to use clips where there was not a whole lot of motion in the first place. For example, below is a frame of a large jellyfish with many small tentacles. This clip was slowed down to 20% and the slow motion was beautiful to look at.
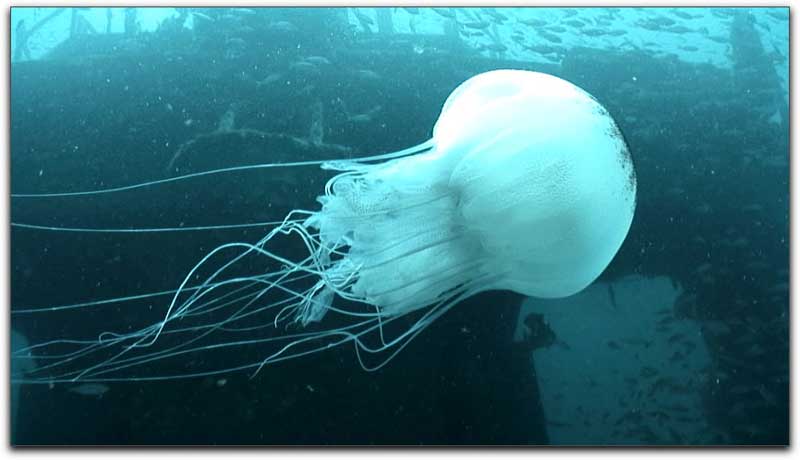
Notice that even the smallest tentacle retains its appearance without blur or ghosting of the image.
With very fast motion I could not eliminate blurring of the image. This is understandable as when a smaller object is moving this fast, even capturing a single un-blurred frame is difficult.
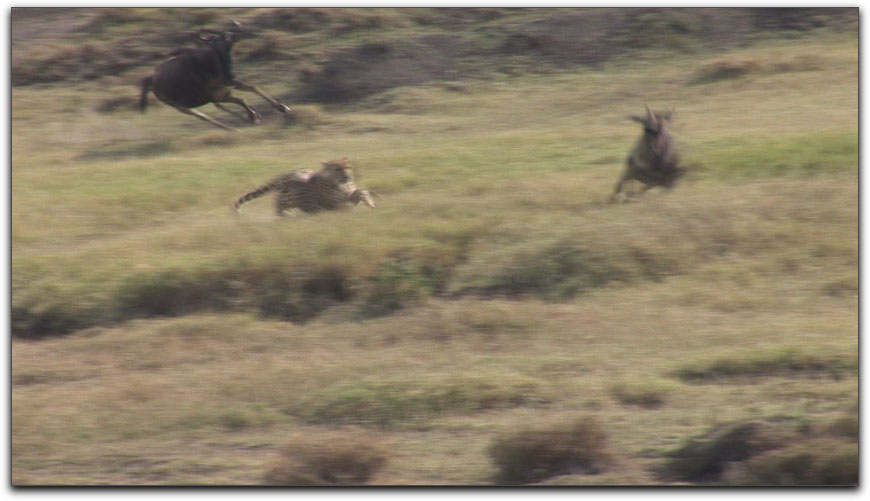
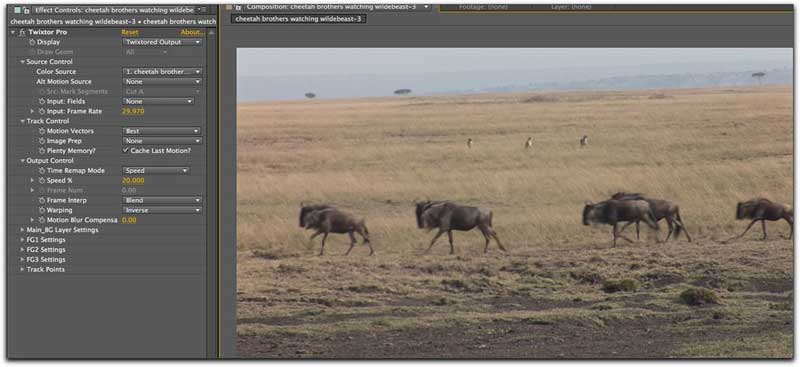
This frame of a cheetah chasing down a wildebeest has had no speed tools placed upon it. It is the original frame.
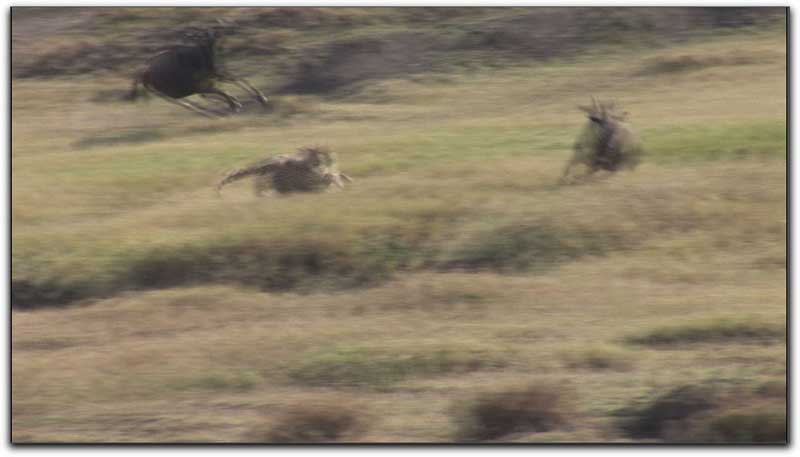
This is the same frame but with Final Cut Pro's speed tool used to slow it down to 25%. You can see ghosting of the animals quite clearly.
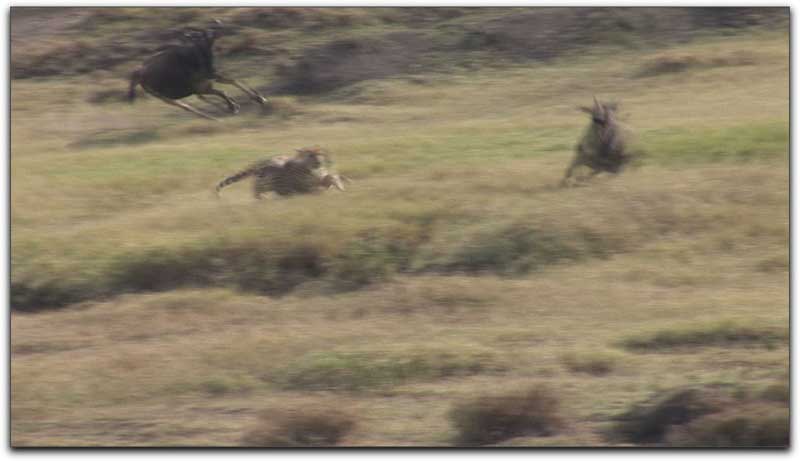
Using Twixtor on this frame doesn't eliminate the ghosting but there is definite improvement in the image.
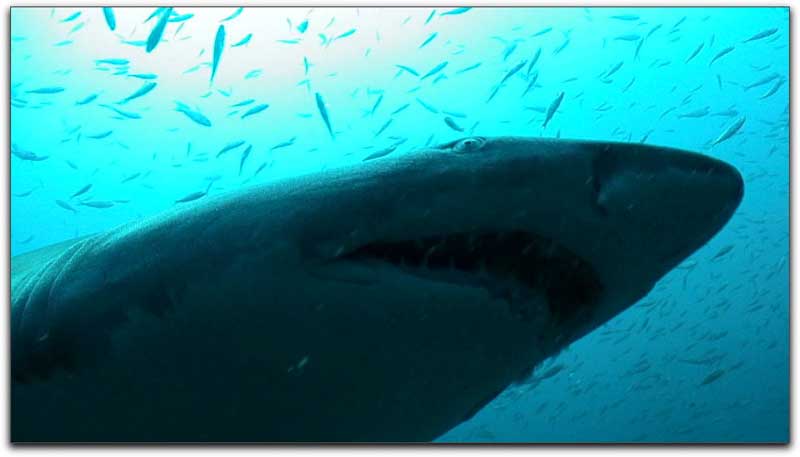
Conversely, this larger subject moving relatively slowly over my head, when slowed down to 15% shows no distortion, blurring or ghosting with Twixtor Pro applied.
One thing I liked is that the workflow when moving from Final Cut Pro to Adobe After Effects was pretty much the same. You have the same modes to change and settings to configure.
Parameters in Adobe After Effects are manipulated in very much the same way as you would in Final Cut Pro.
I always make mention of a site's tutorials and documentation for new users. There are several video tutorials to help you get started that used Twixtor Version 4, however, while some were quite helpful, I also found parts of them to be highly confusing. The first video tutorial provided a very good overview of the basic plug in though I found, while understandable, the audio was distorted and proved to be a real annoyance. Another tutorial on speed ramping was divided in two parts, the first covered using Frames as the remapping mode. I found the narrator's directions to be dizzying, however, when she switched over to remapping in speed mode, well, that section was much easier to follow. There were no video tutorials of any kind pertaining to Twixtor Pro's considerably more advanced features or when working with Twixtor's Vector in functions and, to be honest, I found the manuals for the Twixtor plug ins to be so complicated in its language and presentation that they were really of no help at all and would certainly not be understood by a new editor. After having read a review of Twixtor Version 1 written in 2001, I noticed that the author had said approximately the same thing so I don't expect that documentation will be improved anytime soon. Important to note that I did find several excellent video tutorials for using Twixtor in Adobe After Effects on YouTube that may be helpful to you. Notification of updates is done via the Re:Visions Facebook page and other major press releases. I would prefer that for those who bought a license for Twixtor that their registration info would be used so as to be notified of updates that way.
However, these failings do not take away from the fact that
Twixtor really does its job very well. As I said before, I found that when creating a slow motion clip, it was better to apply Twixtor to a clip that did not have too much motion to it in the first place. Re:Vision's Twixtor is not exactly inexpensive and they do need to write an easy to understand manual for all their versions, however, for those who must have the very best in slow motion and variable speed ramping effects, Twixtor will prove to produce more accurate in its motion estimation and object tracking with less artifacts where subjects are crossing the frame. With the majority of test clips I used, the results when speeding up a clip produced far less stutter and considerably smoother motion, for slow motion the results can be just stunning.
 Steve Douglas is a certified Apple Pro for Final Cut Pro 7 and underwater videographer. A winner of the 1999 Pacific Coast Underwater Film Competition, 2003 IVIE competition, 2004 Los Angeles Underwater Photographic competition, and the prestigious 2005 International Beneath the Sea Film Competition, where he also won the Stan Waterman Award for Excellence in Underwater Videography and 'Diver of the Year', Steve was a safety diver on the feature film "The Deep Blue Sea", contributed footage to the Seaworld Park's Atlantis production, and productions for National Geographic and the History channels. Steve was a feature writer for Asian Diver Magazine and is one of the founding organizers of the San Diego UnderSea Film Exhibition. He is available for both private and group seminars for Final Cut Pro and leads underwater filming expeditions and African safaris with upcoming excursions to the Cocos Islands, Costa Rica, Lembeh Straits, Indonesia, and Wakatobi. Feel free to contact him if you are interested in joining Steve on any of these exciting trips. www.worldfilmsandtravel.com Steve Douglas is a certified Apple Pro for Final Cut Pro 7 and underwater videographer. A winner of the 1999 Pacific Coast Underwater Film Competition, 2003 IVIE competition, 2004 Los Angeles Underwater Photographic competition, and the prestigious 2005 International Beneath the Sea Film Competition, where he also won the Stan Waterman Award for Excellence in Underwater Videography and 'Diver of the Year', Steve was a safety diver on the feature film "The Deep Blue Sea", contributed footage to the Seaworld Park's Atlantis production, and productions for National Geographic and the History channels. Steve was a feature writer for Asian Diver Magazine and is one of the founding organizers of the San Diego UnderSea Film Exhibition. He is available for both private and group seminars for Final Cut Pro and leads underwater filming expeditions and African safaris with upcoming excursions to the Cocos Islands, Costa Rica, Lembeh Straits, Indonesia, and Wakatobi. Feel free to contact him if you are interested in joining Steve on any of these exciting trips. www.worldfilmsandtravel.com
copyright © Steve Douglas 2010
This article first appeared on www.kenstone.net and is reprinted here with permission.
All screen captures and textual references are the property and trademark of their creators/owners/publishers.
|