|
   
| Final Cut Pro 10.1 - A First Look |
Dec, 2013
Final Cut Pro 10.1 - A First Look by Steve Martin & Mark Spencer
www.rippletraining.com

Introduction
Final Cut Pro 10.1 is the next major step forward for Apple’s professional editing software Final Cut Pro X. Not since its initial release over 2 years ago has there been a more significant version with regard to performance and workflow. The most visible improvement in FCP X is the new Library model, but there are dozens of editing and UI enhancements throughout that will have a major impact on your editing speed and efficiency.
In this article we will walk you through the key features that will matter most to both new and seasoned Final Cut Pro X editors.
Mavericks

You must install Mavericks in order to run Final Cut Pro 10.1.
The first thing you need to know about Final Cut Pro 10.1 is that it requires Apple’s latest operating system, Mavericks (OS 10.9). In order to get the best performance out of Final Cut Pro, Apple built it to run exclusively on this new platform.
If you are already running Mountain Lion (OS 10.8), you should be able to upgrade to Mavericks. If you have an older machine that cannot be updated to Mountain Lion, it probably won’t be able to run Mavericks either. For example, one of Mark’s Macs is an aging MacPro (2 x 3 Ghz Core 2 Duo) on which Mavericks cannot be installed.
While jumping right into a new OS may give you pause, as you’ll see throughout this article, the performance benefits of using FCP 10.1 far outweigh any perceived negatives. Check Apple’s website for system requirements:
Performance
Final Cut Pro 10.1 has been optimized to take advantage of the dual graphics cards (GPUs) in the new Mac Pro, but you should see improved performance on any hardware configuration that supports it. The performance improvement comes from a couple of sources: not only does Final Cut fully leverage the underpinnings of Mavericks, its new media management model results in much faster load times.
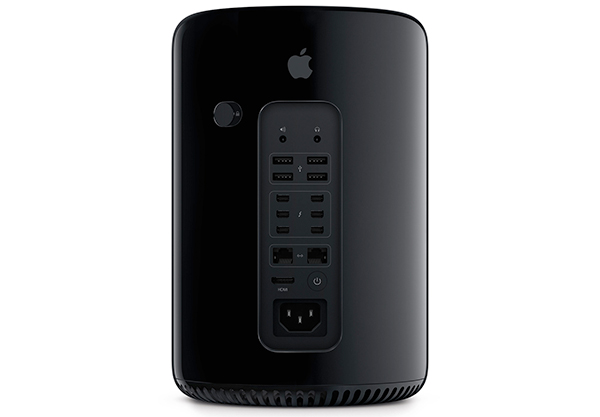
As for the new Mac Pro, it’s a screamer. You’ll be able to play back multiple streams of 4K media; pile on effects; add color corrections and play it all back without rendering.
You’ll also be able to monitor video up to 4K resolution over Thunderbolt 2 or HDMI - no third-party cards are required.
New Unified Library Model
Perhaps the biggest change from prior versions of Final Cut Pro X is the consolidation of the previously separated Event and Project libraries. Now, all Projects are contained within Events. Events are simply “buckets” for both media and Projects - and Events themselves are contained within Libraries. From our standpoint this is huge.
Previous versions of Final Cut Pro made managing media confusing because Projects could contain media from multiple Events spread across multiple drives. And you wouldn’t know this until you tried to move the Project or hand it off to another editor. Then the screaming would begin...
In Final Cut Pro 10.1, you create Libraries that contain single or multiple Events (for importing and storing media). Within each Event are single or multiple Projects (representing your edits).
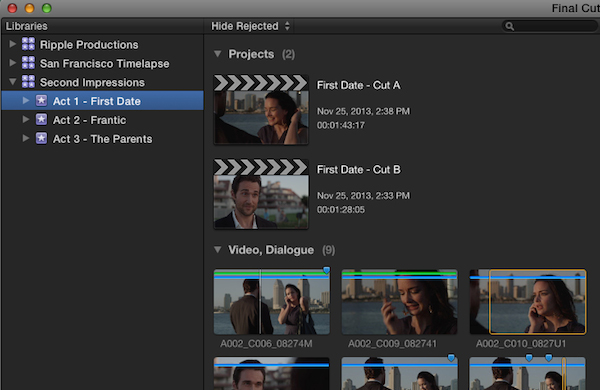
In the image above, there are 3 separate Libraries and one Library opened to reveal 3 separate Events.
We like to think of Libraries as self-contained production units. Each library contains Events with the media you build your Projects from. As with previous versions of FCP X, Events can be further organized with Keywords, Smart Collections and Ratings tags. Because a Library is like a master container for Events it’s easy to copy clips, Projects or even entire Events between Libraries.
You can create as many Libraries as you like and you can save them anywhere you like.
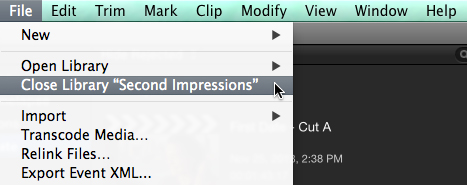
You can also open or close a Library at any time.
The ability to open and close Libraries is a really powerful feature: it lets you reveal just the work you want to see and hide everything else - yet all your other “production units” are just a click away.
Libraries greatly simplify media management when importing, moving, sharing, or archiving projects and media. They can also be automatically backed up to any location you choose. We’ll return to libraries when we turn to the subject of media management towards the end of this article.
Updating
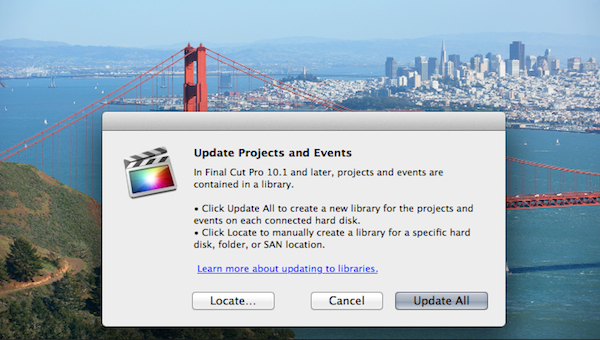
Existing Projects and Events must be updated if you want to work with them in Final Cut Pro 10.1.
Because of this new unified Library model, you need to go through an update process if you want to work with your existing Projects and Events in Final Cut Pro 10.1. The process is straightforward, but there are a couple of things we recommend you do - both before and after you update - to have the best experience. We’ve created a free 3-part video tutorial that walks you through exactly what you need to do which you can see here:
http://www.rippletraining.com/fcpx-features.html
While Apple has made this update process very straight-forward, we highly recommend you watch our videos.
Importing Media
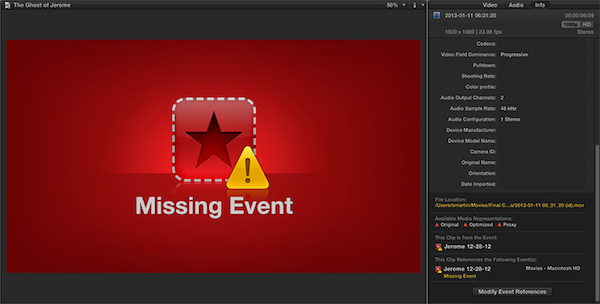
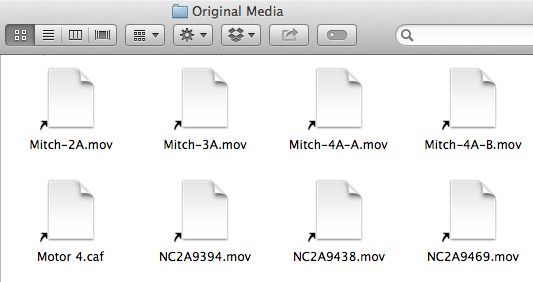
The new library model also affects how you import media. Media can be stored either inside a library - called managed media - or can be stored outside a library in any location you choose, including connected volumes, a SAN (Storage Area Network) or even a NAS (Network Attached Storage) - this option is called external media. A library can contain a mix of managed and external media. And media can be moved into or out of the library at any time.

When importing media that is already located on a connected volume (rather than on a camera card or camera archive), you have a third option of leaving the files right where they are - this is another “external media” option. With external media, the library contains reference files, also knows as symbolic links, or sym links, that point to the actual media file.
To see this new feature in action watch this video.
If you are an individual editor working alone, it’s probably best to let Final Cut Pro manage your media - in other words, to copy your media into the Library. That way, the Library is completely self-contained and is easy to copy, move, and archive.
If you are working with other editors who all need access to the same media, you can put the media on a shared SAN or NAS as external media. That way, each editor has their own local library (with their own Events and Projects in the Library) that points to the shared media.
Projects themselves can easily be shared among editors who have access to the same media using the Export Project XML and Import XML commands.
Project Snapshots
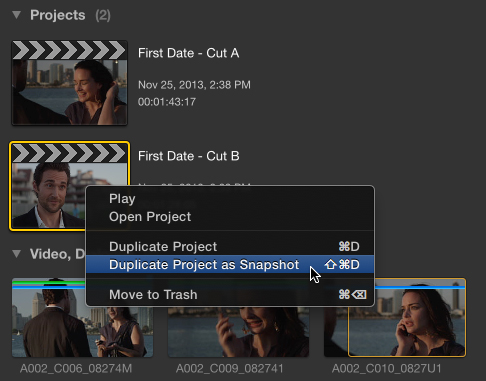
Versioning is one of the most important considerations during editorial as the very nature of video editing requires constant revisions. Often you want to be able to “freeze” an edit in its current state so you can experiment with the story while maintaining the option to return to your original edit if need be. By right-clicking on the Project thumbnail you’ll see the 2 duplicate options.
In most cases, you simply duplicate a Project and rename it. However, if your Project contains Multicam or Compound clips, this could prove problematic because making changes to the Multicam or Compound clip in the original Project would effect all instances of those clips in any Duplicate Project in which they appear.
Normally, this is a good thing. You don’t want to have to update every Compound Clip or Multicam clip in every Project where they exist. This would get tedious to say the least.
That said, there may be situations, where you need to duplicate a Project that contains one or more Compound or Multicam clips and you don’t want the changes you make to those clip types affecting or altering those same clips in your Project duplicates.
This is where Project Snapshots come in.
By choosing to Duplicate your Project as a Snapshot, you are essentially putting your Project in “cold storage” so that all your original Multicam and Compound Clip instances remain as original clip instances and will not be affected by any changes you make to them in your original Project. Project Snapshots will always appear with a date and time stamp to let you know when the Project was “frozen”.
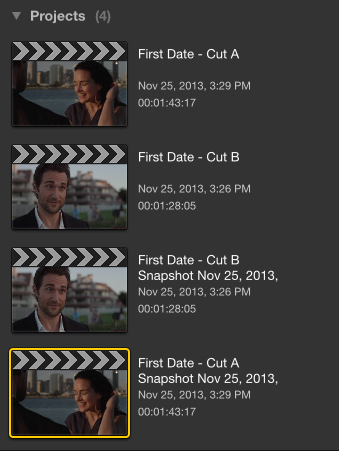
If the original edit you are working on goes in the wrong direction creatively, you can always open the Snapshot by double-clicking - it will open in the Timeline for editing. The Project will be in the state it was at the time you created the Snapshot. By the way, you can create Snapshots from Snapshots if you need to, and can rename them as your workflow dictates.
Custom Project Sizes
One feature that has been sorely missed since the introduction of Final Cut Pro X is the ability to create custom project (frame) sizes. There are times you might need a custom frame size for a specific project you are working on - video walls that have odd dimensions, motion graphics specifically designed for kiosks, etc. Or maybe you just cannot resist shooting video on your iPhone in a vertical orientation and you need to output a final movie this way (no vertical videos!!).
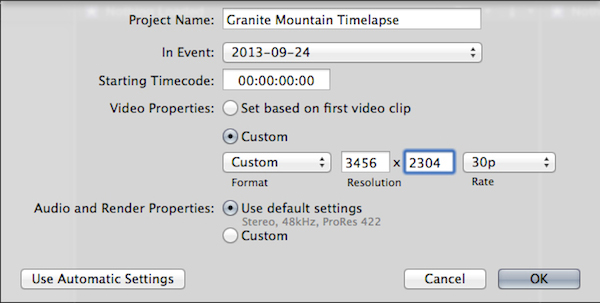
Creating a Custom Project size is simply a matter of choosing “Custom Settings” when you initially create the Project. Choose “Custom” from the Format menu, then enter your custom Project dimensions. Keep in mind that Final Cut Pro still limits your frame rate to broadcast-friendly rates.
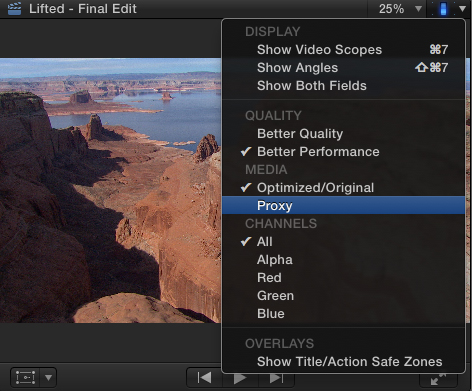
Optimized & Proxy Media Menu
Depending on your workflow, you’ll often need to generate Optimized or Proxy media - what FCP calls Transcoding. In order to work with Proxy media in previous versions of FCP X, you had to open Preferences and check a box. Now switching between Optimized and/or Proxy media is simply a matter of choosing the option from Viewer display options menu.
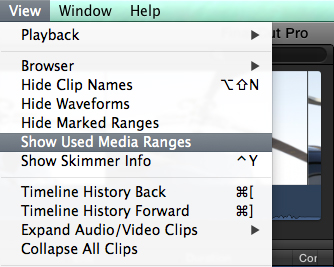
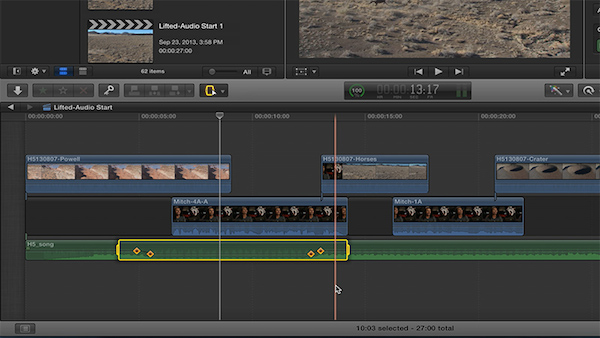
Used Media Ranges
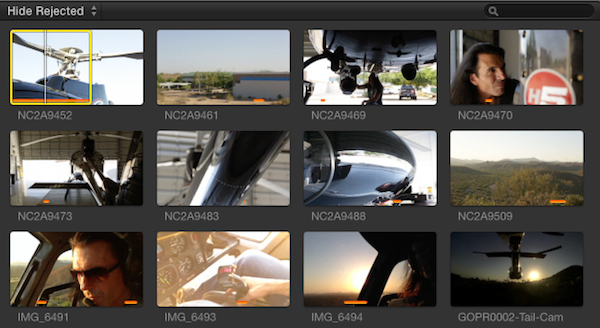
One new feature that has consistently made it into many FCP user’s top 10 feature requests is the ability to see which clip or clip ranges have already been used in a Project. With the Event selected, choose this option from the View menu.
Used clips ranges will appear as orange bars at the bottom of the clip thumbnail in Filmstrip view and along the bottom of the filmstrip in List view. Clicking on the bar will create a selection range.
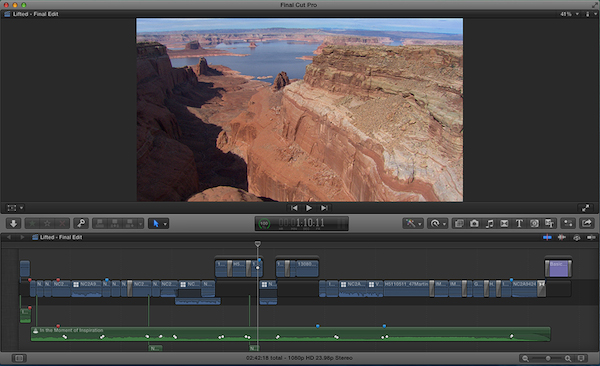
UI Window Enhancements
One of the best features of FCP X has always been that the UI is optimized for a variety of display sizes. For those of you working on a MacBook Pro or Air with a 13” display, you’ll appreciate that you can regain even more screen real estate by hiding the Browser from the Window menu.
New Retiming Options
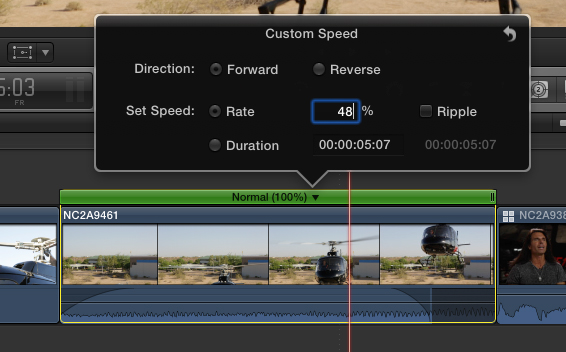
Apple has added some significant enhancements to the retiming features of FCP X. Parking your Playhead over a clip and pressing Command-R now brings up a cleaner looking Retiming bar.
Clicking the down-facing arrow reveals the familiar options of Slow, Fast and Normal speed selections. New however, is a Custom option that brings up a window where you can choose a speed direction or a speed percentage based on a user-defined clip duration.
Replace with Retime to Fit
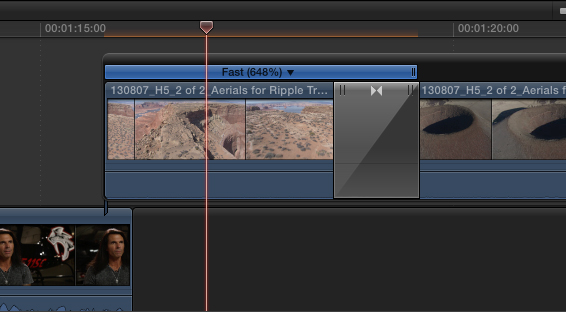
One feature that will make editors giddy with joy is the return of what Legacy FCP users call a “Fit to Fill” edit. In Final Cut X parlance, it’s now called “Replace and Retime to Fit” but functionally it’s the same operation. This edit is used when you want to replace a clip in the Timeline with a clip in the Browser that’s either longer or shorter in duration than the Timeline clip’s duration.
By dragging the clip on top of the Timeline clip and waiting for the clip to turn white, a new menu appears with the option “Replace with Retime to Fit”
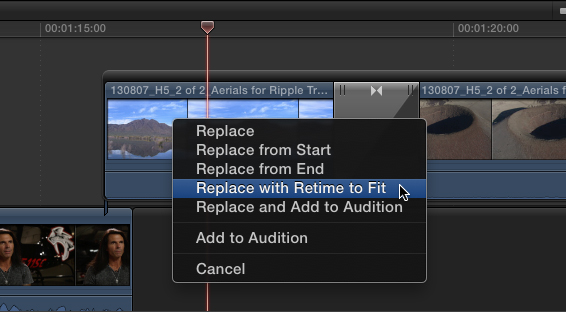
Depending on whether the Browser clip was shorter or longer than the clip you are replacing, Final Cut will do the math and either speed up or slow down the clip to preserve the Timeline clip duration.
New Variable Speed Options
Final Cut has always allowed you to change the speed of a clip over its duration - often called a variable speed change as opposed to fixed speed changes. In previous versions of FCP, this was accomplished with the Range Selection tool, but now variable speed changes can be performed faster with the new Blade Speed command.
Move your Playhead over the frame where you want to change the speed, then choose Blade Speed from the Retime menu on the Toolbar.
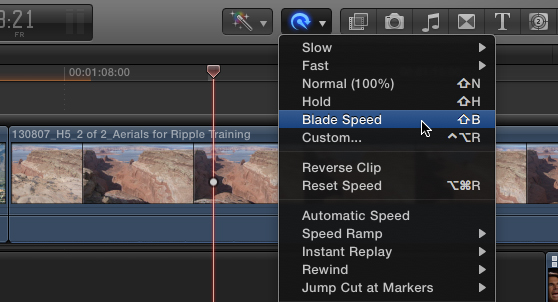
The clip is “split” into two speed segments (you can easily add more speed segments by moving the Playhead to a new frame and pressing Shift-B).
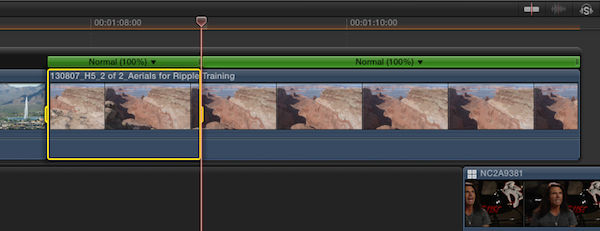
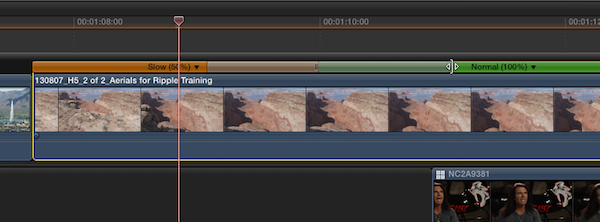
With a segment selected you can change the speed of just the selected segment using the Retime menu or the Custom Speed window.
To see this new feature in action watch this video:
Speed Segment Smoothing
New to 10.1 is the ability to adjust the interpolation curves in and out of speed segments so you can control how smoothly or abruptly the speed changes from one segment to another. In legacy versions of Final Cut Pro, this feature was called “easing”.
The curve adjustments are represented by the translucent bars on either side of the speed segment being affected. By dragging on the edge of the bar, you can add more or less smoothing.
Active Clip Indicator
A new playhead feature called the Active Clip Indicator will save you a lot of time when you want to make changes to a clip. As long as no clips are selected, moving the playhead over any clip will display a little white ball (the indicator).
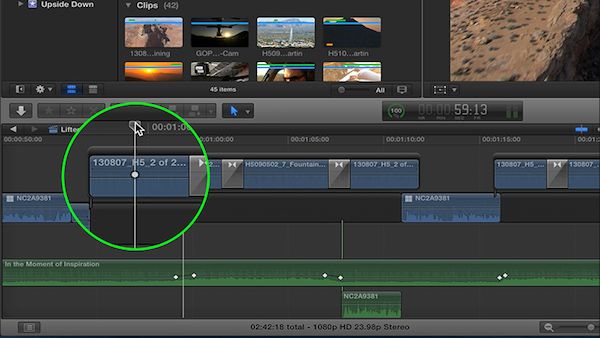
The indicator tells Final Cut which clip is active and you’ll therefore not have to select the clip before applying a speed change, add a color board effect or make changes to an effect in the Inspector. In fact, the Inspector automatically populates with the parameters for the clip that the indicator is over.
To see this new feature in action watch this video:
Audio Rolling Edits
Of all the Timeline enhancements in FCP 10.1, this is one feature we’ve been lobbying Apple to address since Final Cut Pro X’s initial release - the ability to perform a rolling edit on adjacent audio clips in the Timeline.
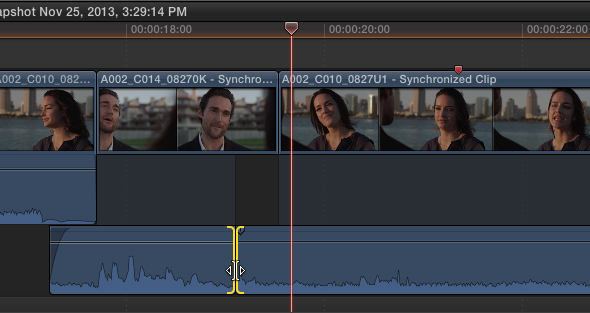
In the image below the expanded audio has been trimmed to an earlier point in time using the Rolling Edit Tool to hide some unwanted material.
To see this new feature in action watch this video:
Fading Audio Components
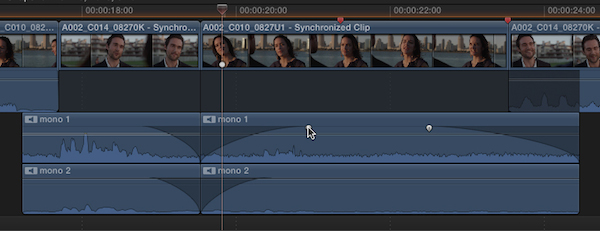
You can now fade individual audio components: the fade handles that were previously available only on the collapsed audio clip are now available on each individual channel (“component” in Final Cut Pro X lingo).
Multicam Enhancements
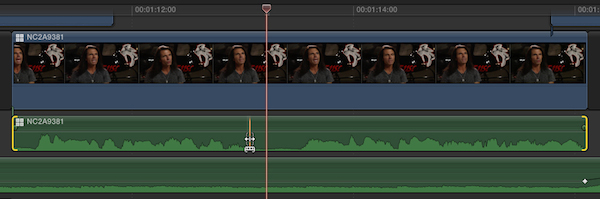
Multicam editors rejoice! The multicam functionality in Final Cut Pro X has been made better than ever through improvements in how audio is handled. The big improvement here is that you can now detach audio, including audio components, from video in a multicam clip. This feature is important because it allows you to move, copy, slip, or otherwise modify multicam audio independently of video.
To see this new feature in action watch this video:
And finally, you can make Video or Audio-only edits from a Multicam clip in the Browser into your Project.
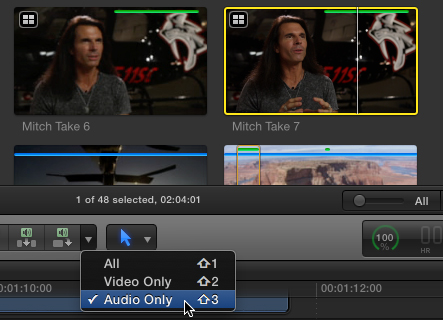
In earlier versions of Final Cut Pro X, you could select Video Only or Audio Only for a multicam clip - but the whole clip would get edited into the timeline. Now this feature works as intended.
Better Keyframe Functionality
Final Cut Pro 10.1 makes it easier to work with keyframes. You can now select, move, copy and paste multiple keyframes applied to video or audio clips. I find this feature most useful when ducking a music track for voiceover. Once you’ve set a range and lowered the volume in one section (setting keyframes automatically as you do so), it’s now a snap to move all those keyframes as a unit if your edit timing changes.
With the Range Selection Tool, dragging across the keyframes selects them. You can then drag any selected keyframe to move them all at once. Or, your can copy-paste them to the next location in the Timeline where you want to duck the audio.
Selecting multiple audio keyframe is now possible using the Range tool.
To see this new feature in action watch this video:
For video keyframes - such as animating opacity, position, scale, etc. - add the Shift key to select multiple keyframes. There’s even a new submenu for keyframe commands under Edit > Keyframes.
New Stabilization Options
We now have a second stabilization option that may work better in some instances. In addition to the Smoothcam stabilizing we’re used to, we have a second method called InertiaCam. Final Cut analyzes your clip and makes its best guess as to which one to use, but you can manually choose either one and adjust the settings - even while the clip plays back in real time! InertiaCam includes a “Tripod Mode” option which is great for removing all motion from a shot instead of just smoothing it out.
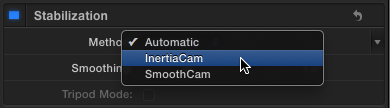
The new InertiaCam stabilization option.
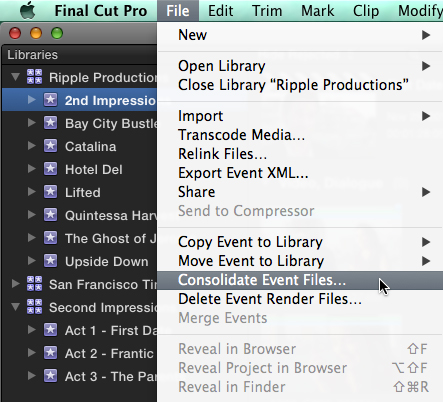
Improved Media Management
Thanks to the new unified library model in 10.1, common media management tasks are greatly simplified. The key commands are the Merge Events command (which was available in earlier versions of Final Cut Pro X), the Move and Copy commands, and the Consolidate command. While there was a Consolidate command in 10.0.9, don’t use it as a reference point! The new Consolidate command works much more like the old Organize command. It allows you to collect all the media associated with a specific project, event, or entire library, and then put all that media inside the library (managed media), or put it all outside the library (external media).
The Move and Copy commands allow you to move or copy a Project or an Event to other connected volumes.
When combined with the Consolidate command, you can handle just about any media management task. To move or copy entire Libraries, you simply drag them in the Finder. If they contain references to external media, those references will remain intact as long as that media is available. And if you want to move that external media into the moved library, simply use the Consolidate command. Note that Final Cut Pro X will never move or delete your external media.
Need to make room on your hard drive? Simply consolidate the event media to another drive. Do you need to move a Project and all related media from your desktop to your laptop to edit while on the road? Copy the event(s) containing the project and related media to a new library on a portable drive, then consolidate the media onto the drive.
Do you need to share media with other editors on a SAN or even a NAS? Use the Consolidate command to move all the media to the network location if it’s not there already. When importing media into an event, choose the Leave in Place option.
We discuss these and other scenarios in more detail in our Final Cut Pro 10.1 In-Depth tutorial.
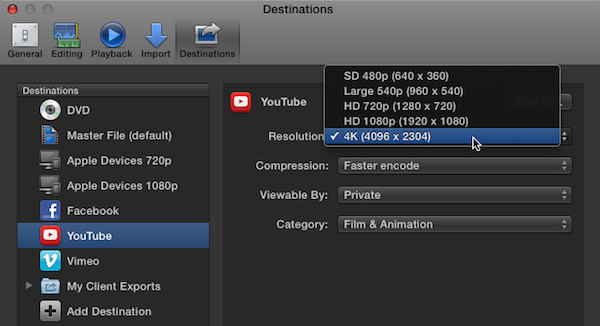
New Export Options
You can now share your 4K project directly to YouTube in all its 4K glory. You can also upload your video directly to the Chinese sites Youku and Tudou.
Updated XML
Final Cut Pro 10.1 updates the Final Cut Pro X XML file format to version 1.3. You use this file format to share information between Final Cut Pro and third party applications. You can exchange existing project and event data or create new Final Cut Pro X events and projects.
With this new version you can now exchange more information, including color adjustments, audio adjustments, video adjustments, text styles, color filters and more.
FxPlug 3
A new version of FxPlug also ships with Final Cut Pro 10.1. This version 3 allows developers to create custom interfaces for their plugins inside of Final Cut. The update also provides dual-GPU support for third-party plugins.
New Compressor UI
Compressor 4.1, like Final Cut Pro and Motion, now has a unified workspace with a number of panes that can be revealed and hidden to keep the interface free of visual clutter. Projects you send from FCP appear in a gray horizontal strip called a “job”.
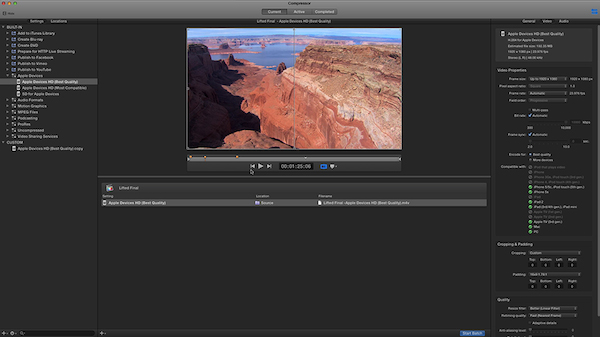
The Compressor workflow is a simple 3 step process: 1. Apply a Setting, 2. Assign a Location, and 3. Submit the Batch. Settings are nothing more than encoding presets - very similar to the ones in found FCP X’s share menu.
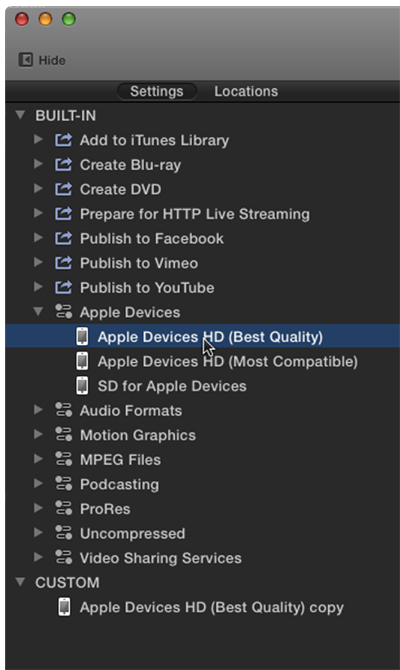
There are two types of presets - the ones with the blue arrow indicate presets that will perform some specific action at the end of the job - such a burning a Blu-ray disk.
The presets with the gray icon are movies that will be saved to your hard drive, then you decide what you want to do with them once the processing has completed.
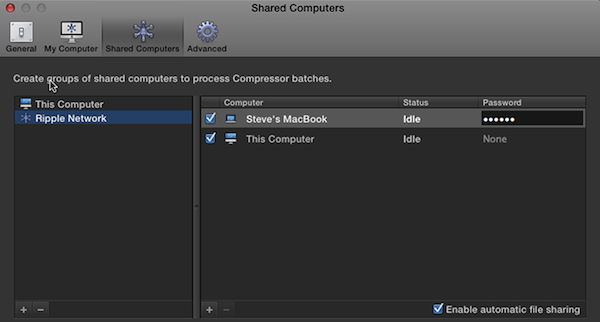
Distributed Transcoding
Apple made distributed transcoding across a network even easier. Gone is the arcane Apple QMaster menu that didn’t make sense even to IT people who do this for a living. There is now a simple “Shared Computers” window where you add Macs to your rendering network, submit the batch and all computers you added will collectively work on outputting your movies. Neat.
Motion
Motion had been updated as well, but you’ll be hard-pressed to find any new features or UI changes. All the improvements are “under the hood”: support for dual-GPUs, support for FxPlug 3, and general performance improvements.
Conclusion: Should You Upgrade?
So, given the fact that you have to install Mavericks and update your existing Projects and events to work with Final Cut Pro 10.1, you may ask yourself: is it worth it?
For us, the answer is a resounding yes. Mavericks has been rock solid, the update process is quick and easy (watch our free upgrading tutorials), and the new unified Library model makes it much easier to find, move, share, and archive Projects. With the additional improvements to performance and workflow improvements, it’s almost a no-brainer-must-have-upgrade. And as has been the case so far, the upgrade is once again completely FREE.
Rippletraining.com - Learning Resources
If you liked our analysis and really want to dig deep into the new Final Cut Pro, Mark and I have produced a 4 hour “In-Depth” tutorial covering all the new features in FCP 10.1. Here are some of the topics we address:
Choosing the Right Media Storage Option
Moving Events across Library Boundaries
Using Custom Project Sizes for Timelapse Workflow
Using Multicam Clips for Single-Camera Narrative Scenes
Project Versioning with Snapshots
Dealing with Mixed Libraries
Custom and Variable Speed Effects
Freeing Up Disk Space
Sharing Projects with Remote Editors
Archiving
To check out Final Cut Pro 10.1 In-Depth click here:
For those of you interested in Learning Final Cut Pro X from the ground up, we recommend our Apple Pro Video Series: Final Cut Pro X. This is a 6 hour tutorial covering everything from initial import to final output. Check rippletraining.com.
Bio
Mark Spencer and Steve Martin are the principle creatives behind rippletraining.com. They produce a weekly podcast called MacBreak Studio focusing on Final Cut Pro and Motion as well as developing creative Plugins for Final Cut Pro X.
To subscribe to MacBreak Studio click here:
To check our their plugins click here:
copyright © Steve Martin & Mark Spencer 2013
|