|
   
| Final Cut Pro X 10.1 Tips and Tricks 02 |
Jan, 2014
Final Cut Pro X 10.1 Tips and Tricks 02
By Richard Taylor
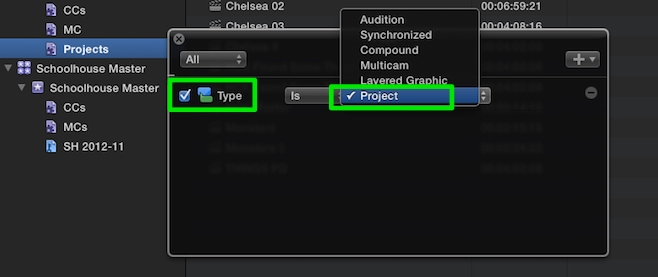
02-01) Since Projects are now contained inside Events, they are available in an Event Smart Collection.
In a Smart collection choose "Type" and select "Project" from the Smart Collection Type pop up menu.
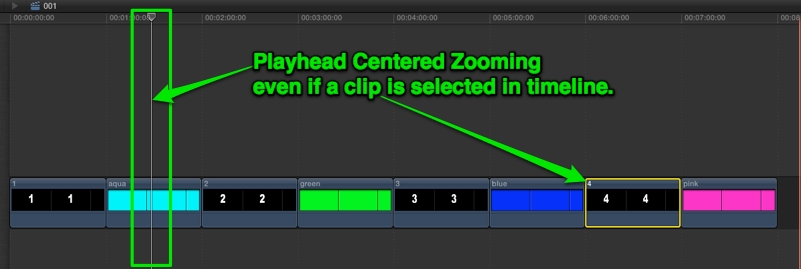
02-02) We now have proper playhead centered timeline zooming.
Even if a clip is selected in the timeline, zooming still occurs around the playhead. (Thanks to Jean-Marc Talenton).
If you have both the playhead and skimmer in the timeline at different locations, zooming will occur around the skimmer.
02-03) If you want to be able to open and close individual Events in FCPX,
place each Event in its own Library. Then you can "Open Library" and "Close Library",
which contain your individual events, from the File menu.

02-04) A quick way to see inside of your Library bundle, if you have media managed by FCPX, is to use
"Reveal in Finder". Select a clip in the Browser, right click on it, and choose "Reveal in Finder".
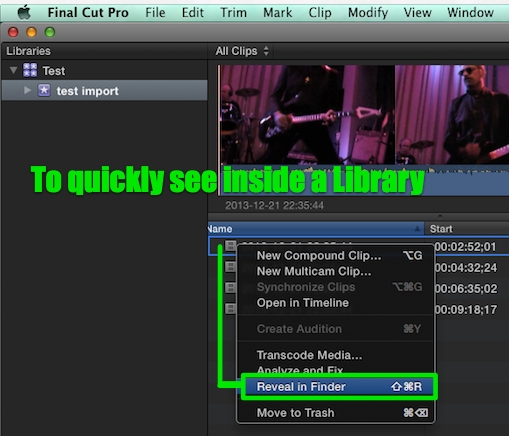
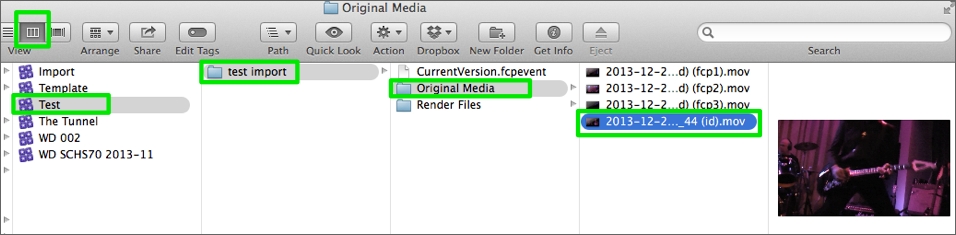
The clip's media file will be revealed inside of the Event's Original Media folder.
With the Finder in Column view, you can see the file path back to the Library bundle.
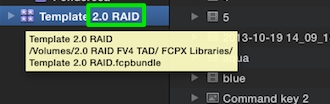
02-05) If you want to know on which hard drive your Library is located, include that info in the Library name.
Or you can hover your mouse over the Library in the Libraries list and the file path will be revealed.
02-06) Speed Transitions are now available in the Retime menu.
In the timeline, select a clip with speed segments...
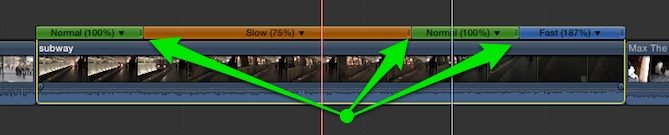
and check "Speed Transitions" in the Retime drop down menu.
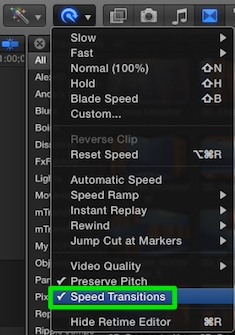
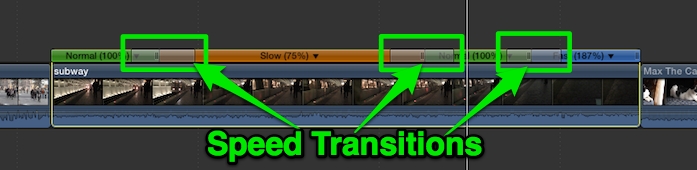
A Speed Transition will be applied to any adjacent Speed segments that are set to play at different speeds.
To turn Speed Transitions off, uncheck it from the Retime drop down menu.
02-07) If you click and hold on the FCPX dock icon and choose "Show Recents"
from the pop up menu when FCPX is closed...
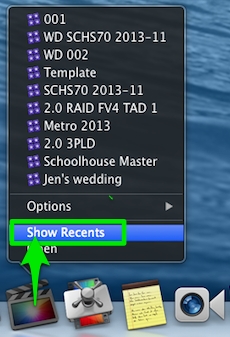
...all recent Libraries will appear on your desktop above the Dock.
If the Library is available, you can click on it to load in and launch FCPX.

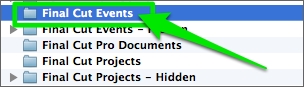
02-08) To update an Event to a Library,
place the Event in the Final Cut Events folder at the top level of an attached hard drive.
You can use Philip Hodgetts free utility Event Manager X to do this for you.
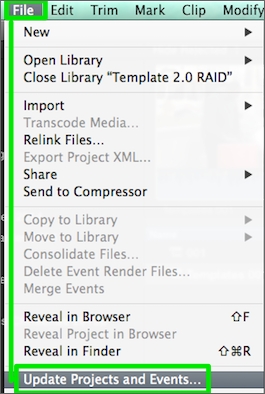
Then go to the Final Cut Pro X File menu and choose "Update Projects and Events..."
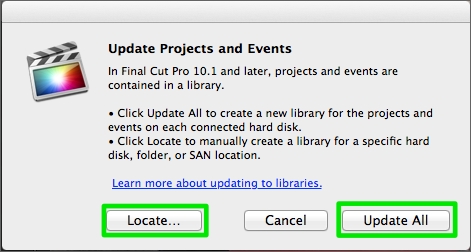
In the "Update Projects and Events" dialog box, you can choose "Update All" to let FCPX update all Events to Libraries or choose "Locate" and navigate to a specific hard drive with the Final Cut Events folder with your Event(s) of choice.
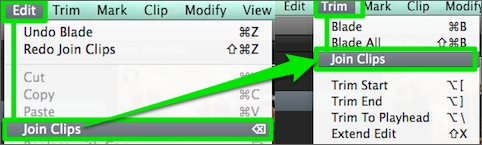
02-09) The "Join Clips" command becomes available under two menus
the Edit menu and the Trim menu, if you have a through edit selected in a timeline clip.
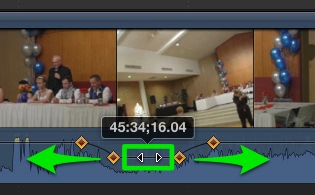
02-10) You can drag a selected group of Audio keyframes horizontally right or left.
Select the first keyframe and shift-select the last keyframe to select the range of keyframes. Place the mouse in the middle of the keyframe selection. Click-hold and drag left or right.
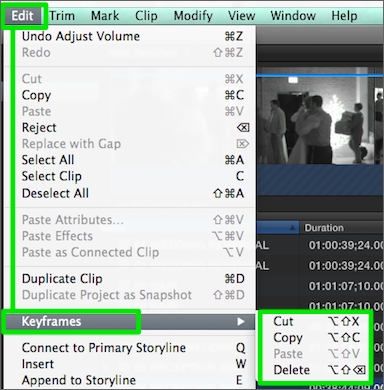
02-11) You can now copy and paste keyframe selections.
With the keyframe(s) selected, go to Edit > Keyframes and choose Copy or Paste.
Richard Taylor is an Editor/Producer and a Level 2 Apple Certified Trainer for Final Cut Pro X from the Washington DC/Baltimore Maryland area. He can be reached via his Final Cut Pro X website FCPX.TV or on Twitter @RichardTaylorTV
Copyright © 2014 Richard Taylor. All rights reserved.
Apple and Final Cut Pro X are registered trademarks of Apple Inc
|