Doing two elements of this effect is possible
with just Final Cut Pro alone but it was a real challenge to
do all three. You can use an Image Mask to cut a hole in an upper
layer of video and cast a shadow onto a lower layer, but you
can't animate an image mask. You can also create the appearance
of an element cutting through one layer of video to reveal another
and animate it by using a Travel Matte but that can't create
an inside drop shadow.
Animating a cutout with an inside drop
shadow requires using Photoshop to create a layer that contains
only the drop shadow nothing else. This can be achieved
by going back to some old-school Photoshop techniques using additional
alpha channels to hold selection information and then combining
two different selections.
1. Open a new file in Photoshop at 720 x 534 (DV) with
a transparent background
2.
Switch to Channels and create a new channel. Channels are like
layers only they hold information about the different color and
alpha (transparency) channels.
3.
Create your text (as usual, make it bold without fine lines)
4.
Apply a curve (if desired)
5.
Select the Arrow tool
6.
You should see a selected outline. We'll need this outline or
selection later so on the menu select Selection > Save selection,
select New Channel in the dialog box and name the new channel
"Main Text."
7.
De-select the selection (Command-D)
8.
We'll need a soft edge for our shadow. Apply Filter > Blur
> Gaussian Blur of 4 pixels.
9.
To make the shadow appear dropped we'll need to offset it by
several pixels down and across. Apply Filter > Other >
Offset with 10 right and 10 down. Make sure that the Repeat Edge
Pixels radio button is also selected. When finished, rename this
channel "Offset Blur" by double clicking on the channel
name on the channels palette.

10.
Now we need to start building the actual images that will transfer
over to Final Cut. Click on the Layers tab and create a new layer.
11.
To construct the text or shape cutout we'll bring back an outline
we created earlier. Select > Load Selection, select "Main
Text" from the Channel drop-down menu and press Command-Delete
to fill it with the color white. At this point DO NOT de-activate
the selection just leave the marching ants where they are.
12.
The layer that will contain just the shadow comes next. Create
another new layer (layer 3) and, with the selection still active,
load the "Offset Blur" selection with the "Subtract
from Selection" option.

This will remove the area within the
second selection from the first selection and leave us with just
a thin selection that's a little inside our White lettering.
13.
Fill the new selection with Black (Option-Delete)
14.
De-select the selection (Command-D.)

15.
Name Layer 2 "Text"
16.
Name Layer 3 "Shadow"
17.
To change the proportioning of our image to work with rectangular
DV pixels we'll have to change the dimensions of the file we're
working on. Select Image > Image Size, Uncheck Constrain Proportions
and change the Height to 480 and accept.
18.
Save the file to an easy-to-find location with File > Save
As.
19.
Launch Final Cut Pro.
20.
Add the clip that you want as the foreground to the Timeline
on v1.
21.
Add the clip that you want as the background to the Timeline
on v2.
22.
Load the Photoshop file into Final Cut Pro's Browser with File
> Import > Files.
23.
Double-click on the Photoshop file to open it in a separate timeline.
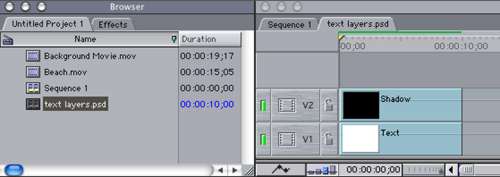
24.
Copy and paste the tracks to the main timeline.
25.
Move Background on v2 up to v3.
26.
Move the Main Text clip to v2. This will become the matte used
to reveal the layer above it.
27.
Move Shadow clip to v4.
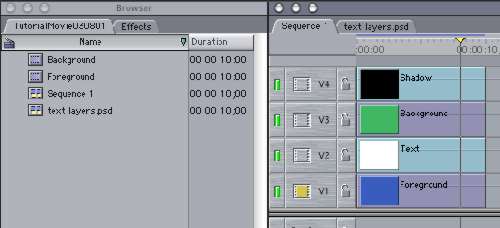
28. Select v3 and then Menu Modify > Composite Mode
> Travel Matte Alpha
29.
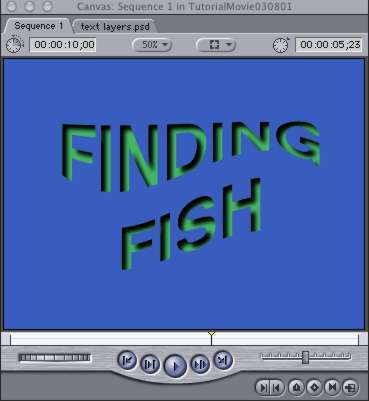
Now it's time to make our text or shape move (the whole reason
we had to create that shadow in Photoshop instead of just using
a mask!) Select v2 (Text) and set keyframes for whatever kind
of movement you would like.
30.
We now need to animate the shadow in the exact same way as the
Main Text clip so to make it accurate and save time we'll copy
and past the attributes. Copy the clip on v2 (Text), select the
clip on v4 (Shadow) and Edit > Paste Attributes; select Basic
Motion in the check boxes and accept.
Conclusion:
Now you,ve created an animated
cutout with an inside drop shadow using Photoshop and Final Cut
Pro and in the process you've learned about how Photoshop channel
operations work and how you can save and retrieve selections
you've made!
NOTE:
This tutorial was demoed at the July 03 lafcpug meeting and is
available on the July DVD.
copyright © Dale Ellis
2003
Dale
Ellis is a multimedia producer here in Los Angeles. Dale
has a BA in TV and Film from Wayne State University in Detroit,
has taught multimedia authoring and computer animation at Mt.
San Jacinto College and Cal. State University Long Beach and
was an interactive project manager in Silicon Valley. You can
see samples his work at http://www.ellismultimedia.com.