|
   
| Tutorial: - 10 Things wish I knew the first time I opened FCP |
November, 2010
10 Things wish I knew the first time I opened FCP
by Clay Asbury
 When I am training clients, I find that the following tips are helpful to quickly get people up and running with FCP. These tips are for producers, or editors moving from from another editing system who have a solid understanding of editing. When I am training clients, I find that the following tips are helpful to quickly get people up and running with FCP. These tips are for producers, or editors moving from from another editing system who have a solid understanding of editing.
1. Control + U is the Shortcut for the standard layout.
This will clean up your interface if it is messy, and makes everything neat and tidy.
Window>Arrange>Standard
2. Create your own Custom Layout
Rearrange your windows, then Hold down Option, Go to Window>Arrange>Save Custom Layout. Shift + U To recall your setup at any time.
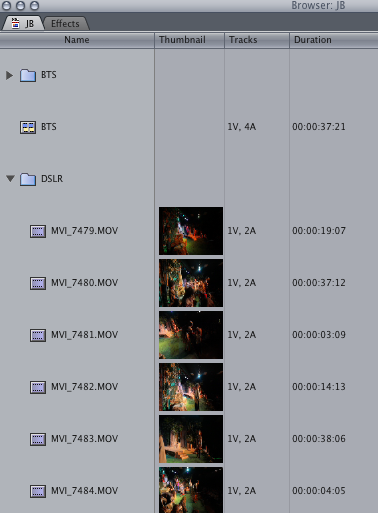
3. Add thumbnails to list view
By default (list view), you don’t see a thumbnail for the video, and you can’t tell if a clip is video/audio or video only.
Right Click on a Browser column (any except for the Name column will work), and select “show thumbnail” from the list.
You will now see a thumbnail of the clip. If you click on the thumbnail and drag, you can scrub through the video.
You can change the identifying frame (called the poster frame) for the clip by clicking and dragging on the thumbnail,
then hold down Control and let go of your mouse first. This is particularly helpful when the first frame of a clip is black.
http://www.vimeo.com/16286359
4. Double-Clicking on a bin (folder) will float it.
In FCP, Folders are called Bins (after the bins that hold film) Unfortunately it is easy to lose your bin behind the interface. If you Option click on the bin, it will then be tabbed.
Exception to this* – If you close your Canvas Window, your Canvas & Timeline will both disappear, and Control + U will not get your Timeline back.
Go to your Browser and double-click the sequence to bring it back.
http://www.vimeo.com/16286489
5. Command + Shift + [ or ] lets you move between tabs.
This works in the Browser, Viewer, & Timeline. Very handy for navigating bins and moving between sequences in the Timeline.
6. Set your Scratch Disk before you capture/ingest for the first time.
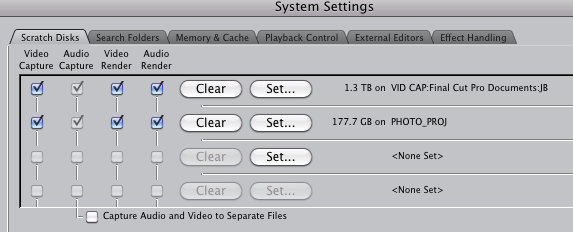
By default, FCP, saves your captured media to your User/Documents/Final Cut Pro Documents.
You do not want to do this. You want to put your media on to a separate drive.
Go to Final Cut Pro>System Settings, and click Set to select another drive.
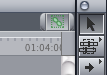
7. X- Marks in & Out (think X marks the spot), This also shows you the length of the marked clip
If you want to mark the clip on track two, turn off the Auto Select for Track 2 first.
Option + X- Clears in & Out
Option + I – Clears In
Option + O – Clears Out
Shift + I/O – goes to In or Out
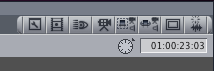
8. Linked Selection is not your friend.
 If you accidentally click this button, your linked Video & Audio are now unlinked.
The problem with this is they are still underlined in the Timeline, which should mean they are linked and if you click on one the other is selected. If you accidentally click this button, your linked Video & Audio are now unlinked.
The problem with this is they are still underlined in the Timeline, which should mean they are linked and if you click on one the other is selected.
Unfortunately that is not the case, and if you select the video and move it, it is now out of sync.
Solution – Click on the button in the timeline, and drag it out and it will poof away.
If you do need to select just the video or audio, you the Option key to temporarily break the link.
http://www.vimeo.com/16737917
9. Trimming in the Timeline
V- Will move your playhead to the nearest edit point.
U- Will toggle between Ripple & roll
, and . – will trim a frame left or right
Shift , & . – multi-frame trim (set in preferences > editing, default is 5)
Trim numerically – Type + .5 to trim 5 frames right , -5 for 5 frames left.
http://vimeo.com/16769287
10. Make your own Buttons.
Those dark gray bars at the top of the Browser, Viewer, Canvas, and Timeline
are there to hold buttons, Buttons are like custom shortcuts, and I use them extensively.
To make a button, go to Tools>Button List. Type “Title Safe” in the white window. Then click on the icon and drag it to the gray bar at the top of the Canvas.
To Save a button, right click on the gray area and pick “Save all button bars”.
To load up buttons lists you have made, right click on the gray area and pick “Load all button bars”.
You can keep this on a flash drive for when you are moving between different edit suites, or if you are a freelancer so you always have your settings.
http://www.vimeo.com/16716532
NOTE: Read "10 MORE Things wish I knew the first time I opened FCP" HERE
Clay Asbury is an editor,consultant and Apple/Adobe Certified trainer with over 12 years post-production experience.
He is currently the lead instructor at the Atlanta based FCP Trainer which offers classes in Final Cut Pro and Adobe After Effects.
His approachable and effective teaching style has developed from teaching at Apple/Adobe Training Centers and the Art Institute of Atlanta and Fordham (Tarrytown) University.
His clients include well-known companies such as Turner Networks, CNN, and the Federal Reserve Bank.
He wrote the chapter on trimming in "Edit Well: Final Cut Studio Techniques from the Pros", from Peachpit Press.
copyright © Clay Asbury 2010
This article first appeared on www.claygasbury.com and is reprinted here with permission.
All screen captures and textual references are the property and trademark of their creators/owners/publishers.
|